Adrian Fuller Posted September 20, 2021 Report Share Posted September 20, 2021 Hi all I am at last starting the engine rebuild of my 58 Tr3a. Almost straight away I am at a stop as not sure what sealer to use on the cam shaft core plug and the next part will be the rear main bearing felt sealer.. Has anyone got any suggestions?. I guess I am going to be posting quite a lot over the next week or so. Sorry in advace Adrian Quote Link to post Share on other sites
Lebro Posted September 20, 2021 Report Share Posted September 20, 2021 Wellseal, & stuff as much felt (pre-soaked) down the slots as you can, leaving some proud. Bob Quote Link to post Share on other sites
trchris Posted September 20, 2021 Report Share Posted September 20, 2021 Hi Adrian I used some black silicon sealer from euro car parts on the core plug, if you apply I very thin line on the engine block where the core plug mates then after installing as per manual wipe the excess off the inside making sure there's none on your cam bearing I also smeared some around the outer edge just to be sure. The main bearing felts wellseal and as Bob says plenty of it if you do it right you will see it ooze out between cap and engine Chris Quote Link to post Share on other sites
Adrian Fuller Posted September 20, 2021 Author Report Share Posted September 20, 2021 Thanks for the info. And while I am typing Bod I got some max power con rods which I believe you fitted, these do not have any lock tabs, did you use any product on the threads and what did you torque them up to. Also is there a correct orientation ie writing to front of the engine?. Thanks again for your help Quote Link to post Share on other sites
Motorsport Mickey Posted September 20, 2021 Report Share Posted September 20, 2021 These Maxpeeding rods have ARP Bolts fitted which should be fitted using their own lube. The bolts need stretching a required amount, there will be a torque recommended in the supplied pack, if lube not supplied it’s available on e bay. Do a search on Maxpeeding on this 4 cyl forum and you’ll find a few threads covering it. Although the ARP recommend a torque it didn’t stretch the bolt enough to reach it’s “elastic” range. PeterW also posted there and there’s a conversation relating to ARP stretching and what ARP recommend and how to measure it. Mick Richards Quote Link to post Share on other sites
Lebro Posted September 20, 2021 Report Share Posted September 20, 2021 What Mick said. I had no means of measuring bolt stretch, so I used the torque setting given in the booklet that came with them. Don't have that to hand, & I won't guess. As I recall they can be fitted either way round, but could be wrong. Bob. Quote Link to post Share on other sites
Ian Vincent Posted September 20, 2021 Report Share Posted September 20, 2021 For the camshaft core plug, I followed Mick's advice and used JB weld (plus a new plug), I didn't want it leaking again. Rgds Ian Quote Link to post Share on other sites
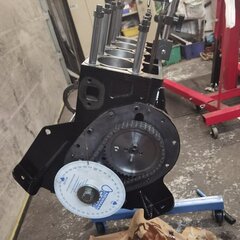
Adrian Fuller Posted September 20, 2021 Author Report Share Posted September 20, 2021 Thanks everyone Next on my list is rebuilding the head, I have fitted 5/16 exhaust valves and the springs supplies only have two springs foe exhaust and inlet, my was uestion is do I still fit the collar under the exhaust spring seen at the top of the picture? Thanks again Adrian Quote Link to post Share on other sites
Lebro Posted September 20, 2021 Report Share Posted September 20, 2021 I didn't Bob Quote Link to post Share on other sites
Ian Vincent Posted September 20, 2021 Report Share Posted September 20, 2021 Neither did I. I fitted TR4a springs which are identical (and only double) for both inlet and exhaust. Rgds Ian Quote Link to post Share on other sites
Lebro Posted September 21, 2021 Report Share Posted September 21, 2021 I was going to do that, buy found that the later springs were a smaller diameter, which meant also replacing the caps on all of them, & that the springs did not locate nicely in the cylinder head. Tests showed that the standard 4A springs were no softer, (or stronger) than my original TR3 ones. Bob Quote Link to post Share on other sites
Keith Wigglesworth Posted September 21, 2021 Report Share Posted September 21, 2021 This is how Peter and I did it. Put Wellseal and cut up wadding in a pot and soak. Then bang in with a suitable drift. Leave a little proud of the surface. Very messy but effective. Quote Link to post Share on other sites
Motorsport Mickey Posted September 21, 2021 Report Share Posted September 21, 2021 +1 The soaked felt needs ramrodding in so the Wellseal compresses out of the felt and forces between the rear block bearing cap and the sides of the block. The gap there is machined and only a couple of thou clearance, so it needs a very thin sealing agent…step forward Wellseal. Mick Richards Quote Link to post Share on other sites
Adrian Fuller Posted September 21, 2021 Author Report Share Posted September 21, 2021 Has anybody used one of the bastuck seals. How on earth do you close the gap (see picture below) especially when trying to put the crank into the bearing and seal, there is just no room... Also the instructions say use silicon sealer on the outside of the seal which is supposed to stop movement but will probably prevent movement when trying to assemble with the bearing cap and top seal which looks like it snaggs on the sharp edges which again may stop the bearing cap seating properly. Thanks again for any suggestions Quote Link to post Share on other sites
iain Posted September 21, 2021 Report Share Posted September 21, 2021 5 hours ago, Keith Wigglesworth said: This is how Peter and I did it. Put Wellseal and cut up wadding in a pot and soak. Then bang in with a suitable drift. Leave a little proud of the surface. Very messy but effective. +1 this really does work very well. Quote Link to post Share on other sites

Recommended Posts
Join the conversation
You can post now and register later. If you have an account, sign in now to post with your account.