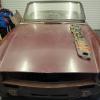
PodOne Posted June 12, 2019 Report Share Posted June 12, 2019 (edited) Hi folks Removed the old boot floor, RH side/floor and inner/outer valance and untaken quite a few edge repairs and fitted a new RH side/floor and repaired the LH one from the remains of the RH. I've temporarily placed the new floor in position and it will need quite a bit of knocking into shape. There is quite a bit of droop looking from the from the two side panels. Do I need to brace the and support the panels from the inner wings or will the inner lower valance pull it all into place? I've no spot welder and reproducing the plug weld looks like it will be a pain as I can't see a way of clamping the edges together to do a good job of it other than pop rivets which I can't see been that good at pulling the panels together unless putting them in every few inches. Any suggestions or tips appreciated. Thanks Andy PS Oops forgot to ask. The new floor has a curved lip at the rear unlike the oil one is this to facilitate replacing a floor in situ and should it be cut in my case? Edited June 12, 2019 by PodOne Another Question Quote Link to post Share on other sites
RogerH Posted June 12, 2019 Report Share Posted June 12, 2019 Hi Andy, you will need to hold the skins together in order to weld them. I used aerospace skin pins. Frosts do similar for auto (Clequo I think). Pop rivets would work or self tappers would be easier. Roger Quote Link to post Share on other sites
Keith66 Posted June 12, 2019 Report Share Posted June 12, 2019 Hi Andy Number of options as Roger states but i used self tappers and it seemed to work ok. After the plug welding i also plugged the self-taper holes and ground it all smooth(ish). Not sure about your comment regarding the curved lip. Do you mean a curved bit in your pics where it attaches to the rear floor assembly above the diff? I'm sure that it is correct and was there on mine and fitted fine to the rest of the bodywork and is as the parts plates at all the suppliers. and as pic below. The very rear of the boot floor just plug welded as an overlapping straigh edge to the inner rear valence (from memory no pics) Cheers Keith Quote Link to post Share on other sites
Mark69 Posted June 13, 2019 Report Share Posted June 13, 2019 Hi Andy, I’m sure 100% that the back curved up stand needs to be cut off, Produced like that so it can be utilised on other marques.Once modified fits a 6. Ask me how I know. Mark Quote Link to post Share on other sites
stuart Posted June 13, 2019 Report Share Posted June 13, 2019 17 minutes ago, Mark69 said: Hi Andy, I’m sure 100% that the back curved up stand needs to be cut off, Produced like that so it can be utilised on other marques.Once modified fits a 6. Ask me how I know. Mark Correct as its like that for use in 4/4a/5`s This is an original unpicked Stuart Quote Link to post Share on other sites
Keith66 Posted June 13, 2019 Report Share Posted June 13, 2019 Hi All Now i'm confused. hopefuly because we are talking about different things and hopefully not because I got it all wrong. Mark says he's 100% sure that the curved up section needs to be cut off and Stuart (who i'm sure knows better than most) agrees and posts a pic of the section "unpicked" Now i thought that Andy was asking about the front bit of the boot floor that curves up to attach to the rear floor assembly above the diff as it is in both mine and Stuarts pics rather than the rear section of the boot floor that attaches to the inner valence. But I'm sure my floor came as Stuarts pic curved up at the front of the floor but completly flat at the back and fitted with no modification at all. As i did my floor, err a while ago, do those floors now come an extra bit where it attaches to the valence that needs removing or is the curved up bit at the front bigger? Something must have changed as i simply (well not simple, difficult and took ages) took the old rusty floor out and plug welded the new one in with no cutting extra bits off at either end and it fitted fine. Pleasse don't tell me i've got it all wrong as its way to late to change now!! Cheers Keith Quote Link to post Share on other sites
Mark69 Posted June 13, 2019 Report Share Posted June 13, 2019 Keith, your lucky you got the correct panel, I was supplied with a panel that had a curved up stand on both front and rear. just had a little more fettling to do than you. Rest assured you got it right. Mark Quote Link to post Share on other sites
stuart Posted June 13, 2019 Report Share Posted June 13, 2019 Moss supply for both 4/4a/5 and then 6 under the same part number now. 850387. Stuart. Quote Link to post Share on other sites
PodOne Posted June 13, 2019 Author Report Share Posted June 13, 2019 Thanks all My old one was like the one in Stuarts pic. I thought maybe the new one with a curve at both ends was possibly a way to replace the panel while leaving the valences in place rather than a universal panel for a number of TR models. Now I know I'll trim it down as required after I've knocked it into shape its not the best of pressings as it has lots of ripples near the edges and will need holes cutting as per the old panel. Andy Quote Link to post Share on other sites
Keith66 Posted June 15, 2019 Report Share Posted June 15, 2019 Hi Guys Phew!!! Well i did do mine, err a while ago. I assume the change is down to cost cutting from the suppliers. Why make two parts that fit when you do supply one that will "do". Cheers Keith Quote Link to post Share on other sites

Recommended Posts
Join the conversation
You can post now and register later. If you have an account, sign in now to post with your account.