Fireman049 Posted August 15, 2017 Report Share Posted August 15, 2017 qim ~ Obrigado ~ Tom. Quote Link to post Share on other sites
Kiwifrog Posted August 15, 2017 Report Share Posted August 15, 2017 Hi Hard at it! I sprayed the cracked dome with Strating Fluid and nothing that I could detect happened. Maybe that means that it is OK I dismantled the carbs, cleaned them and put them back together. Success? When I lift the pins without the damper in place, the pistons fall with that nice mettalic sound; but with the dampers fully tightened, I am not sure they fall identically. Can't remember if you test with or without the dampers. I started the car without the filters and found the first problem: the one you all have been telling me about! The forward piston lifts before the rear one. So, now I am going down to have a go at loosening the carbs, one from the other, but before I mess it all uo, and despite having been told a million times what to do, could you be so kind as to tell me from the photo below, what is the minimum I have to do? Can I undo just ONE screw to set up the rear carb? The red or the green, or both? And can I do it just on one side? Which? The front first to lift piston, or the rear? EDIT Rereading the thread, the answer is this one: The shaft nearest the manifold has two clamps fitted. Undo one lock nut which will disconnect the carbs. Adjust each butterfly until you get an even reading then re-tighten the clamp. But... how do I adjust the butterfly? With the screw that controls tickover? Of course, if there is a leak in the cracked dome, maybe that is the reason why it starts lifting first... The other problem I have (BIG problem) is that I find it nearly impossible to get the air-filter retaing nuts (especially the one nearest the firewall) out as my normal spanner is too big and thick. How do you folks manage it? Qim Spraying the dome with starting fluid or cleaning fluid will do nothing the dome is there to cause a difference in air pressure to lift the needle, if the dome is cracked bin it , get a cheap hs6 from eBay and change the dome and piston, don't forget to change the needle and center it correctly then you can start to tune your carbs, as it is no matter what you do you are wasting your time Cheers Alan Quote Link to post Share on other sites
qim Posted August 15, 2017 Author Report Share Posted August 15, 2017 (edited) If my memory isn't wrong, it's the easiest thing on earth to put the AC air filters on my car's SU H6 carburettors. A simple 7/16" combination wrench, as I recall. Plenty of room to tighten the bolts, although it does take a little agility. I don't get your problem, Camilo. What wrench are you trying to use? Do your non-standard filters attach differently somehow? Hi Don 1/2" combination wrench. I have HS6s and the rear nut in the rear carb is just about impossible to get to because of the float chamber that gets in the way. What I need and hoped someone in the forum sent me in the right direction is a shorter and thinner spanner. Mine is long and I cannot move the nut more than a few degrees at a time leaving the next try impossible to get to from either above or below. Do your non-standard filters attach differently somehow? They are standard, bought as such even if they are sealed unlike my original ones. But how do I clean them? Camilo Edited August 15, 2017 by qim Quote Link to post Share on other sites
Don H. Posted August 15, 2017 Report Share Posted August 15, 2017 ...1/2" I have HS6s and the rear nut in the rear carb is just about impossible to get to. What I need and hoped someone in the forum sent me in the right direction is a shorter and thinner spanner. Mine is long and I cannot move the nut more than a few degrees at a time leaving the next try impossible to get to from either above or below... I tend to reach for my ratcheting combination wrenches first. Very helpful for places where one can't get a good swing of a standard wrench. Quote Link to post Share on other sites
Don H. Posted August 15, 2017 Report Share Posted August 15, 2017 ...They are standard, bought as such even if they are sealed unlike my original ones. But how do I clean them?... Maybe rinse them out, dry them, and remount? That's what everyone else does. It's what the manual said to do, too. The manual suggested cleaning in gasoline, but honestly anything will work, and in fact, they almost certainly don't need to be cleaned anyway. Quote Link to post Share on other sites
Fireman049 Posted August 15, 2017 Report Share Posted August 15, 2017 (edited) qim ~ We used to clean sealed air filters with petrol and allow them to dry naturally. Engine oil from an oil can for the wire mesh filters. Tom. Edited August 15, 2017 by Fireman049 Quote Link to post Share on other sites
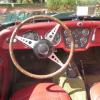
qim Posted August 15, 2017 Author Report Share Posted August 15, 2017 never saw one like that with switch for direction, Yours is metric. I looked now online for an impwerial one but can't find it, yet Mine is attached: Quote Link to post Share on other sites
qim Posted August 15, 2017 Author Report Share Posted August 15, 2017 never saw one like that with switch for direction, Yours is metric. I looked now online for an impwerial one but can't find it, yet Mine is attached: Quote Link to post Share on other sites
TR NIALL Posted August 15, 2017 Report Share Posted August 15, 2017 Qim,don't start with Spanners or you'll never get sorted,some of those Rachet Spanners are Flat and some have an Angled Head. Quote Link to post Share on other sites
TR NIALL Posted August 15, 2017 Report Share Posted August 15, 2017 (edited) Qim Spraying the dome with starting fluid or cleaning fluid will do nothing the dome is there to cause a difference in air pressure to lift the needle, if the dome is cracked bin it , get a cheap hs6 from eBay and change the dome and piston, don't forget to change the needle and center it correctly then you can start to tune your carbs, as it is no matter what you do you are wasting your time Cheers Alan Good Advice Alan,Qim make sure they ain't from a TR7 or Dolly Sprint as the Domes are smaller in height. Edited August 15, 2017 by TR NIALL Quote Link to post Share on other sites
Don H. Posted August 15, 2017 Report Share Posted August 15, 2017 never saw one like that with switch for direction, Yours is metric. I looked now online for an impwerial one but can't find it, yet Mine is attached: C'mon, Camilo, don't be so OCD literal. Yes, it's a metric wrench image, but it's not important to the main point what size or measurement system it is. I took that photo from the site of the company who made (some) of the ratcheting wrenches in my toolbox. I have metric and inch-based in both house and garage shops. There are many suppliers and many styles, as Niall notes. I have nowhere near enough energy to guide you through all the choices available. You're on your own. Quote Link to post Share on other sites
qim Posted August 15, 2017 Author Report Share Posted August 15, 2017 Hi Alan and TR Niall It appears that the dome may have cracked but that it has been repaired as the use of Xtarting Fluid did not cause any difference in the carbs. After my tuning adventure the car seems to be running very well. I only need to test the consumption. The dome problem will have to be sorted out and I am aware that I need a pair of HS6s domes/pistons. Thanks Quote Link to post Share on other sites
qim Posted August 15, 2017 Author Report Share Posted August 15, 2017 (edited) . I have nowhere near enough energy to guide you through all the choices available. You're on your own. Hi Don In fact, I have already contacted a firm in the UK to see if they can post me a set. I had no idea these things existed... http://www.autotoolsdirect.com/5pc-af-imperial-ratchet-ring-spanners-wrench-set-10-sizes-14-78-reversible-386-p.asp After all, I have not done any work on my car, with my own hands since the early 80s.. Thank you, again PS - what is OCD?... Edited August 15, 2017 by qim Quote Link to post Share on other sites
TR NIALL Posted August 15, 2017 Report Share Posted August 15, 2017 (edited) Hi Don In fact, I have already contacted a firm in the UK to see if they can post me a set. I had no idea these things existed... http://www.autotoolsdirect.com/5pc-af-imperial-ratchet-ring-spanners-wrench-set-10-sizes-14-78-reversible-386-p.asp After all, I have not done any work on my car, with my own hands since the early 80s.. Thank you, again Do Not Buy those Spanners they are Rubbish. Edited August 15, 2017 by TR NIALL Quote Link to post Share on other sites
Don H. Posted August 15, 2017 Report Share Posted August 15, 2017 I'm with ya on those, Niall. It's an old-fashioned, bulky design for a ratcheting wrench, and dissatisfying in use. Get the kind with the compact head. In your market, Camilo, check out what FACOM have available. As my father used to say, we're not rich enough to afford cheap tools. Quote Link to post Share on other sites
qim Posted August 23, 2017 Author Report Share Posted August 23, 2017 (edited) I went out for a drive this afternoon: 170 Km in motorway driving between 100 kph and 140 kph. At 120 kph RPM was a steady 3000. Adding what I had done yesterday I ended up with a consumption of 10,85 l/100Km. Weather: sunny, temp: low 30ºs The car pinks going up, even a gentle motorway incline despite having retarded the distributor via the vernier wheel a few more clicks. Where do I go from here to get better consumption? Timing? That is something new to me. I bough a strobe gun but I'm at a loss where to start... Plugs:nice and brown. Camilo Edited August 23, 2017 by qim Quote Link to post Share on other sites
peejay4A Posted August 23, 2017 Report Share Posted August 23, 2017 Try a retarding further until the pinking stops. A few clicks probably isn't taking up the slack in the vernier adjuster - give it some more. Quote Link to post Share on other sites
qim Posted August 23, 2017 Author Report Share Posted August 23, 2017 (edited) The car was ticking over very nicely, but I get the impression that since I retarded it a few (3/4) clicks more it is a little bit rougher. Could that be the cause? With my new toy (the strobe gun) I guess first I have to see how far off the mark the timing is. The book, if I remember well, says 4º from TDC, but I read elsewhere that due to the new fuel at 95 octane yiou should be looking for around 10º from TDC. Is that right? Edited August 23, 2017 by qim Quote Link to post Share on other sites
qim Posted August 23, 2017 Author Report Share Posted August 23, 2017 Well, according to this link, I should return the strobe light... http://www.macysgarage.com/myweb6/ign-timing2.htm Quote Link to post Share on other sites
peejay4A Posted August 23, 2017 Report Share Posted August 23, 2017 No. There is slack in the vernier adjustment. Use the strobe to find what your current setting is. Let's assume it's 4 deg before TDC and you are getting pinking. If you move it to 10 deg BTDC the pinking will get worse. It's not an exact science. You need to find the setting that suits your engine, fuel and driving style. Quote Link to post Share on other sites
qim Posted August 23, 2017 Author Report Share Posted August 23, 2017 Thank you Pete Back to the strobe instructions... Meanwhile, how do I make a 12-volt test light ? I need two pieces of electrical wire and need to solder a 12 v lamp in between, But what do I put at each end? Quote Link to post Share on other sites
RobH Posted August 23, 2017 Report Share Posted August 23, 2017 Crocodile clips http://www.ebay.co.uk/itm/12-CROCODILE-ALLIGATOR-CLIPS-SHOCKPROOF-Insulated-Electrical-Lead-Croc-Battery-/311746360028 or buy a ready-made tester http://www.ebay.co.uk/itm/Heavy-Duty-Car-Van-Electrical-Circuit-Tester-Probe-6V-12V-DC-Test-Lamp-Light-/121957314547?epid=1704321887&hash=item1c6538eff3:g:Tn0AAOSwOdpX0aDM Quote Link to post Share on other sites
qim Posted August 23, 2017 Author Report Share Posted August 23, 2017 (edited) Hi Rob I read that the ready-made testers are slow to react and that the ideal is the DIY type. Do you agree? Where do you attach the crocodile clips to? One to the battery? and the other to where on the distributor? Edited August 23, 2017 by qim Quote Link to post Share on other sites
peejay4A Posted August 23, 2017 Report Share Posted August 23, 2017 You connect the test lamp across the contact points. One lead to earth, the other to the low tension wire between the coil and distributor. When the points are open the bulb lights, when closed it's off - ignition on. You don't need a test lamp if you are using a strobe. Quote Link to post Share on other sites
qim Posted August 24, 2017 Author Report Share Posted August 24, 2017 Hi First try; first failure! I bought an Accuspark SP8000 (see image) and tried according to the (Chinese written...) instructions. 1) I chose the 4 cylinder option, obviously, but unsure what to choose on the other side. I assume that it is the angle (the 2nd light from the left) 2) I thought that I had to point it at the timing mark on the pulley but how can I do it if it is hidden under the thermostat and other things? Help... Camilo Quote Link to post Share on other sites

Recommended Posts
Join the conversation
You can post now and register later. If you have an account, sign in now to post with your account.