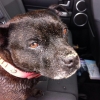
Nickffc Posted October 16, 2016 Report Share Posted October 16, 2016 (edited) this weekend i did this.....!!!...pretty on the outside.... to a bit dogey on the inside... the start of the restoration.... Edited March 30, 2019 by Nickffc Quote Link to post Share on other sites
len1 Posted October 16, 2016 Report Share Posted October 16, 2016 (edited) Finally got my bodytub out in the open to see how daylight shows it.Its finally getting there.Len sorry i dont know how to turn picture Edited October 16, 2016 by len1 Quote Link to post Share on other sites
Mark69 Posted October 16, 2016 Report Share Posted October 16, 2016 Finally got my bodytub out in the open to see how daylight shows it. Its finally getting there. Len sorry i dont know how to turn picture amazing what you can get in a tardis. Looking good Len. Quote Link to post Share on other sites
Mark69 Posted October 16, 2016 Report Share Posted October 16, 2016 Steve T very kindly agreed to make me a pair of his front filler pieces. Very good price and I'm very happy with them. Saved a lot of cutting and welding. I fitted the driver's side a couple of weeks ago while I was doing the front inner wing. Worked a treat. Thanks Steve! Great work Sean, looks like you've mastered the welding! Quote Link to post Share on other sites
Steve T Posted October 16, 2016 Report Share Posted October 16, 2016 You're welcome Sean. As Mark says, the welding looks a treat too. All taking shape. Quote Link to post Share on other sites
SeanF Posted October 17, 2016 Report Share Posted October 17, 2016 Looking good Len. The paint looks great. I'm interested to know where/how you had it done? Thanks, Sean Quote Link to post Share on other sites
len1 Posted October 17, 2016 Report Share Posted October 17, 2016 Hi Sean. I done the paintwork myself. I built a garage size shed in my garden and done it in there.A friend of mine was going to do the paint but after all the prep work I had done I thought what the hell ...give it a go .I Am really happy with it. Len Quote Link to post Share on other sites
ptjs1 Posted October 17, 2016 Report Share Posted October 17, 2016 this weekend i did this.....!!!...pretty on the outside.... to a bit dogey on the inside... the start of the restoration.... Nick, It looks much better than when I first stripped down mine! Paul Quote Link to post Share on other sites
Steve T Posted November 20, 2016 Report Share Posted November 20, 2016 Decided I'd better try and sort out a rear floor ( over diff floor ), so have dug the 3 rotten ones out of the shed and intend to make one good from them all. The new floor tooling still hasn't got onto the machining stage at work and I need to get on. Quote Link to post Share on other sites
Steve T Posted February 25, 2017 Report Share Posted February 25, 2017 Not done much in the garage as Doris blew my carport roof off!! Quick fix to keep the TR dry and then re-roof in 16mm polycarbonate come the summer. £800 I could have spent on the TR ???? Quote Link to post Share on other sites
Mark69 Posted February 25, 2017 Report Share Posted February 25, 2017 Glad to see you have it sorted , but what a bummer. Quote Link to post Share on other sites
Andrew Smith Posted February 26, 2017 Report Share Posted February 26, 2017 I stripped down the FireBlade even further.........................well, no one said reported garage activity had to be on TRs............. Quote Link to post Share on other sites
Richard Young Posted February 26, 2017 Report Share Posted February 26, 2017 (edited) I'm setting up pinion and crownwheel preloads/backlash...Found that my new bearings varied in thickness to the old ones,only by max couple of thou but it results in having to take new measurements to establish shim sizes Can't just throw the old shims in and bolt up...nearly done though, so happy. Edited February 26, 2017 by Richard Young Quote Link to post Share on other sites
Nickffc Posted February 26, 2017 Report Share Posted February 26, 2017 .....still going....! Quote Link to post Share on other sites
Hamish Posted February 26, 2017 Report Share Posted February 26, 2017 .....still going....! Don't your arms and neck ache working on it up there ? Quote Link to post Share on other sites
Hamish Posted February 26, 2017 Report Share Posted February 26, 2017 Roll bar fitted this weekend. Hopefully getting close to ready for sprints and hillclimbs Quote Link to post Share on other sites
Nickffc Posted February 26, 2017 Report Share Posted February 26, 2017 Don't your arms and neck ache working on it up there ? :D :D .... only just noticed the upsidedown picture..... :D :D Quote Link to post Share on other sites
Britishbest Posted March 15, 2017 Report Share Posted March 15, 2017 Engine / Gearbox out, stripped last weekend. This weekend degrease and clean prep for rebuild....well thats the plan, we'll see. Quote Link to post Share on other sites
DaveN Posted March 15, 2017 Report Share Posted March 15, 2017 The joys of working shifts....I don't have to wait for a weekend So today looking at the colour and state of the coolant I decided to flush it again this time taking out the block drain...and nothing! not a dribble...not even damp! So in went the wire coat hanger...still nought! On went the mains, result, a black, best described as a worm wriggled and oozed its way out, each time I put my hand over the rad filler (did that to control the pressure!). then left it flushing for 20 mins. Put it all back together and went for a thrash down the m4 and around Windsor. Next job is an indicator buzzer the type that's adjustable, and a DIY loom and relays for the headlights and fuel pump! Quote Link to post Share on other sites
Tim D. Posted March 15, 2017 Report Share Posted March 15, 2017 Finally got around to fitting the supercharger kit.. Looks absolutely fab, hopefully it will work well.. Unfortunately couldn't finish as my gasket set didn't have one for the water pump and I discovered that I need longer pushrods for the new head (doh!) Roll on next weekend when I might hear that supercharger "whine" for the first time! Tim Quote Link to post Share on other sites
Steves_TR6 Posted March 15, 2017 Report Share Posted March 15, 2017 Finally got around to fitting the supercharger kit.. Looks absolutely fab, hopefully it will work well.. Unfortunately couldn't finish as my gasket set didn't have one for the water pump and I discovered that I need longer pushrods for the new head (doh!) Roll on next weekend when I might hear that supercharger "whine" for the first time! Tim We will need a video of that ! Quote Link to post Share on other sites
Tim D. Posted March 15, 2017 Report Share Posted March 15, 2017 Don't worry, if she fires at the weekend without any untoward noises i'll film it! Will also write it up on my blog. Tim Quote Link to post Share on other sites
BlueTR3A-5EKT Posted March 15, 2017 Report Share Posted March 15, 2017 Repaired the snapped bakelite brush plate of an exchanged TR2-3 Smiths heater motor with K-Poxy 2 pack glue, Fitted new rear bearing in motor housing, skimmed commutator. Set armature end float & reassembled. Tests OK Next task is to blast and repaint the steel cover then I will have a spare for exchange again.... Peter W Quote Link to post Share on other sites
Mark69 Posted March 18, 2017 Report Share Posted March 18, 2017 (edited) Just put the boot lock back together, new barrel and key from a full set ,so matching keys all round. Main lock body replated Would liked to have had the push button re chromed but at £60 it can wait . Better things to spend money on. Edited April 14, 2020 by Mark69 Quote Link to post Share on other sites
Tim D. Posted March 19, 2017 Report Share Posted March 19, 2017 Got my TR6 running on the Moss supercharger. https://youtu.be/yRdHG-mUubs Cheers Tim Quote Link to post Share on other sites

Recommended Posts
Join the conversation
You can post now and register later. If you have an account, sign in now to post with your account.