


hot-growler
-
Content Count
158 -
Joined
-
Last visited
Content Type
Profiles
Forums
Calendar
Posts posted by hot-growler
-
-
SHi, rebuilt my 150pi engine and purchased new throttle linkages as my old ones were badly worn. Got it all together and it's running like a pig. Is there anyone in the Lancashire area that can give me a hand. I have a couple of synchro gadgets and am aware of the theory of the job, but putting into practice is something quite different altogether. Thanks, Stephen
-
Hi, does anyone know the best way to replace the central spindle bush on the throttle shaft? Is it just a case of cutting and opening it up & gluing it back together? thanks, Steve.
-
Hello. I have since refitted the bits and tries again.
Is it normal for pressure to increase when adjusting screw clockwise with a bit of fuel leaving the back of the valve (max pressure was 105) and then pressure drop with a significant gush of fuel?.
Well that is what has happened, so i backed it anticlockwise and left it at 105.
Thanks, steve.
-
-
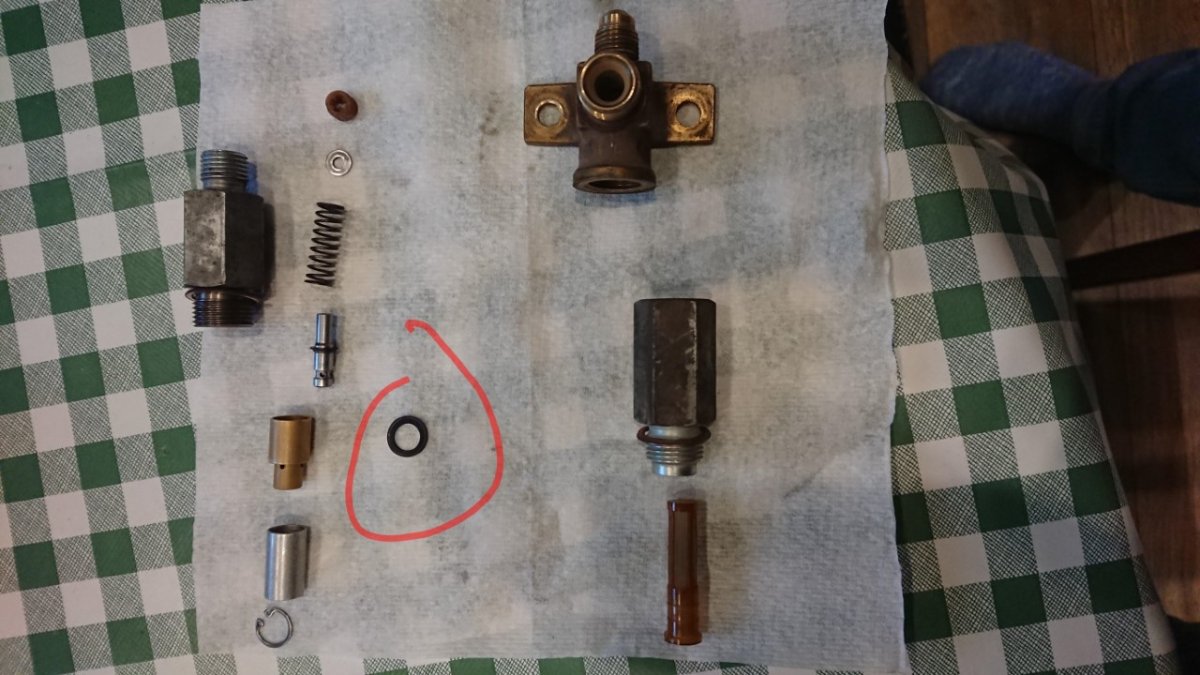
prv.mhtmlHi, checking fuel pressure at the metering unit, i'm only getting 90PSI, so I decided to strip the PRV. I think the nylon adjuster was seized.
Anyway I found a flat rubber washer at the bottom of the valve housing. The workshop manual shows no sign of it in the stripdown pic. Should it be there.
Are there any ways to increase pressure to 105PSI?
Thanks a mil
-
Thanks for advice, I will ill get new sprockets before I fit engine.
Did as John said but valves on #1 port are open and closed on #6
-
Thanks, sounds simple, will give it a try.
I remember doing timing on my Stag and seemed much simpler.
-
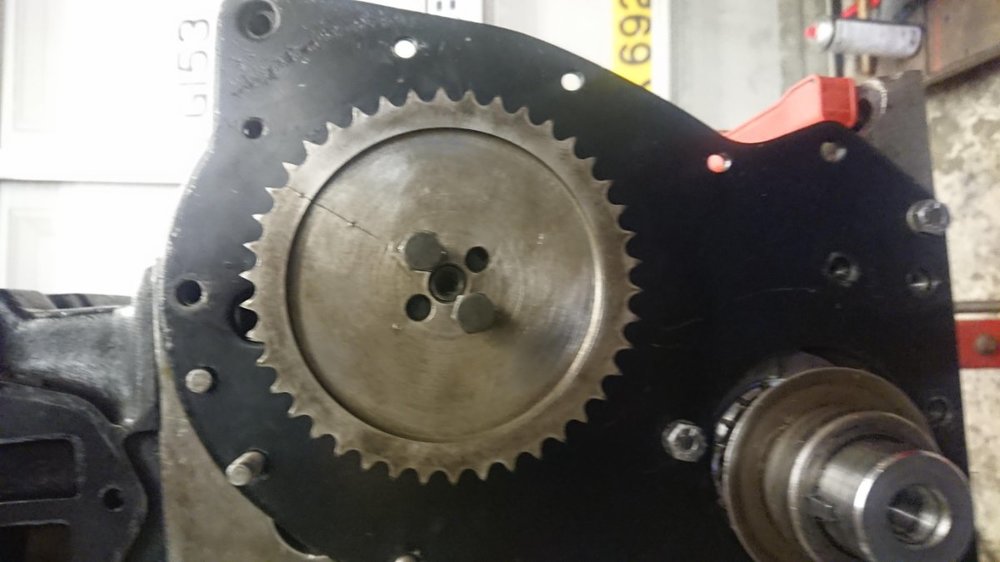
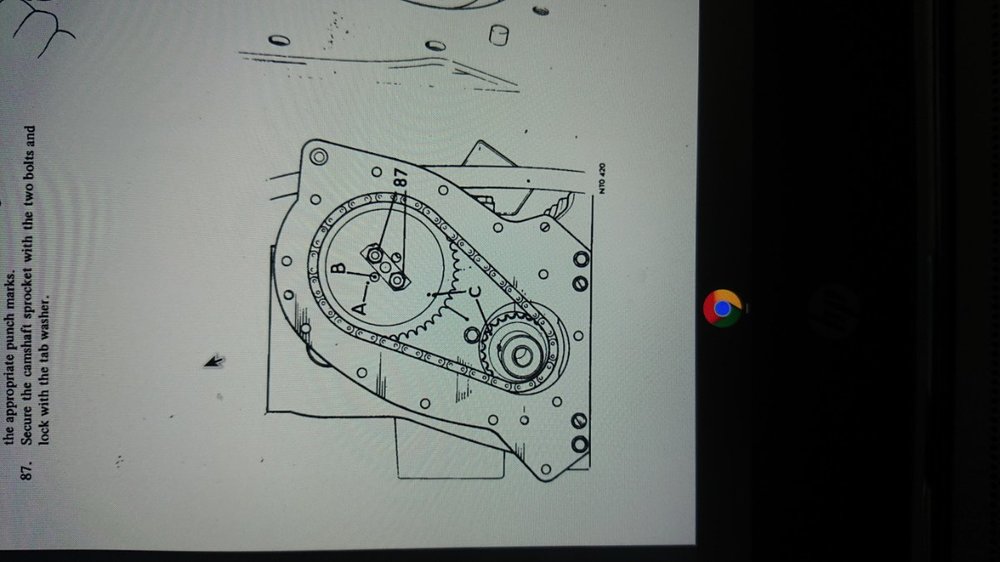
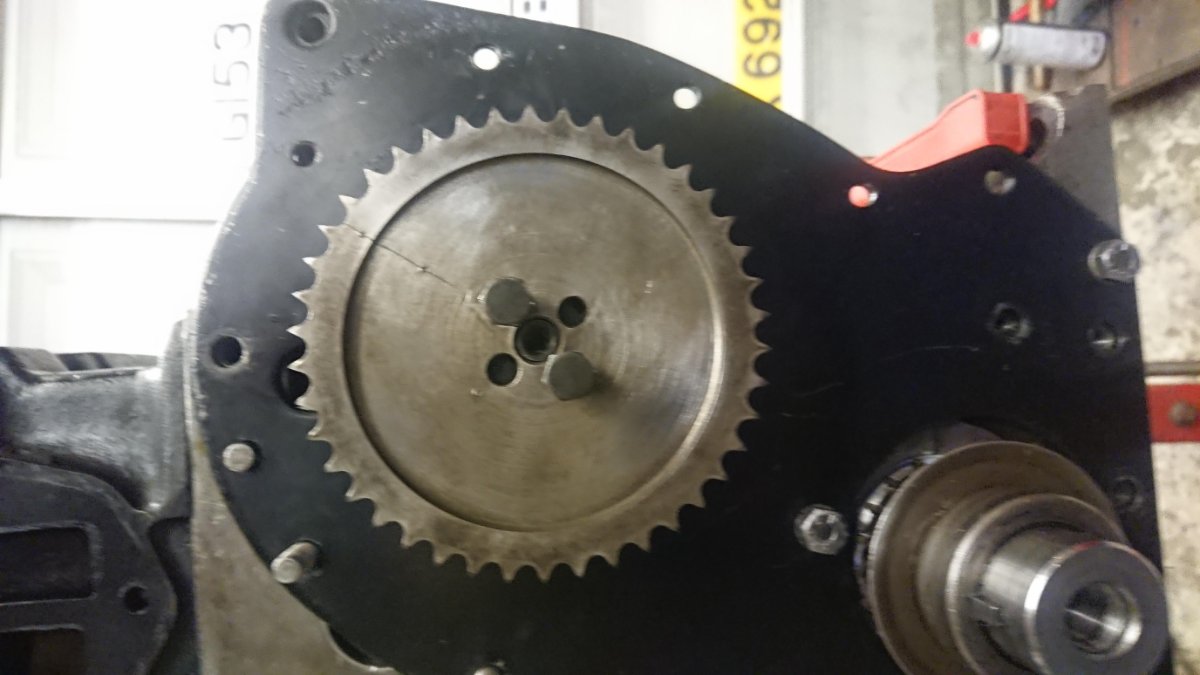
Does my first pic show roughly where it needs to be for correct timing?
if so then for marks A and B to line up, mark C is out. Interestingly my marks A and C on my cam sprocket are different to the Workshop Manual

-
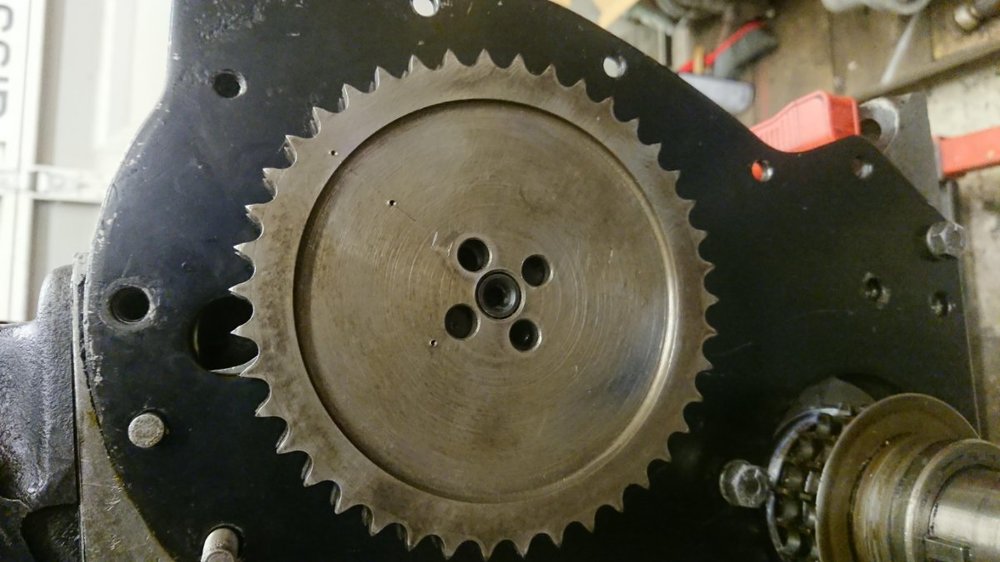
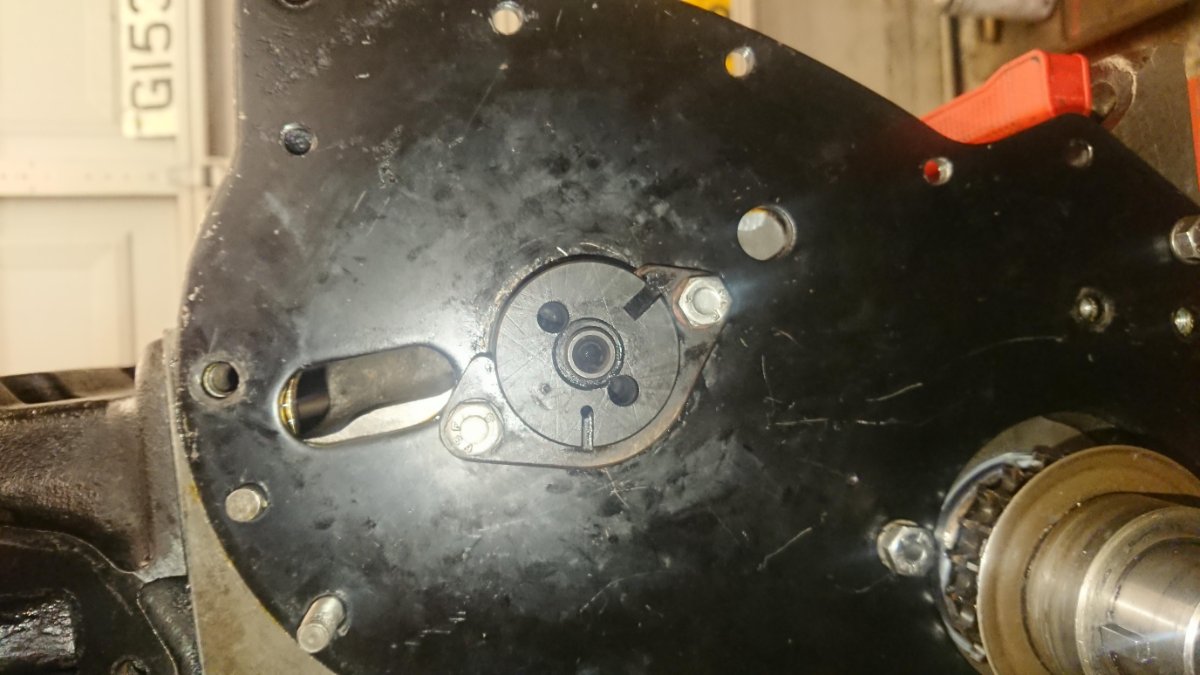
Hi, i currently have the crank at TDC and timing marks 'C' lined up as in brown repair manual. dots A and B are where the book suggests, but valves are open on #1 cylinder but closed on #6. Have I got the camshaft 180 degrees out?
When i turn the camshaft to close valves on cylinder 1 the timing mark 'C' is 180 degrees out. I'm confused.
Steve
-
Danke Harald
-
hi has anyone got a front on pic of timing chain cover, re-fitting engine together and need pic to see where studs, screws and bolts fit. had a pic but think i deleted them by mistake, thanks steve.
-
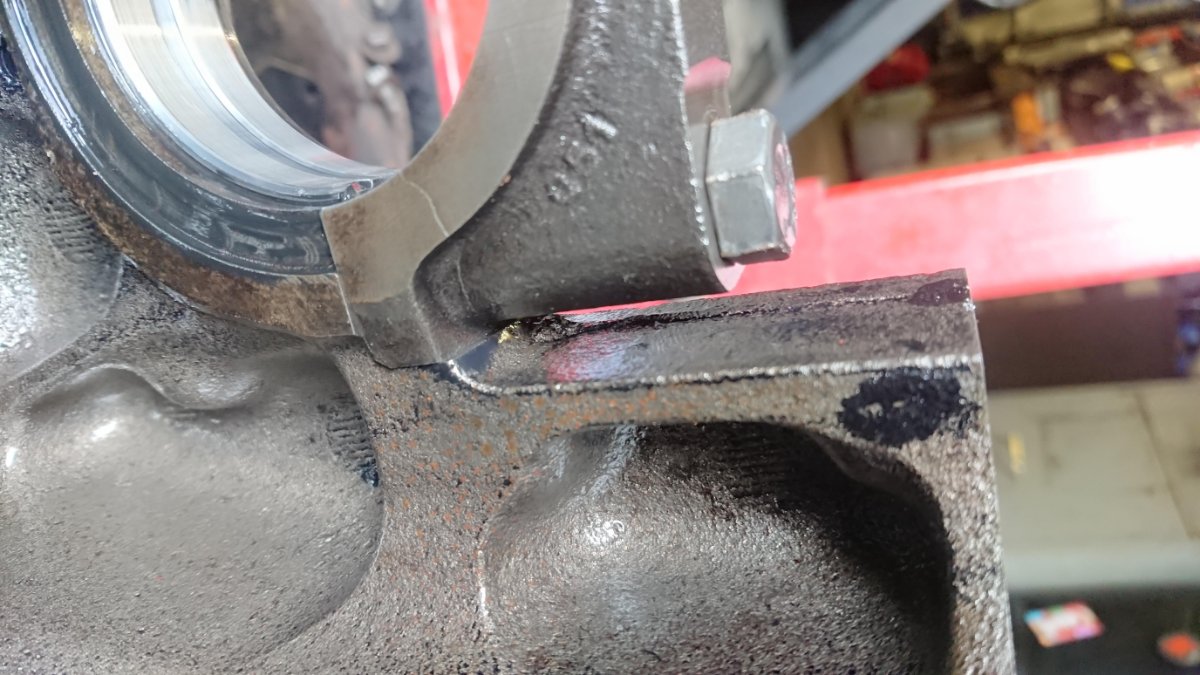
hi everyone, i haven't read any of the replies for a few days as i was kindly given a cap by jerrytr5 for a nominal fee. Tried the cap as was but could feel a lip that showed it wasn't in line with the lower curve of the bearing housing, and when bolted up the crank wouldn't budge.
Took it to an engineering shop in Bradford called W Drake ltd that specizlise in line boring, and miraculously they line bored it back to original. All 4 caps have been worked slightly.
Have trial fitted the crank back in and it seems to be fine, the crank spins freely with caps torqued down.
Thank you to everyones input, particularly Jerry, who kindly let me have his spare cap.
Will check size of crank, but the fact it spins freely makes me think it is correct. Steve.
-
standards before, 10 thou after. not measured. will get my micrometer out to be sure.
-
would it not also stop the crank from turning when bolted up?
-
I considered just fitting and hoping for the best so i refitted the broken cap and torqued it up and pieces fitted together well. added engineers blue and seemed to turn very easily. shell was fine, no obvious rubbing of the crank
Not going to go down that road cos if it fails under load there'll be a mess.
Just had crank ground to 10 thou and correct bearings fitted.
-
company in bradford can line bore the crank, but need acap to machine. it's cap #4 the thrust cap. engine recessed block.
Steve
pm'd jerrytr5 to see if he has one.
-
by the way it is the thrust cap too, may affect things a bit...
-
need to find a machine shop to make a cap.
thanks for advice, it is easy to go down the wrong road...
-
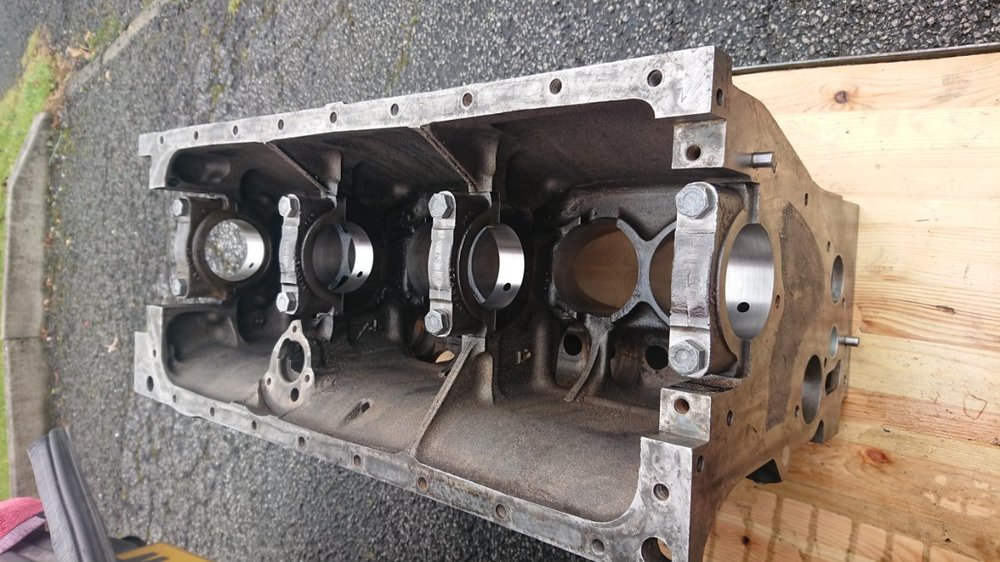
what about getting a replacement block and reboring to fit my pistons? Are there any differences in 2.5 blocks or are they all the same? my cp is recessed and flat piston faces. Just had head rebuilt too with a light skim as gasket had been blowing slightly.
-
East Lancashire, but can travel
14 minutes ago, Motorsport Mickey said:You need a good quality engineering firm. Even better if they’ve done it before with auto connections. A steel cap needs making up the same size as the one broken, outside dimensions the same to allow it to ‘nip’ into the block, copy the broken cap. Then they’ll put in a jig borer and align bore it ( alignment bore) to accurately give you a new steel cap that fits into place the same as the others and will carry the bearing.
I see you are in Lancashire but that covers a lot of area, can you give us a more Specific area ? The local TR group will be a good ask first to tell you who can do and if trusted.
Mick Richards
-
how do i go about having a cap made?
-
2 pieces fit together when bolted up. worth putting it in and running?

-
Crack closed up but when I loosened it, it broke in 2. The 2 pieces fit together OK though
-
Yes tiny crack there too. Cap still in one piece though?


Fuel Injector Pipes
in TR6 Forum
Posted
Hi, the pipes from the metering unit to injectors in my CP TR6 are looking ready to replace.
Does anybody know where I can locate the correct pipe to make my own.
Many thanks, Hot-Growler.