


T Rusty
-
Content Count
96 -
Joined
-
Last visited
Content Type
Profiles
Forums
Calendar
Posts posted by T Rusty
-
-
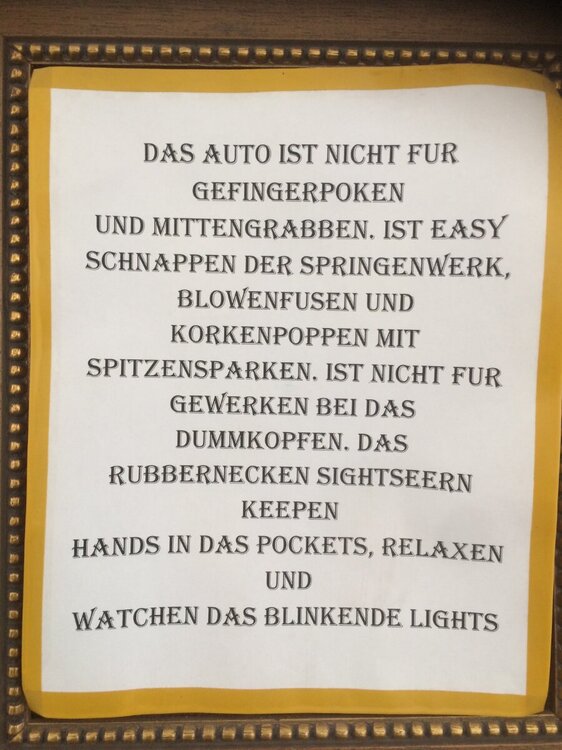
Hello Christian, I’m up near Frankfurt. A friend gave me this small poster in hoch Deutsche that even non-speakers can understand and which now hangs in my garage. And I have many, many bolts from TR3 A and TR3 needing the acid treatment. Paul
-
Miles, without access to my 3A, from memory one bolt from runner to seat bottom broke off. I broke off the other and drilled both holes out completely. I replaced them with stainless flat head bolts from the local hardware store (M8 I think, 1/4” ?). I had to grind the tops a bit on the sides to fit them into the rail but it works. I don’t have access to a welder. Paul
-
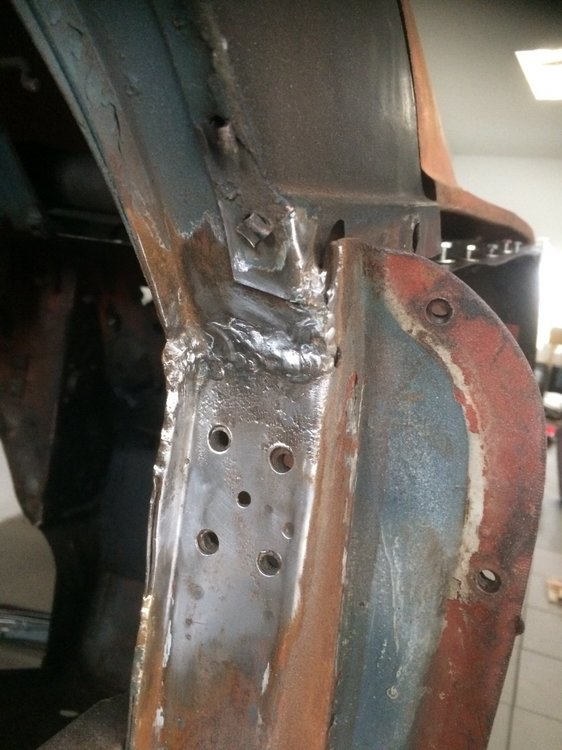
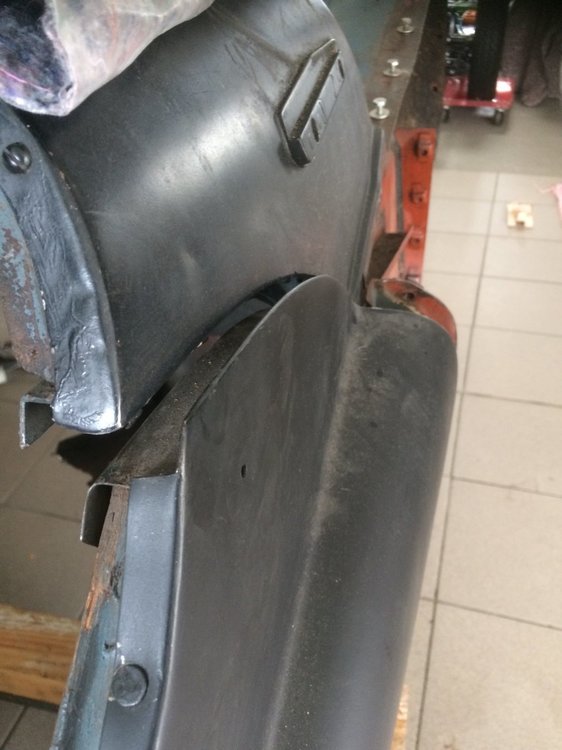
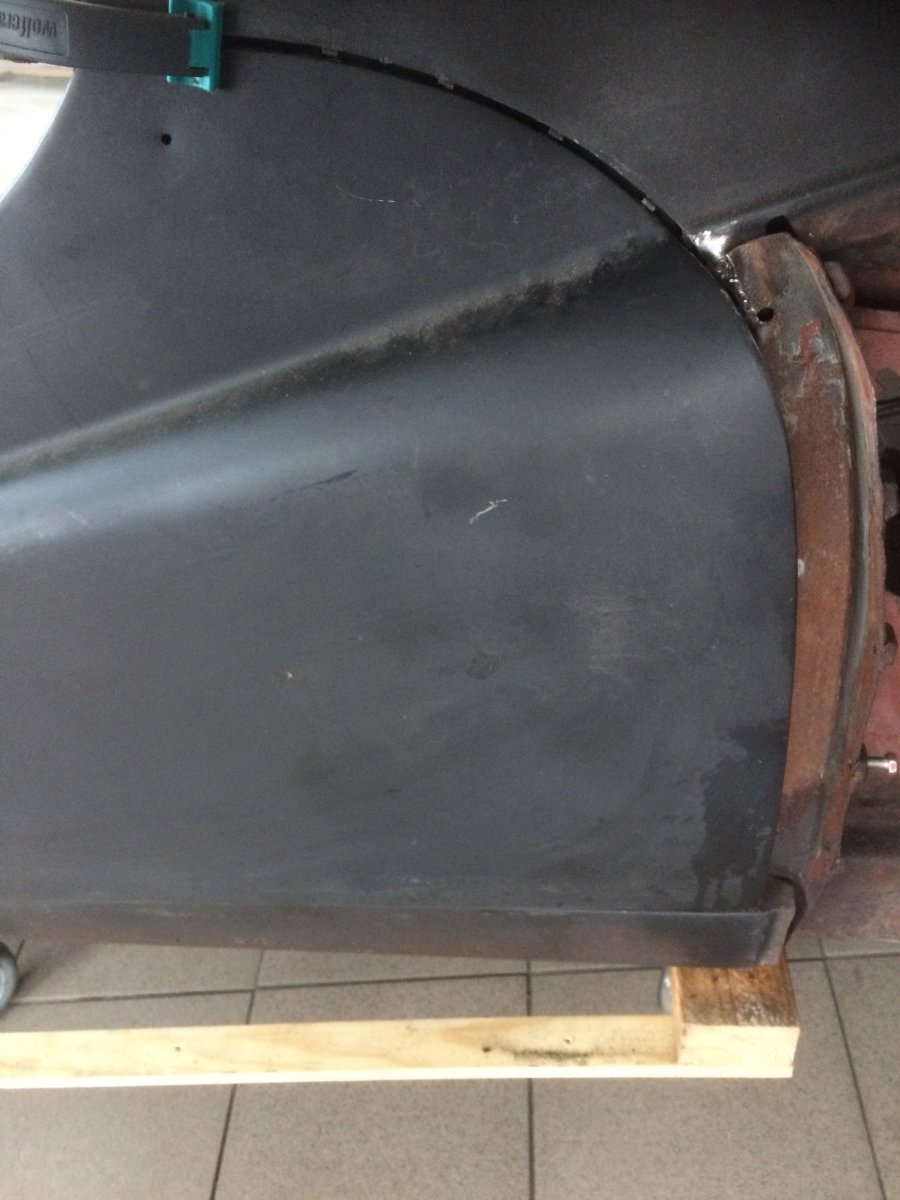
Re hinges. The good news, the hinges have absolutely no wiggle. They are brass, look original and are the original Winchester Blue Colour. I’ve now redirected my work to finish removing the right floor. In reading about that job here on the forum I can gather all the info I need in about fifteen minutes. To find and remove about eight inches of factory tack welds takes an hour or more. See picture.

-
Thanks Stuart, At least this time I’m working from above on the chassis without body rather than on my back trying to correct things from underneath. In spite of buying all the recommended bits and clamps I wound up making one. It’s not pretty but works better than what I bought. Opening the ends of the x would mean heating with a torch and hammering? Paul
-
Stuart, in your picture the exhaust going through the X member. Did you do anything to keep it from rattling? I’ve got the big bore stainless on my 3A and I don’t think I’ve cured the rattle yet. I’m working on the TR3 now with same exhaust. It’ll have the A overdrive, looks like a very tight fit too.
-
And the outer sill IS NOT in the right place. Paul
-
Peter, that doesn’t scare me a bit...
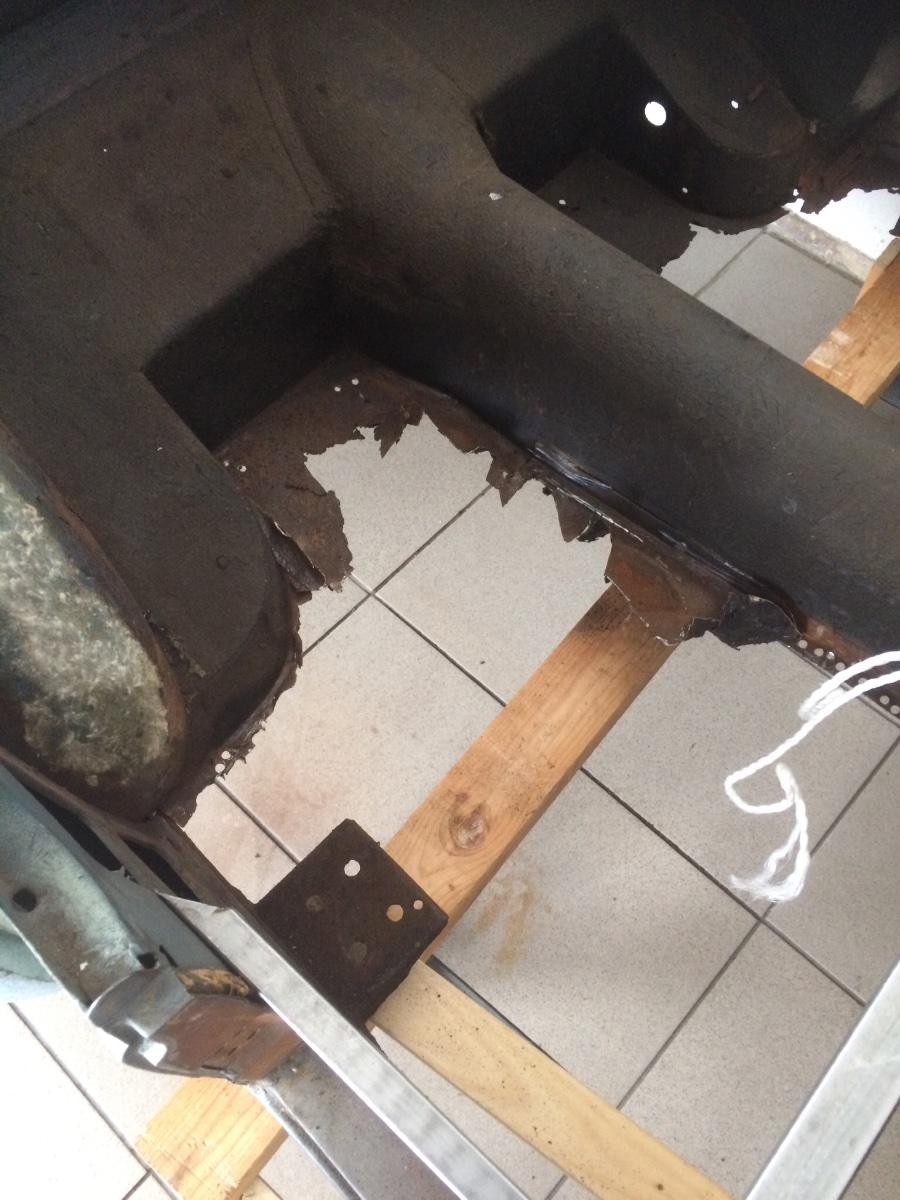
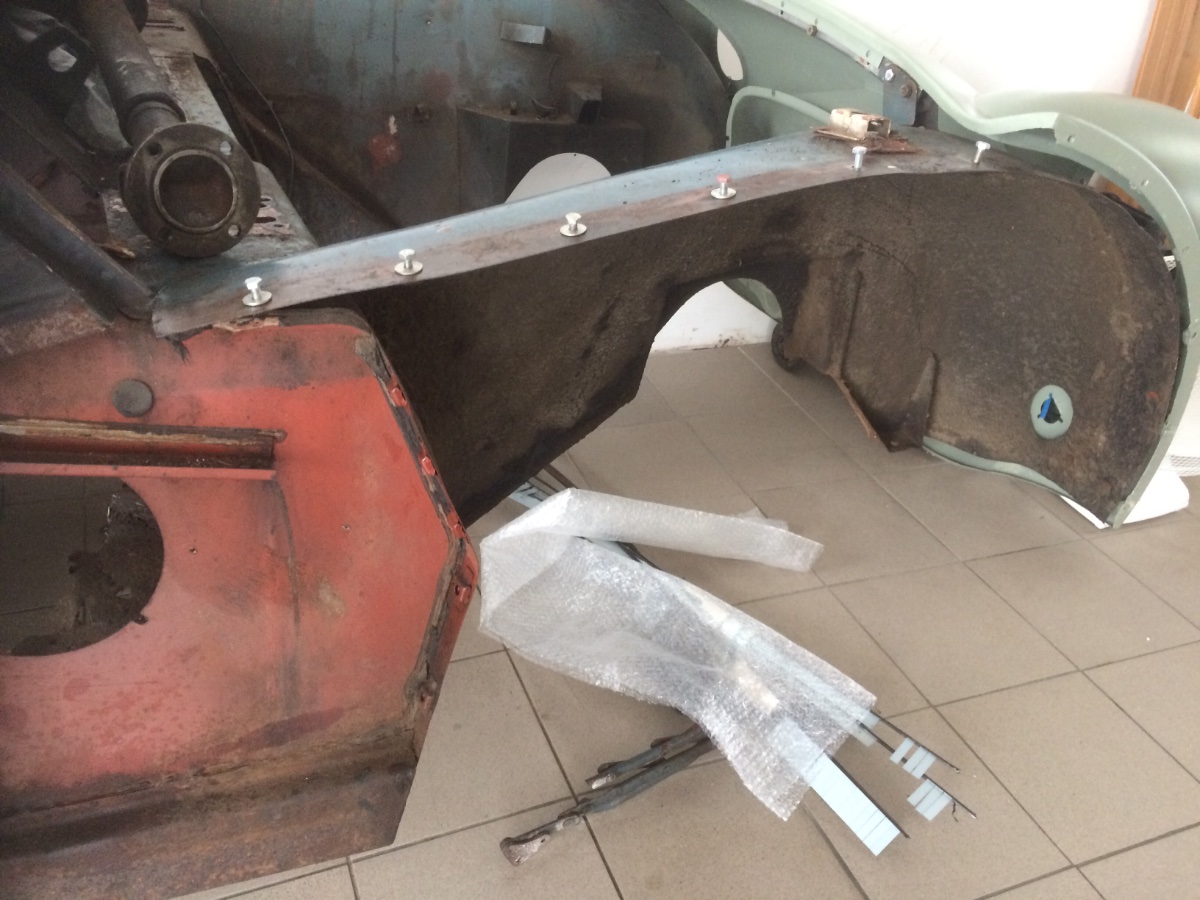
 Actually I’m at the thinking and tinkering stage. Since the floors are nearly non-existent I did some measuring and eye-balling the new ones today and it looks like they will fit pretty well. I’m thinking of putting them in with pop-rivets to hold everything together for now, then tackling the sills. Uncovered enough of the right sill today to discover the original Winchester blue paint. And I agree, fitting the doors will involve a lot of head scratching and more visits to the forum. After the floors are in I’ll set the body back on the chassis, then start with the doors. The chassis shows floors bolted on (just for entertainment purposes).
Thanks to all for help and comments.
Paul

-
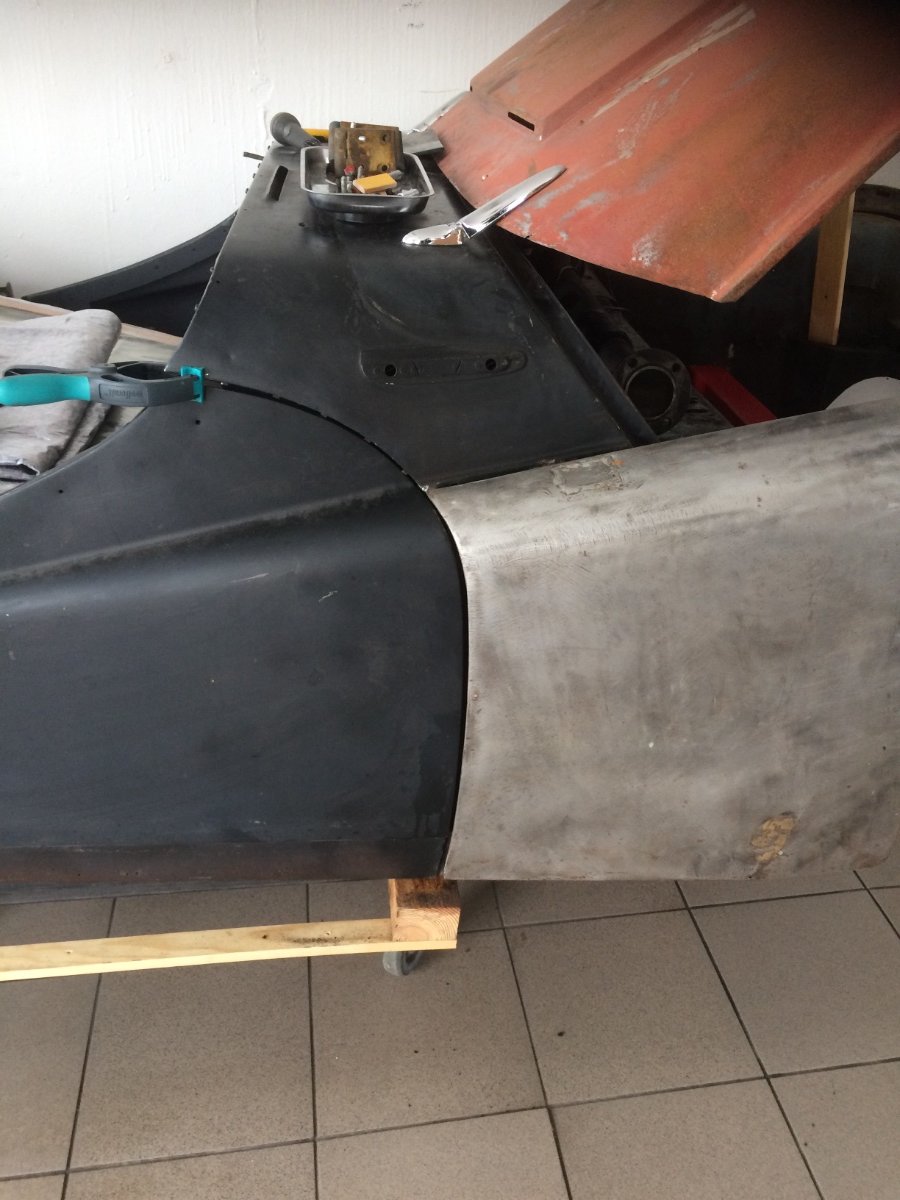
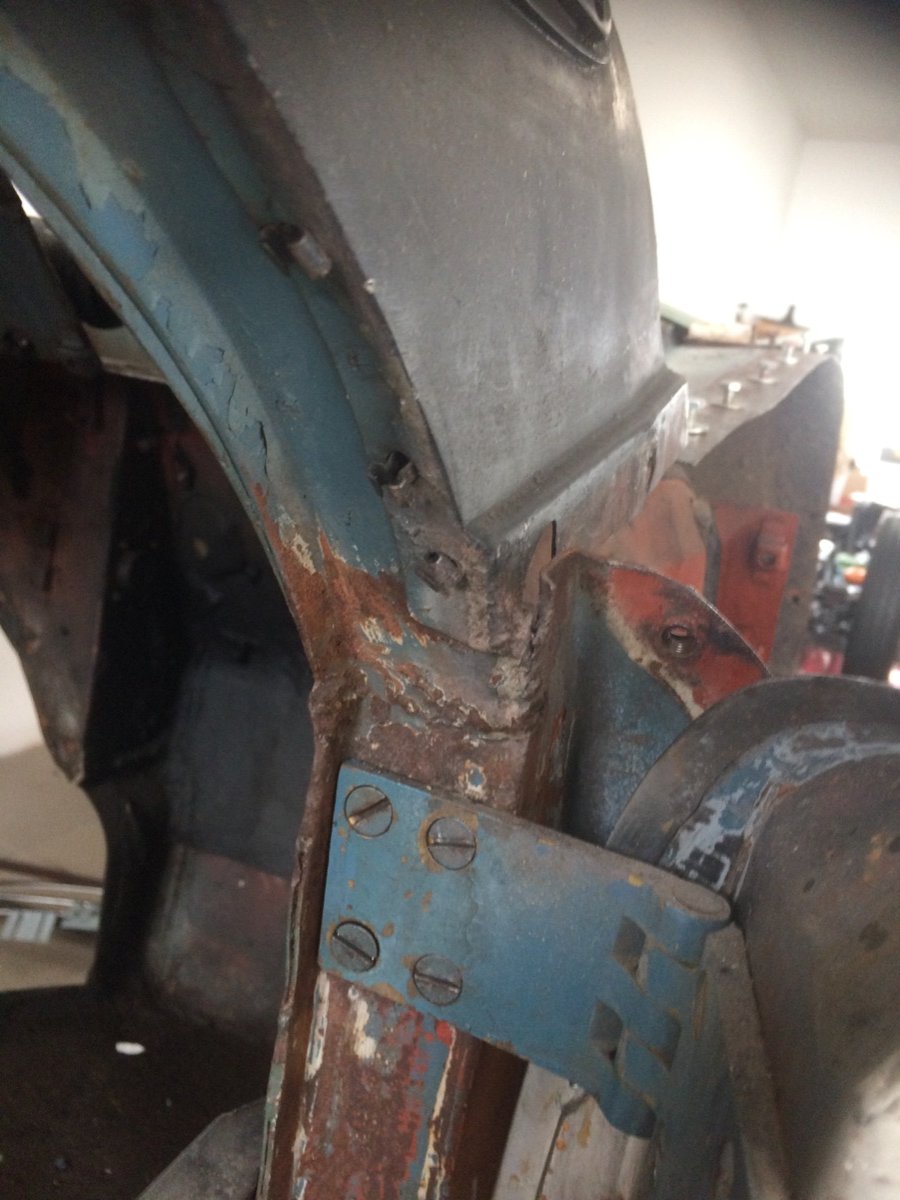
Keith, and all others...I took your advice and correctly bolted on the ugly right front wing first. I’m impressed, all bolt holes lined up. When I tightened up the bolts, the fit to door improved a lot. See the picture.
Thanks to all for the advice, next visit to garage I’ll try the door with hinges. Suddenly the ugly wing doesn’t look so bad. All the holes lined up without the need of foul language and a hammer. Paul

-
I’ve always been a big Healey fan too but the TR3 already stretches the budget (and strains the marriage).to the limit. Also what I like about the TR3, is most parts j can handle alone if no one is around to help. I’ve finished a US TR3A that was a rusty non original mess but I built it to drive, not so much to show. I drive it to car shows to admire restored Triumphs brought in on covered trailers.
-
Yes, import out of U.S. The floors were original but nearly non-existent. I agree, I’ll give it a lot more thought before cutting anything. Ive tapped out the rusty bolt holes and will mount the wing property to get a better idea of how it all fits together. Thanks for comments. Paul
-
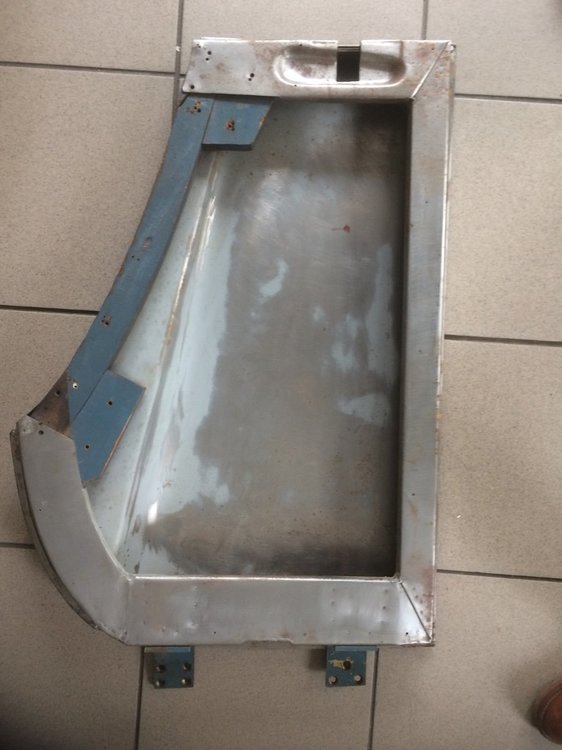
I wire brushed the weld and although sloppy I think it’s original. I removed the hinges and the door fit curve to swage perfectly, front and back. From the front down to outer sill fit is good too but doesn’t come close to meeting the joint line. Are they supposed to meet? See picture. Bottom door gap is about an 1/8”. The rear part of door gap at the top is okay and meets the swage perfectly but going downward from the top to bottom the gap shrinks until the door overlaps the “B” post by about 3/16” at the bottom.
There was a lot of poor work done on the rear part of the outer sill, so gaps and fit not a concern for now until the new sill, etc. are being welded in.
The door has had a lot of work done. The blue is original color.
Thanks for all comments and suggestions.I don’t think I’ve proved anything but gives me a lot to think about until next visit to my garage.
I think the easiest would be to weld the door shut and just leap (or crawl) over the sill.
Paul

-
Thanks again Keith. Your info is noted. I now have two very ugly wings that fit poorly so are not much help. The right one overlapped the door by about 3/8”. Door gaps of 5mm noted.
I have a bunch of photos I can’t find taken when the car arrived. When I find them i hope it will give a better idea of how things fit together then. The hinges are wiggly by the way.
Paul
-
Great info, I’m printing it out to absorb later. Thanks. Paul
-
Pater, Unfortunately the original wings were taken away by a Meister for cosmetic work. He disappeared with them and people who followed up on it for me said he was not a good person and to forget the parts, they were probably traded for drugs. He seemed like a nice guy. A family man. We talked about his two children and what he planned to buy them for Christmas. Two years ago. Only the bonnet and two front wings fit into his car at the time. Such a trustworthy type if he had a trailer I’d have probably had him take the whole car. It is said live and learn. I’m 76 and I so far I have only lived.
Anyway, the original wings fit very well. I’ve just found this picture of the car as bought and it looks as if the door is sticking out there too. And I’m looking for two front wings in repairable condition but I think Brexit, etc. will put them out of my price range if they come from the UK.
Door bottom gap looks very good.
If the door could close it would fit and gap would be good with a bit of minor adjusting.
The gap in the back is a little wider at the bottom than the top but I’ve wrestled with the whole body so often that’s probably my doing.
Cutting the door frame and bending the metal occurred to me too but what I think I’ll do next visit is take the door off completely and see how it fits without hinges and confirm that the curvature matches the scuttle at least.
If there was visible accident damage I’d expect a bent A post.
Anyway, Thank you Peter and Stuart, I appreciate the thoughts very much. Paul

-
Car in need of total restoration. There is no evidence of prior accident damage that I can see. One picture shows inside of right front fender with lots of undercoating but no rust or damage. Both sides and the front are like this.
On the right side, the door at the top front sticks out about 3/4” and won’t align even with pressure. The back and bottom easily close and align and door gaps could be made to look pretty good too.
Both doors have had considerable work done and look finished. The workmanship looks good from the eye of an amateur.
The door hinges look original but look big and thick and heavy to my inexperienced eyeball. The A post has old sloppy welding at the top, above the upper hinge, but I’ve seen similar welds on various parts of my 3A. Could it be A post was replaced? The skuttle shows no damage anywhere.
The floors were rusted out and inner and outer sills had poor work done. The rear of car had minor parking lot damage and some rust but everything fit.
Any idea where I should start with the door?
Thanks, Paul


-
Thanks Stuart, just emailed Shipley for a quote.
Mike, where would the top be picked up? I typed in London and estimated weight and measurements. Can you email a few more pics? Payment I’ve done with bank transfer, cash in an envelope (don’t think I’d recommend that for that amount of money) or after thinking about it, I could arrange payment through in-law in UK.
is that an original TR3 part? I don’t care for the aftermarket one that is more “square”. Think it was made out of plastic. A profile pic would be appreciated.
Thanks,
Paul
-
Can this be shipped to Germany? I could use it. Also looking for two front wings for aTR3, in repairable condition. Thanks. Paul
-
Miles A sent really good diagram and a picture. Much appreciated too. I’m now looking for someone to blame for the mess in case there is a witness around when I open the “lid”. Will see if I can locate the Tony Thomson info. The simpler, the better. Paul
-
I’ve added electric fuel pump, electric fan, heated seats, cig lighter plug for the Navi, overdrive and it could be I have forgotten something. I don’t remember exactly how I hooked it all up. It didn’t look nice but it all works and I’m glad it’s hidden behind the dash. The car is now negative ground with alternator.
I’m planning to open that can of worms and re-do it the way it should be done, with fuse box, fuses with proper values and wire gauge, etc. as necessary.
Can anyone suggest a wiring diagram with fuse box, etc. Picture would be appreciated too, of course. Original appearance under the bonnet isn’t important.
I have the original correct wiring diagram for the TR3A.Thanks. Paul
-
On 11/30/2020 at 6:19 PM, David Owen said:
Thanks. If they break I will find someone competent to show me how to remove them.
Hello David, did you find someone competent to remove them? The o rings on my 3A tranny leak badly. I have an extra lid which I planned to re-do with new o rings and use. But in spite of all care the square screws sheared off. I used every tool I had and extractors I had to buy and every fluid I’ve heard of but the sheared off, hardened stubs, are still in there. I’d gladly send the lid to someone who could extract the broken screws. Thanks. Paul
-
Ian, if you still have them I’d like to buy a set. I’ve tried the email address but it “bounced” I’ll try again but I do need a set and you can consider them sold! Thanks, Paul
-
8 hours ago, Peter Cobbold said:
.....they voted for that faker Trump.
Peter
Not twice I hope
-
Peter, I bought my 3A from a guy in Missouri who provided description and photos. What arrived was similar to the car in your picture but with a bent chassis, lots of body putty and thick red paint. I was not a pleased customer but I have since restored the car top to bottom and I console myself even today by knowing the PO will one day roast in hell. Interesting picture though. Paul

-
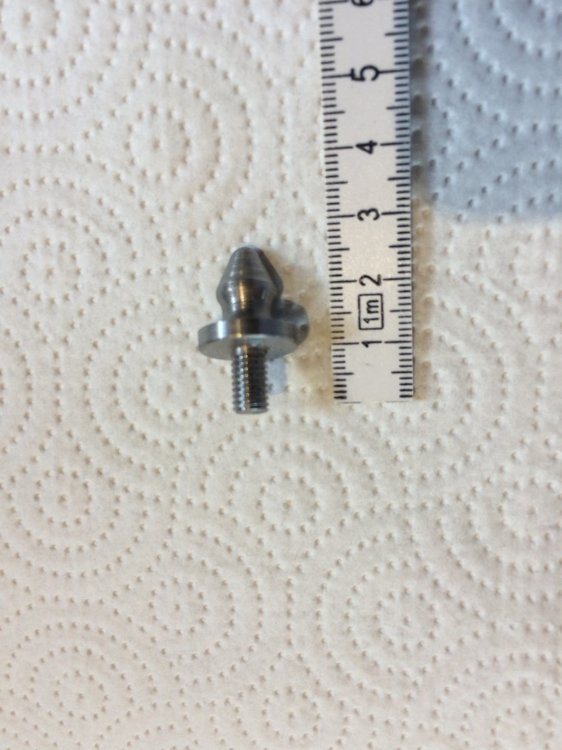
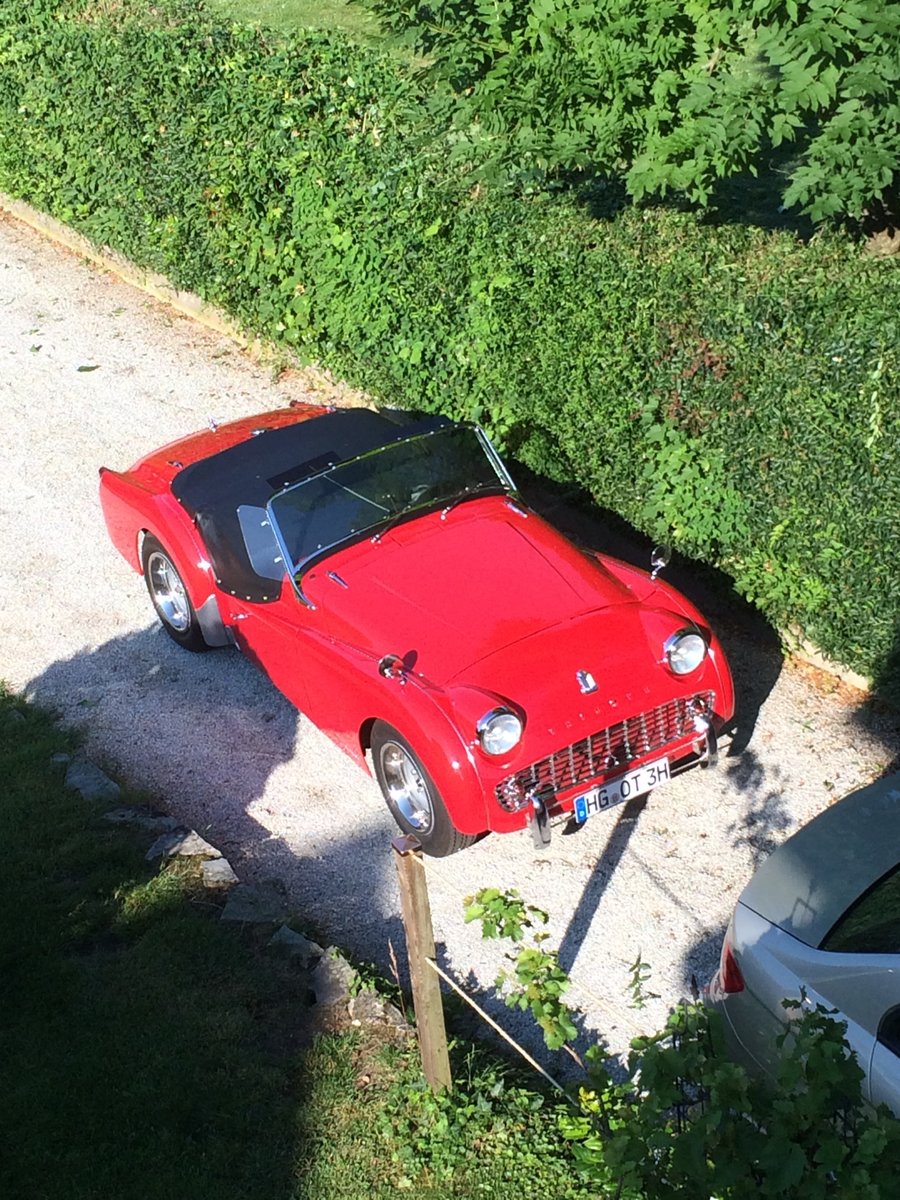
Not the best pics but late TR6 wheels with chrome discs from Moss. The 3A hubcaps would leave the outer rim holes part covered but I was willing to sacrifice that to cover the hub and lug nuts. To fit the caps I had planned to drill holes and thread in the studs pictured, made by a friend (free) but still haven’t got around to it. I went to wider rims and tyres because I thought they’d improve grip and also a friend following me was less than complimentary about the appearance of the skinny originals. The car was rust and body putty and junk when I bought it so originality was never a worry.


Engine lack or power
in TR2/3/3A/3B Forum
Posted
As a TR3A driving, travel loving, bird watching amateur mechanic this post had it all. Mick, thanks for your very detailed answers. Lots of stuff in there I’ll re-read many times. Ewan let us know how things progress. Paul