


stuart
-
Content Count
26,568 -
Joined
-
Last visited
Content Type
Profiles
Forums
Calendar
Posts posted by stuart
-
-
Yes there was a bracket though its often been deleted or rotted off Im afraid, I may have one kicking about somewhere but theyre easy to make.
Stuart.
-
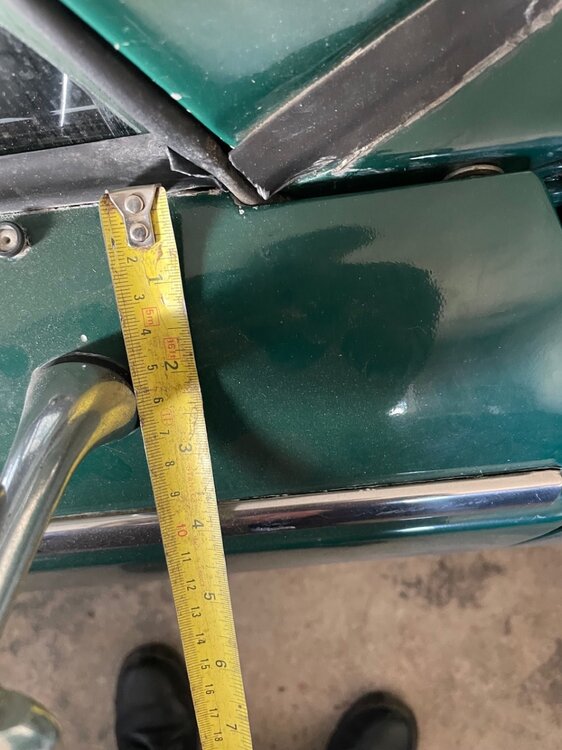
Usual location for one of those mirrors is as below
Stuart
-
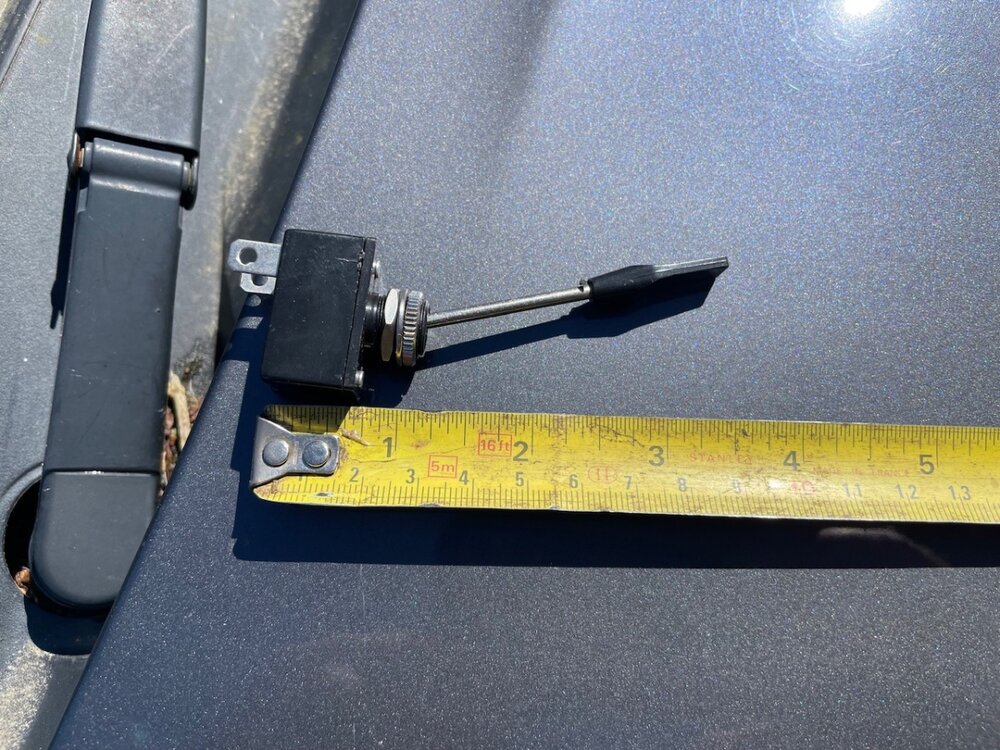
I have one of these momentary switches spare if anyone requires one, they are a bit hard to find with decent length stalks these days
Stuart
-
I think there is a sale on at Moss so that may explain the different price.
Stuart.
-
1 minute ago, Willie said:
Hi Stuart,
Would the K&N have one of these? A pal asked that question.
Willie
I believe most have that now as it seems the way cars these days are built, you could always ask the factors you got it from.
Stuart.
-
Could be non return valve as a lot of cars these days have the oil filter facing upwards on the side of the block.
Stuart.
-
1 hour ago, RobH said:
For most it's little different from operating the standard arrangement except you can't go direct from 4 OD>3 OD - (but then why would you want to?)
The logic box turns OD off when you change gear, so if you are in 4 OD and just change down instead of turning OD off, it goes direct to 3rd giving a lot more acceleration potential.
With the arrangement of a momentary switch on the gear knob you can actually go 4/od to 3/od by keeping the button depressed when you change down. Though as you say why would you?
Stuart.
-
2 minutes ago, Andy Moltu said:
Yes, that was the scandal that hit Austrian wines years ago.
It all got confiscated and they used it to de-ice the runway at Zurich airport

Stuart.
-
13 minutes ago, RogerH said:
Hi John,
are you referring to the grab handle?
If so most DIY type members can recover it. I've done a couple. I believe TRGB also undertake this service.
The TRShop sell there NEW grab handle and Moss also have a new grab handle. Not sure what Rimmer has.
The TRShop item looks very good.
If you recover your own do consider that the extra layer will make fitting the back plate a bit difficult.
The new ones do not have the back plate.
Roger
Is it possible to add an original metal backing plate to one of the new TR Shop ones Roger?
Stuart.
-
1 hour ago, BlueTR3A-5EKT said:
As does the current mayor of London, unless he can work out how to shove his hand in the owner’s pockets.
Im sure he will find a way, he`s screwing everyone else over.
Stuart.
-
The main front rubber should be glued on. I always use this glue https://www.woolies-trim.co.uk/p-1263-heat-resistant-adhesive
I would glue the front seal on and then stretch that raised block so it met with the side rubber and glue it to the end of it.Tthe front one is fairly spongy so that bit should stretch if not find a small block of Sorbo rubber and carve it to the same shape and add it to the side to take up the gap. It prevents water and draughts from that front corner.
Stuart.
-
 11 minutes ago, roy53 said:
They are 10 " and the finned ones with a couple of the fins broken off. But when you think of their age .
Roy
I know, Ive got them on the back of my Girling axle 4a
Stuart.
-
Good job your not in Scotland as they want to ban them.
Stuart.
-
2 hours ago, roy53 said:
I have a new set of shoes with competition spec material supplied by Enterprises for a TR2 .
Also original Alifin drums if anyone is interested that i had intended use but changed plans
Roy
Are they 10" Alfins, which type radial or finned?
Stuart.
-
26 minutes ago, Lebro said:
Once you try it, there's no going back !
Bob
Exactly so, as I get a few different cars to drive I always forget that not everyone has them fitted
Stuart.
-
Apparently at the meeting at Moss when this was announced the bit about Rimmers being included in the deal came at the end of the takeover announcement after all the usual stuff about keeping the company profile high etc all the usual takeover waffle and there was an audible intake of breath in the room.

Stuart.
-
15 minutes ago, RobH said:
"Patented blend of synthetic diols with ADH Enzyme blocker and non-aqueous corrosion Inhibitors for I.C. engines"
Brackets "Snake oil!"
Stuart.
-
2 minutes ago, John Morrison said:
Thanks again Stuart TR 6
John
OK so starting at the front (This is per side) 1 thick rubber washer, next on the turret support bar 1 thin rubber washer 1 ally slotted spacer 1 thick rubber washer. Then on the inner front of the foot wells 1 thick rubber washer. Front main chassis mount 1 flat rubber pad 1 steel shim plate 1 flat rubber pad Rear main chassis mount same as front so 1 rubber pad 1 steel shim plate 1 rubber pad. On top of the front of the "T" shirt one thick rubber pad (Thats the one that has the steel plate on top of the floor) and then just behind for the seat belt mount 1 ally slotted spacer. On the front mounting of the spring bridge 1 slotted ally washer. At the rear end of the chassis leg 1 thin rubber washer 1 slotted ally washer and 1 thin rubber washer. in the centre where the cross bar runs under the spare wheel well is 2 thick rubber washers. Also you need the rubber strip glued to the chassis in the appropriate places as per the spares catalogue.
Easiest is to buy a new body mounting kit first as last then you should have enough with a few spares.
This is a nominal starting point and you will need to allow some considerable time to balance the shims out to achieve the best fit which is with the body as low as possible on the chassis and still level. Do be aware that your also going to have to juggle door/panel gaps now as well as they never quite go back the same and adding or subtracting shims does need to be done with the whole thing bolted down tight every time hence the need for plenty of time being allowed as especially with trying to add or subtract main body shims you need the whole thing unbolted to be able to lift it sufficiently. (Although not in the case of that dark blue 4a advertised recently that didnt have any floor brackets
)
Stuart.
-
Just now, BlueTR3A-5EKT said:
Bit like finding an old Triumph dealer with a cupboard full of Churchill tools.
Im lucky that mine came from Dave Gleed.
Stuart.
-
42 minutes ago, BlueTR3A-5EKT said:
I've got one like that for fitting piston engine cylinders on a DC4 engine.
Not be a lot of call for that these days I suppose
")
Stuart.
-
23 minutes ago, John Morrison said:
Thanks Stuart
putting the tub back on a new, to this car, replacement chassis so it’s all to be worked out from scratch
John
Then your going to have to do what I do which is the same chassis up on stands and level front to back and side to side then you need to start with the nominal amount of shims starting from the front and working back. What car is it on? Depending on model then I can tell you what you need.
Stuart.
-
34 minutes ago, RobH said:
Glycol is completely miscible with water , so will form a mixture as soon as it comes in contact with circulating water, it won't stay as a separate layer underneath. If it were otherwise how could you mix bluecol with water when you re-fill ?
Im not sure if there isnt something else in the Evans stuff as it doesnt seem to mix that well with water which is possibly why they say you have to get rid of all the water in the system before filling with it. Its a bit like an oily feel to it.
Stuart.
-
2 hours ago, Dave McDonald said:
Brilliant weekend of motorsport at Goodwood.
The Can Am car demos were awesome.
Dave McDJohn Sykes son Adam was driving one of the CanAm cars.
Stuart.
-
7 minutes ago, Lebro said:
Easy to pull the shaft out, but the change the seal which has failed (between bearing & backplate) the hub needs to separated from the half shaft as Perter said above. NOT EASY ! you do need the special splitter, & a very big hammer

Bob
I do have the right Churchill tool to pull the hubs but even with that theyre a struggle.
Stuart.


How lucky am I?
in TR5/250 Forum
Posted
Where did you get that info from?
Stuart.