
.jpeg.b815754e832633c9a990e90f10433a61.jpeg)
JDC_747
-
Content Count
29 -
Joined
-
Last visited
Content Type
Profiles
Forums
Calendar
Posts posted by JDC_747
-
-
Hi Malbaby
If you consider the rear fixings as exactly that - fixed - then by adjusting the point at which the seat rail ratchets engage, it is possible to realign whilst remaining with the rear fixed, crabbing the seat sideways for want of a better phrase. This essentially shifts the front squab be closer to the tunnel, but still allows the seat to clear the B pillar when moved rearwards. It's not a great amount of lateral movement but enough for me to get the position relative to the steering wheel that I wanted, and the seat is flat and moves smoothly back & forth. Does require new holes drilling however, as mentioned by others. The geometry of both brackets and seats is not ideal but I have a pragmatic solution.
thanks
Jeremy
-
Hi all
Thankyou for all the help and advice, it's invaluable, shows what a brilliant forum this is.
After some more trial fitting and finger-crushing, I now have a plan, involving the 2 rear original fittings and some nylocs and 4mm spreader plates. The big thing for me was to have the driver's seat as 'square' to the steering wheel as possible, to minimise the left-hand offset. A slight realignment of the rachets on the runners has allowed this, keeping the seat squab nicely against the tunnel. Spacers on the front and none on the back give an ideal rake and just keep the top of my head below the windscreen trim level. Just need to trim the rear bracket studs to allow a bit more rear movement of the runners, which I need despite having stumpy legs.
I'm starting to ramble now so I'll end with a final thankyou.
Jeremy
-
Hi Nick
Thanks for the reply, yes that's what I'll be doing. Can use the rear 2 captive nuts thankfully.
Hi Stuart
Yes, agreed, massively unsafe to use them so already off, also gives a better fit re: tunnel.
Thanks chaps.
Jeremy
-
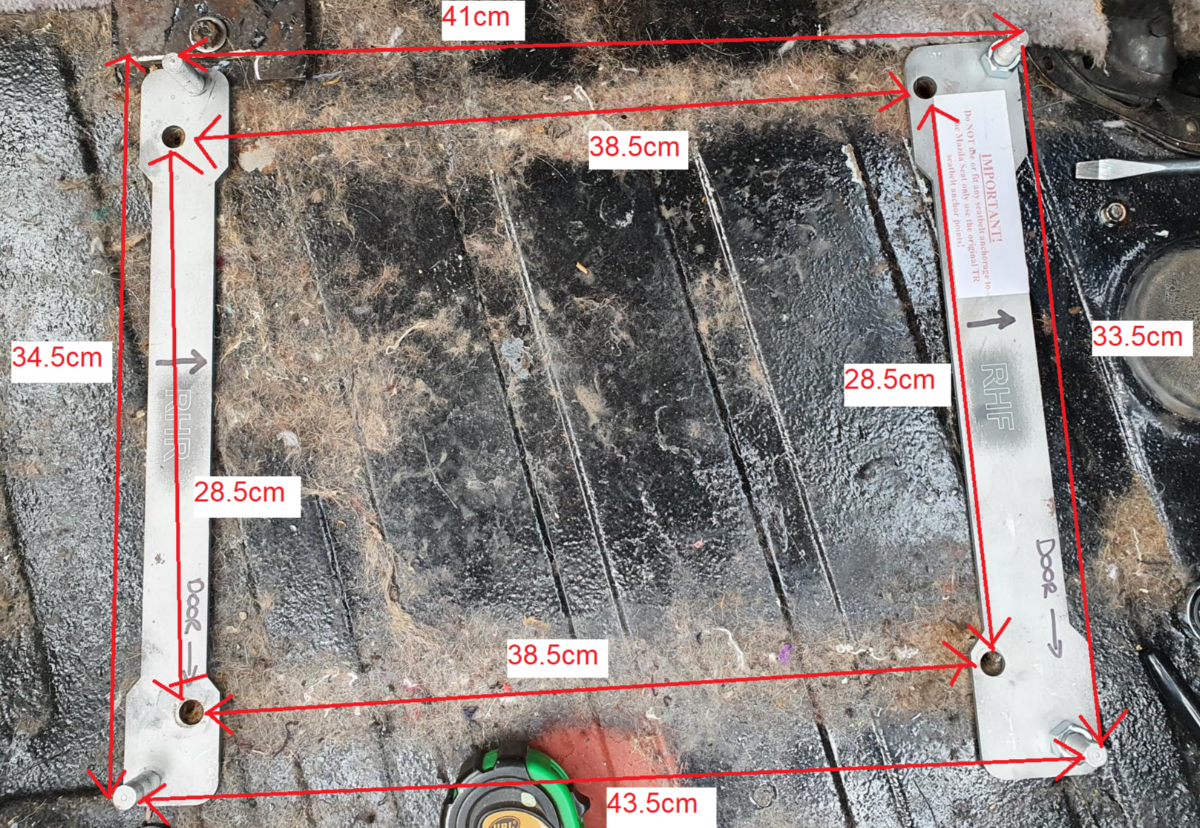
A detailed reply, thanks Malbaby. Yes, Carl's view was that outside spacing should be 360mm as you say. I believe this would then align bracket studs with runner holes.
I have 4mm spreader plates and appropriate bolts etc, so I suspect I'll drill the floor to match.
Ta, JDC.
-
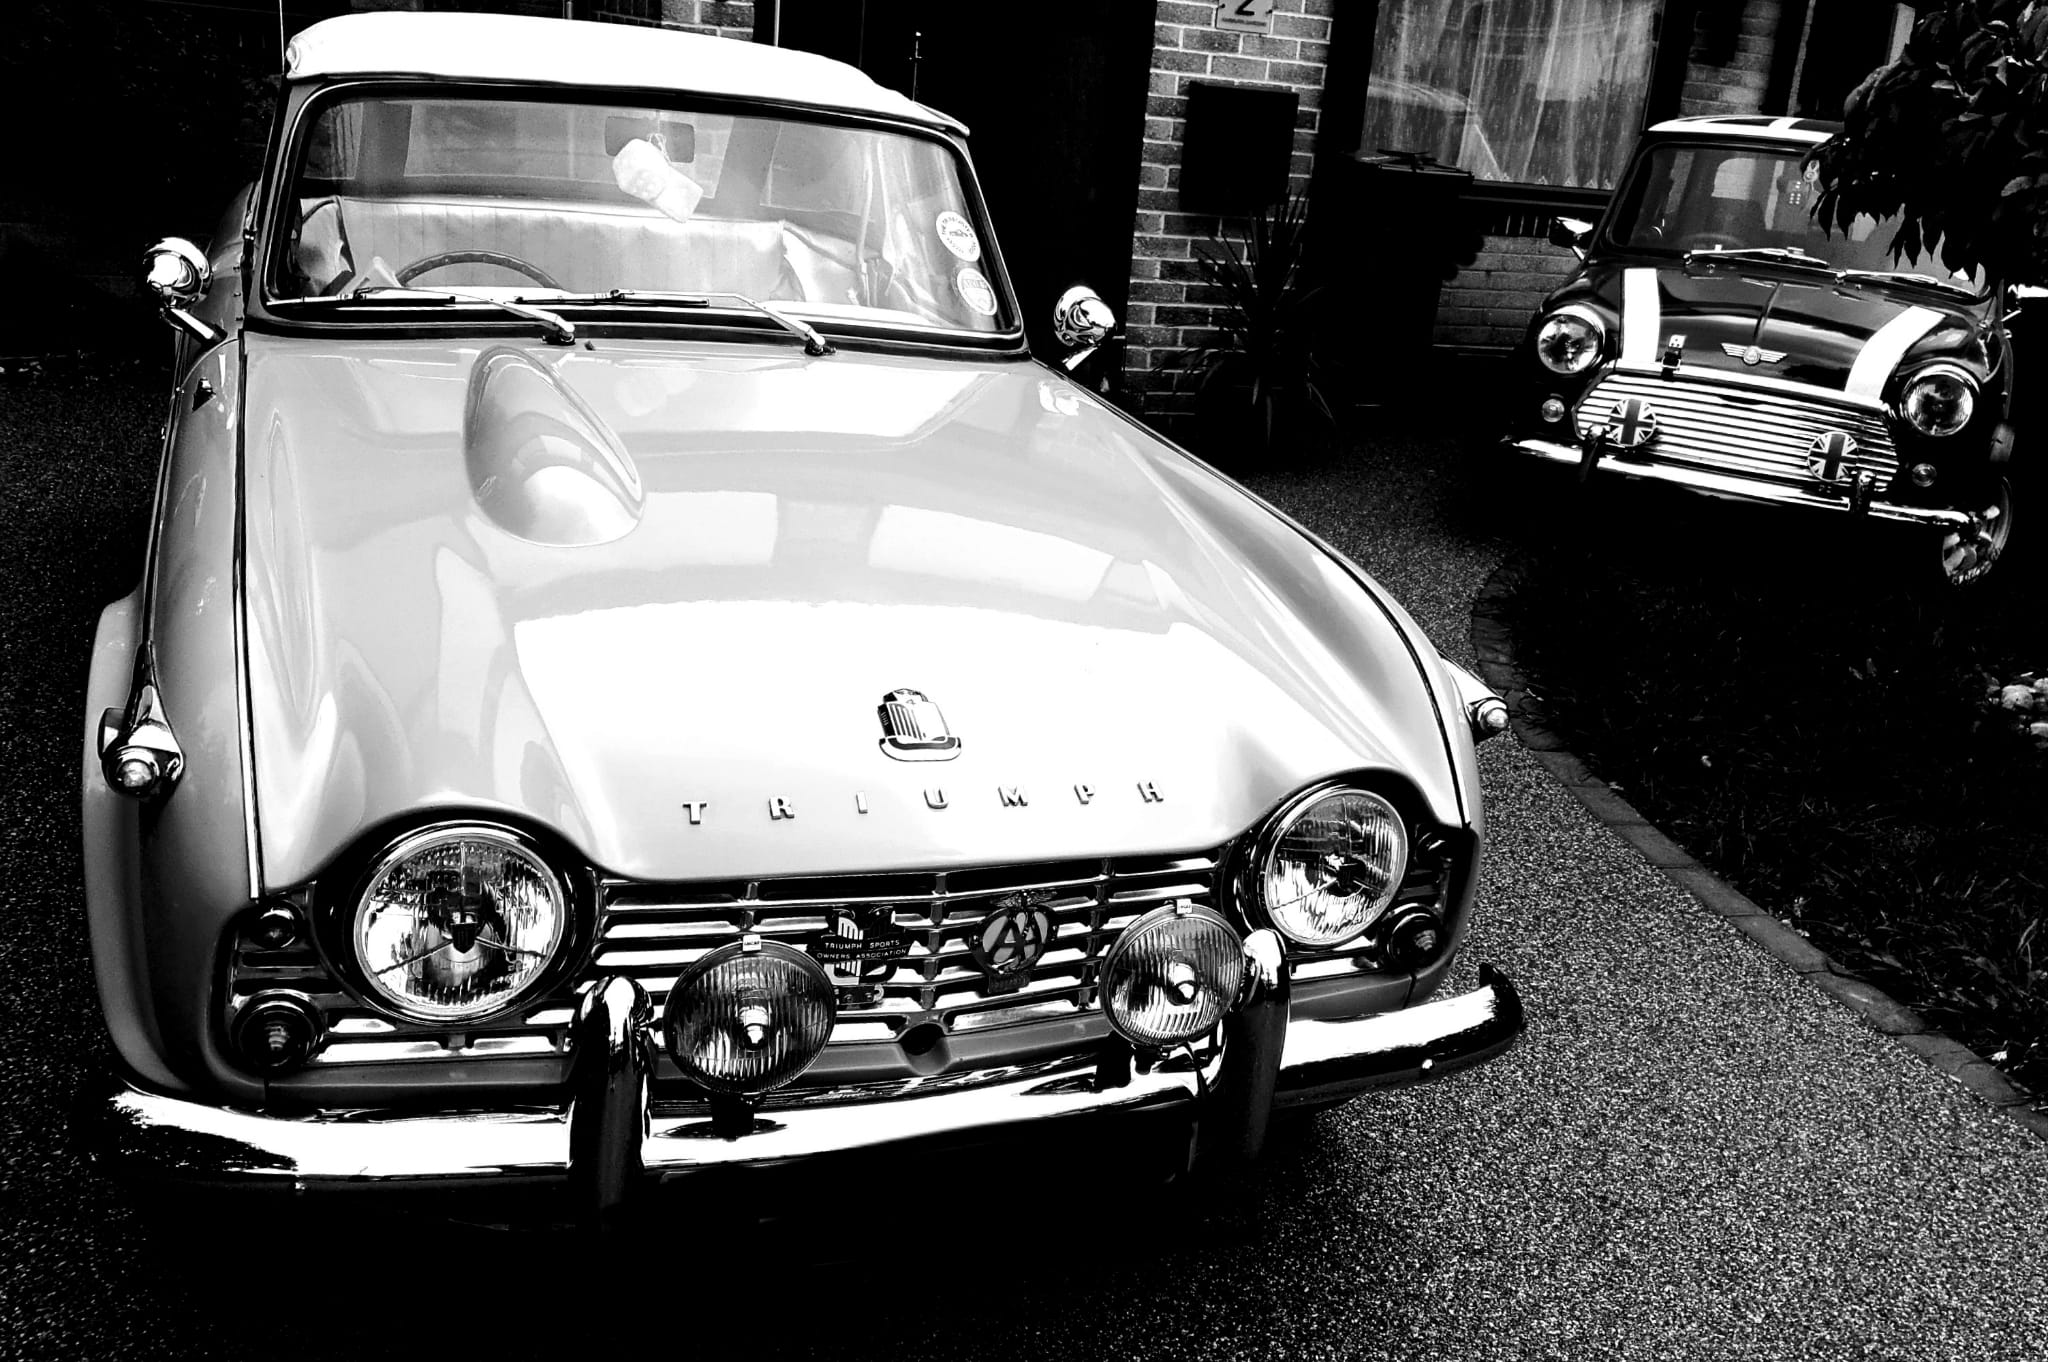
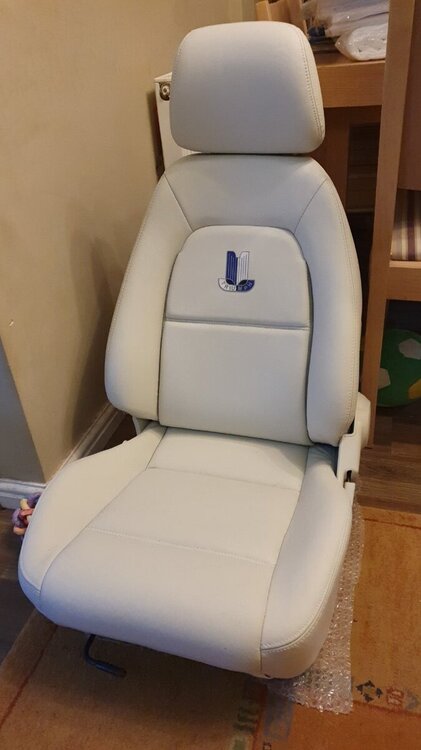
Hi all
I'm fitting mk2 MX5 seats using the TRTrader brackets. The captive nuts on my 1965 TR4 have what seems to be somewhat unusual spacings - see pics. Should be 36cm outboard measurements apparently. Carl has very kindly offered to reverse engineer the brackets, free of charge, rather than have me drill new holes in the tinfoil floorpan. Still, I'm wondering what is different on mine, having checked underneath I can see no sign of nuts or plates being moved/replaced on my floor.
Can anyone shed some light please?
thanks
Jeremy
P.S. seats were originally sh*te brown, so I sprayed them with poly leather dye and added the fabric Triumph badge. Really pleased with the result.

-
Quick post to say I had an excellent customer experience with these chaps, v helpful. Last minute change of plan with my seats etc and they were first class about it.
JDC
-
1 year later...but better late than never.
-
2 hours ago, Z320 said:
Hi Jeremy,
it‘s yours now, so the title must be „my locking fuel cap“!
Great to hear you are pleased….
Ciao, Marco
True enough!
-
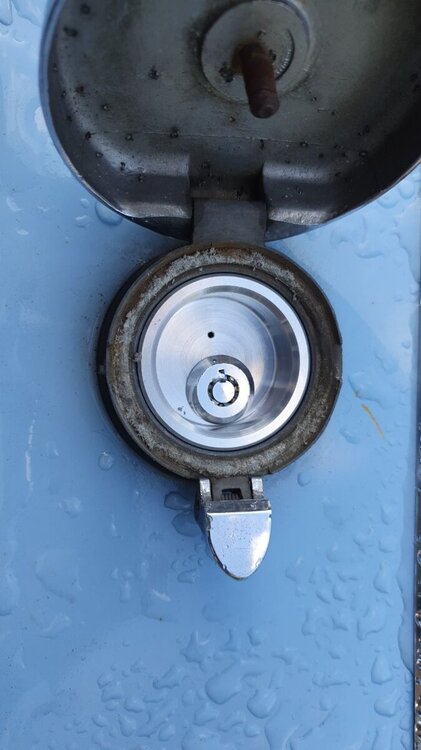
Hi all
Received one of these class bits of engineering today, fits like a glove.
Would definitely recommend.
Jeremy
-
Thanks Phil, sounds like a plan.
-
17 hours ago, Z320 said:
sorry, I have not been asked
Feel free to reply anyway Marco!
-
Mine's a 4 Stuart.
-
Hi Stuart, once again great advice, back to 4 BTDC and temp now comfortably where it was before - thankyou.
Hi Phil, having read a few posts, the bypass restriction seems a good idea. I plan to use a couple of inches of smaller diameter hose in the bypass but what worked for you?
Jeremy
-
Thanks for the quick reply Stuart, I'll put it back to 4 BTDC.
Jeremy
-
P.S plugs were gapped to 25thou, champion 6HYS iirc
-
Hi chaps
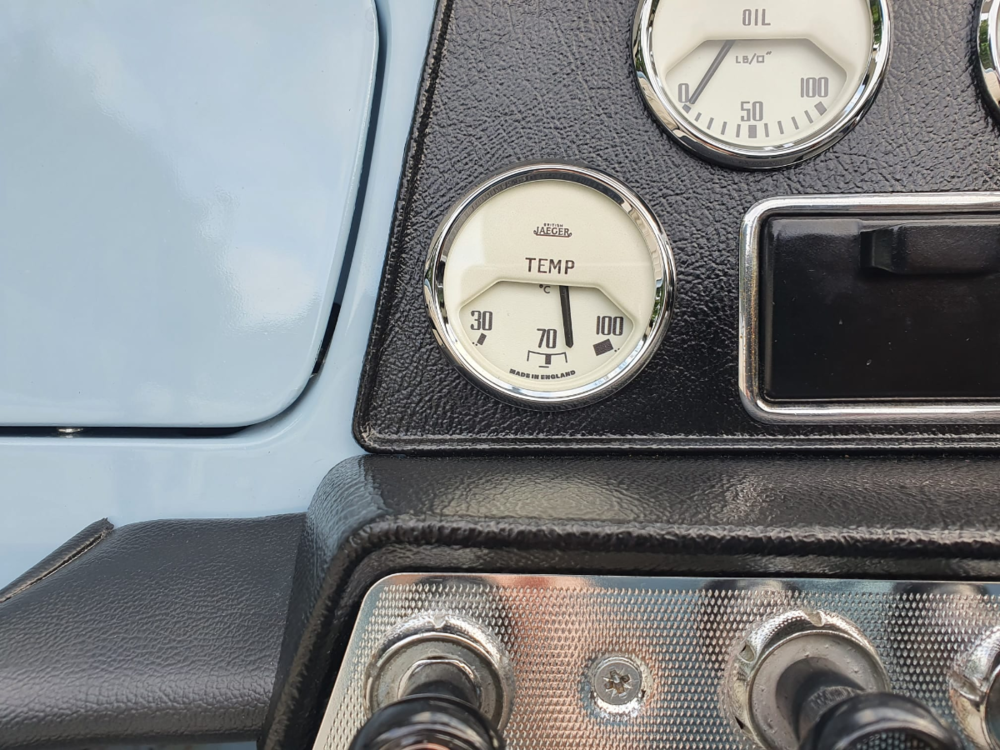
I've done the valve clearances and the static timing, both as per the Macy's Garage instructions. Having read posts on here regarding unleaded, I've set it to 8 BTDC rather thaN 4. I've also checked the distributor, weights are moving ok, springs are in place and all looks ok to my noobie eyes. Set points to 15 thou. Cleaned rotor arm and removed and cleaned/checked/gapped plugs. Plugs were all ok, 3 & 4 a little darker, possibly running a tad rich? Was then able to get idle to a fairly smooth 850- 900 rpm. Anyway, went for a good run this afternoon and noticed the temp gauge was higher than before, higher than when run last week at same air temp and a long run with some traffic. It's not overheating by any means, but moving up above end of the 'normal' range, see photo. I've not pulled the plugs yet to have a look (too hot!), what could this be? Is it something I may have accidentally done under the bonnet? Thanks in advance for any help and advice..
Jeremy
-
Hi Ralph
No, wasn't me, I was under the bonnet on Sunday. Nice to hear from another Yorkie TR4, not far from me either!
Jeremy
-
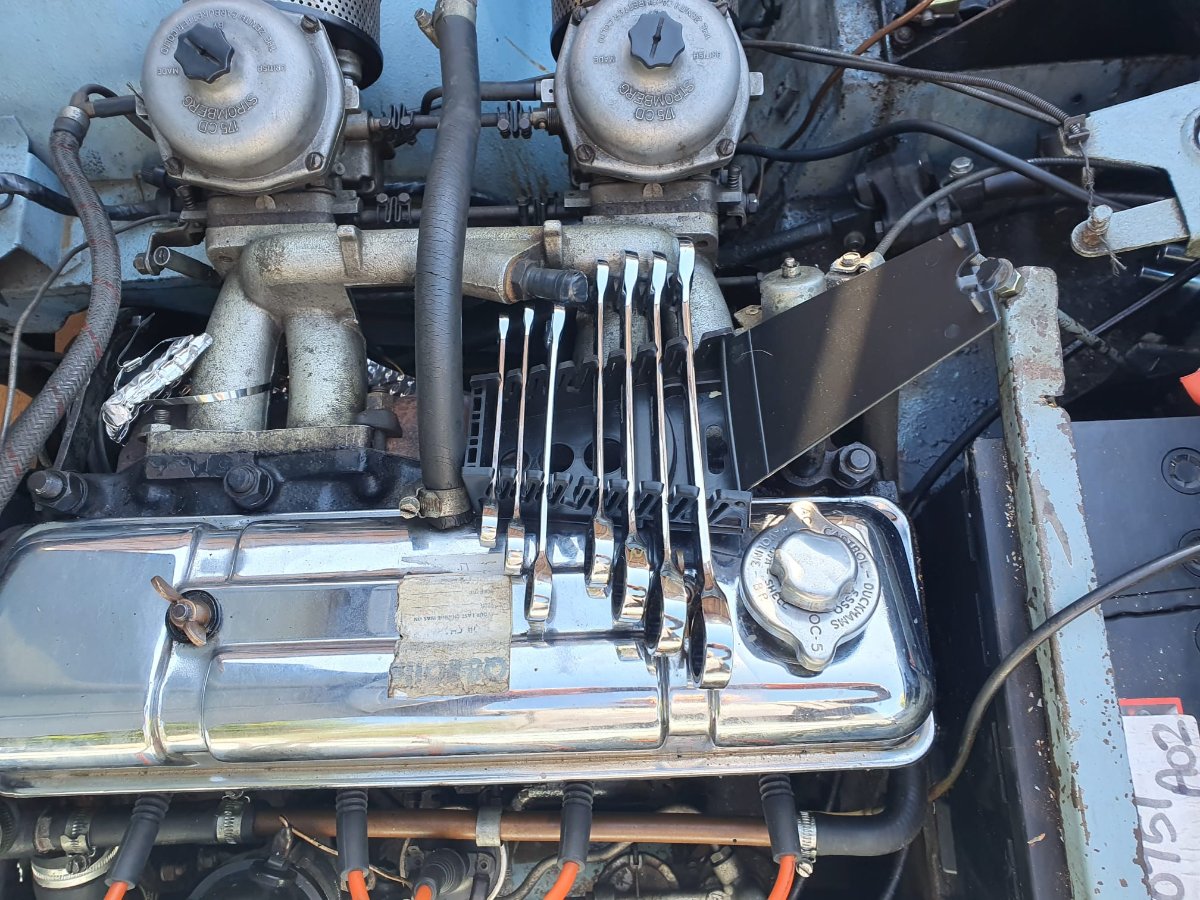
"Where's the other one though?"
That one is in my toolbox, it's the one I was using to adjust bonnet bumpers

-
Opened the bonnet this morning to do valve clearances using the excellent Macy's Garage article, to find something interesting - see pic. I did wonder where they'd got to. Been there since Sunday, jammed between rocker cover and inlet manifold. Imagine the racket/damage they would have caused if...
Now where did I put my spectacles...?

-
Hi Jim, yes it is the Revington one. Fitted quite nicely after a little trimming. The pic I posted was work in progress, it's now riveted every 25mm or so and sealed with intumescent gloop. Same 3M product as yours I think, but mine was white. Then stuck some sound deadening panels on it and hey presto done.
-
Thanks Jase, I did another daily use POC run today, no problems apparent as yet. Slight lean to starboard at the back so time to check out the lever arm shock first. I have some tractor oil of some sort for the Midget Armstrongs, works a treat so here we go again.
-
Hi Ian
I did weigh up all the pros and cons discussed on various forum threads, tbh what attracted me was a straight swap with no messing (other than some tin snips for the alloy sheet) and it was just an hour under the bonnet. And you're right of course, the big shiny sheet by the manifold screams Dynamator.
I do defer to those with far more experience than me but it seems some others have had success with this as well. Famous last words possibly...
Jeremy
-
Please let me know how I can pay you, cheers Jeremy.
-
Hi all
Firstly, sorry John, first name is Jeremy, often called Jezza (and many other things by Mrs C) but I'm not sure I've really taken to that! You're right I will be getting stuck in but thankfully I know my limitations!
Stuart - yes, Dynamator frying is a risk as I understand it but I've fabricated a massive double-skinned dimpled aluminium heatshield worthy of Concorde so hopefully that'll help.
Malbaby - thanks, I guess the photos flatter it a bit but it's basically a pretty sound car I think.
Hi Bob. I Thankfully don't think I need a full resto, lots of respect to you and others who take on that task. Would be a bit beyond me I think. As said to Malbaby basically an OK car, just needs some routine work plus the inevitable running repairs as I use it. And yes, daft questions are my speciality
 .
.
cheers all
Jeremy


TR4 floor captive nuts for TRTrader MX5 seat brackets.
in TR4/4A Forum
Posted
Hi Malbaby
Yes, of course I will, when the weather calms down enough for me to go out finish the job. It might even be of some use to someone with a similar problem.
Cheers
Jeremy