


Bfg
-
Content Count
1,795 -
Joined
-
Last visited
Content Type
Profiles
Forums
Calendar
Posts posted by Bfg
-
-
Colour in the tin looks to be a pleasantly darker shade of conifer-green on this screen. Out in the daylight will reveal all. I'm sure it'll look superb. Excellent work Jase.
")
Pete
-
Thank you Marco. ..and I like your gearbox modification
On 3/29/2024 at 9:39 PM, PodOne said:Metal will rust and transfer lots of heat into the cabin fine in winter but in summer perhaps not.
In my personal experience - This is inaccurate.
"Metal will rust" ..but the one I reused was already 65 years old and it'll most likely last another 65+ years before it'll need restoring. Conversely, polyester resin (fibreglass) will break down when exposed to stress & heat over that many years. Epoxy resins ought to fare better, but judging by its modest price and the accompanying website photographs - the brand recommended is of polyester.
The gearbox cover is not like the floors of the car where rain water might sit, nor is it exposed to the harsh environment under the wheel-arches or along the line of tyre splash, nor like the bulkhead which is prone to battery or brake fluid spills. Arguably the gearbox propshaft tunnel is the less vulnerable to rust than almost any other part of the car.
Note : the one I reused had been butchered, and that added to the amount of work I had to reshape it, but it was not compromised by rust.
- - -
"Transfer lots of heat into the cabin" might only be based upon a false presumption that heat energy transfer is one dimensional. In practice, metals transfer heat very well in three dimensions ..Without that being so most engine designs would have struggled. Localised heat is conducted to the surrounding metal.. ie. to a very much larger surface area, whereby that heat energy is dissipated into the moving air stream.
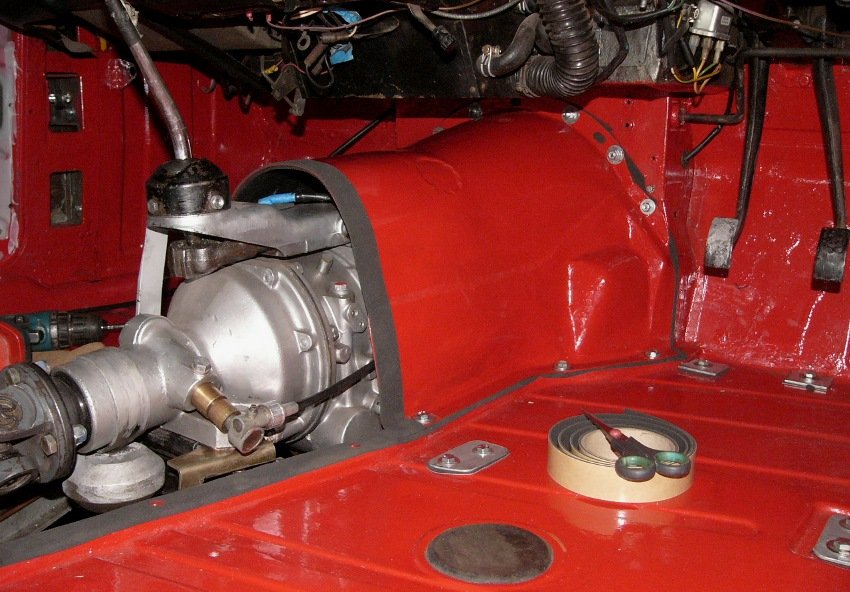
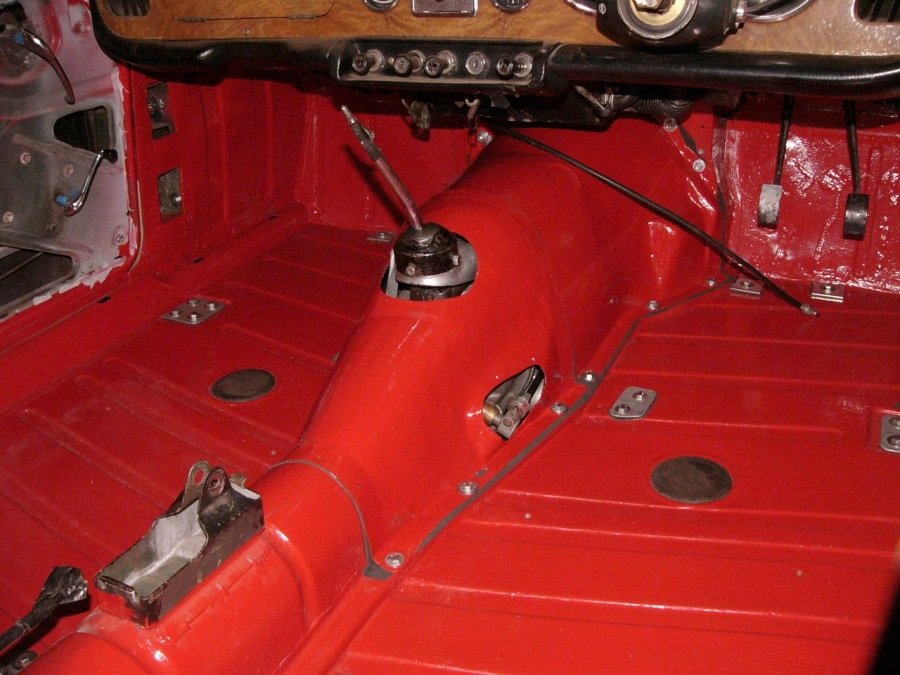
I used black rubber (ribbed) on the underside of my gearbox cover for noise absorption, so unlike Marco, who also changed from a cardboard or GRP to his home-fabricated steel gearbox cover, I did not benefit from a shiny reflective surface to reflect heat away from the steel.
Even so, having personally changed from a fibreglass gearbox cover, on my TR4A, to an all steel one I have not noted excess heat through it. Overall, I would not claim it to be any better an insulator from engine bay and gearbox generated heat, but I would say that perhaps because mine is very much better fitting - it is quieter inside the car than with the old fibreglass cover. Again, I presume for the same reason, of tight fit, there are no engine fumes either.
The motive behind my changing to a steel gearbox cover was led by presumption that a steel tunnel, securely fastened to the bulkhead and as a backbone to the body shell, would be stiffer. This being both longitudinally and across the bulkhead (from one side of the car to the other). As I drive my car without a dashboard brace (the H-frame) - this was desirable and imo worth my time and effort of altering one. I did shape the gearbox cover to fit under the standard H-frame, just in case it should be needed, but as far as I am concerned it is not. The car doesn't have issues with scuttle shake.
- - -
These covers are not available in steel, but are not really that difficult to alter < here > from a TR3 ..the pictorial running through to its fitting < here >. Mine was more awkward because it had been butchered ..so I had to extensively rebuild it around the gear-change-lever hole, and equally because I'm 6'-5" and have big broad feet ..and so strove to reshape the cover for as much space inside the car as I could muster. Again adding to the task, I also made it in two parts for easier access to this car's overdrive, should that ever be needed. I'm pleased with how it turned out.
Pete
-
Thank John, Thanks Stuart.
-
cool
-
Yes indeed, most fibreglass boats are similarly white, which although a pain to keep clean in many waters ..and their decks ridiculously bright on the eyes, it does hide the imperfections.
I wonder if your fibreglass moulding is of a better quality than this one. Despite the repair, across the top it now looks fine. But all around the bottom it's very wavy. I've improved its bottom front corners but had to face the fact that I'd be better off starting again (using it to make a new mould, and then taking a decent moulding out of it). Doing that would be another time consuming project, which I really don't need nor want. So, If the black doesn't work for me, I'll pull it off again and repaint it a cream colour.
Pete
-
A quick pictorial update . . .
^ Fibreglassed underside to the frame, where I'd used masking tape to extend the flange. As you can see the resultant extra width of that was 3 to 4mm and instead of being 1mm thick it is now around 3mm thick. With the extra thickness the frame was much stiffer than it had been, so I opted to not fit wood, or other means to prevent it from twisting. Despite my original intent, and Stuart's endorsement of doing so, the lid's T-bar worked well before to prevent twisting, and so I felt little motivation to change things.
^ Having something more sturdy to work with, I got on with rebuilding the contours, and primed it. With so many colours ; black of the moulding, grey of raw fibreglass, primrose yellow of the paintwork, and green of the fibre-filler it was difficult to see the shape. Coating with primer added yet another colour but when first applied helped highlight flaws.
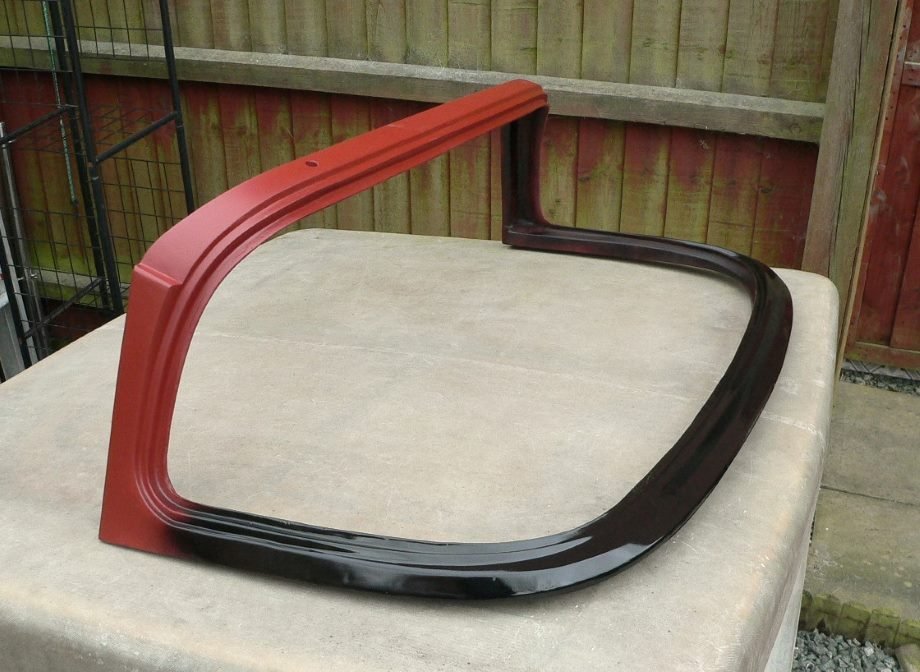
^ I had considered painting the frame red, to match the car, but then because of the extent of rubber seals around all edges decided to go with gloss black. Unfortunately, the reflections in that show up every wave and wobble in the fibreglass moulding. I rubbed down and repainted it a couple of times but decided the odds were stacked against me. If I were to insist on having good reflections - then this fibreglass moulding would need to be replaced with an aluminium backlight frame.
^ If you don't take those reflections too seriously this the backlight looks acceptable for a driver's car. I need to replace the glazing rubber's 'chrome' infill bead, as the one I have is broken and twisted. The rubber itself I reused. Again it's far from perfect but usable. At this stage I though the black looked good.
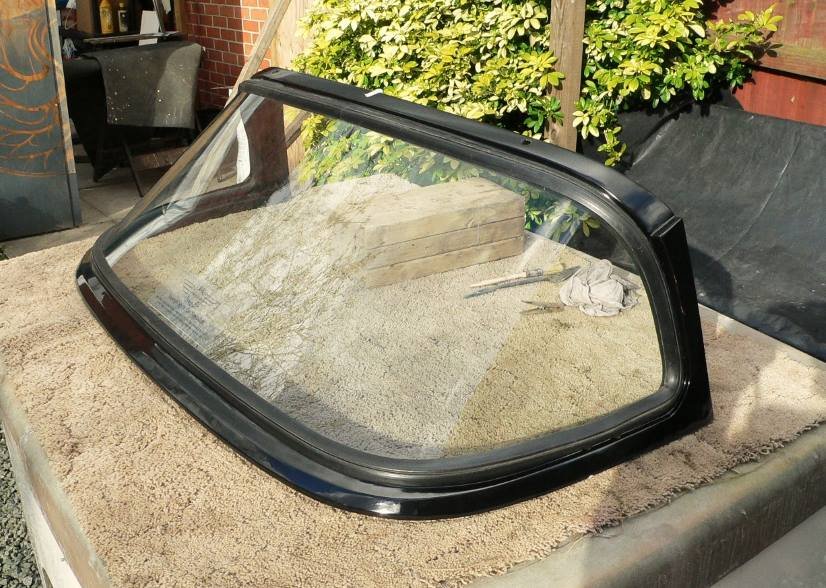
^ work in progress. The backlight is now mostly refitted but it's glass has not yet 'settled'. I could do with the heat of a closed car on a still n' sunny day to soften its glazing rubber. There's no sealant or mastic holding the rubber in place yet, and as you can see the rear interior trim is still to be refitted. Now on the car, I'm not so keen on the backlight being black. Perhaps it'll grow on me or else fade into the background. We'll see.
^ Conversely, I liked the backlight being painted primrose yellow.. and its light tone disguised the moulding's numerous defects (..not only distortions but clearly its mould was chipped and at the end of its working life).
That's all for this week, I bid you have a good weekend.
Pete
-
21 hours ago, Tr4aJim said:
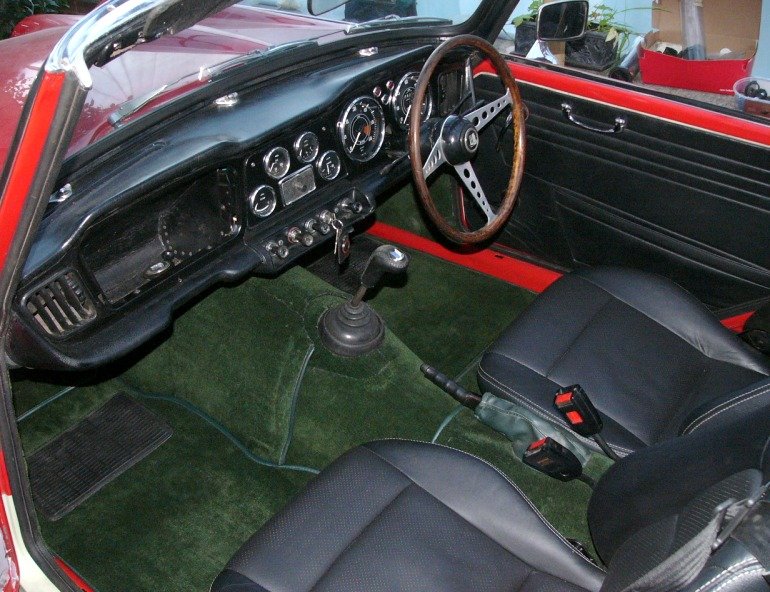
I mounted a “cigar lighter” type socket inside the glovebox. It has its own inline fuse. I then put a dual USB adapter in the socket as that is my most common use, however I can still use any other similar accessory as needed. The reason I mounted it in the glovebox is I use the open glovebox door as a shelf to hold my phone (I have a suction cup style holder the sticks very well to the inside of the lacquered door). With the glovebox closed, everything is neatly tucked away.
I did the same on Katie, although I've taken the timber facia and glove-box lid off. A TomTom with 9" screen conveniently sits in the glove box upon a cloth, all the power lead coiled up behind it. When parked I just put my woolly hat in the lid-less glove box to hide the TomTom away.
-
On 3/17/2024 at 7:44 PM, Jase said:
does anyone stoneguard the inside of the bonnet prior to painting?
23 hours ago, stuart said:I wouldn't, its not original and never looks nice, now you've got rid of all that filler it`ll be a lot easier to lift the bonnet
")
Stuart.
I'm guessing Jase recognises there's not an issue with stone chipping under the bonnet, so is wondering if Stoneguard would be a good substitute for, better looking than, and less prone to peeling off when hot, than the stick-on panel anti-drum pads.?
a tad more bonnet weight -versus- a quieter car.
If the stays were masked off as it were applied, so the stoneguard was just on the underside of the skin panel, and then Hardura faced felt (sound absorbancy) were applied over those areas. The stoneguard might be effective anti-drum ?? ..adhering well but unseen. Black Hardura would be in keeping as a period upgrade, if not 'original spec'. Neatly done, I suspect it would look good under there, as a compliment to polished BR-green paintwork on the stays.
Pete
-
42 minutes ago, Ralph Whitaker said:
I would stay away from colours that you have tinted to make darker or lighter. Should you need to buy more in the future it is hard enough with standard colours without adding more difficulty to the equation. And you cannot rely on paint scanners for the correct match either, a friend had his van scanned 3 times and each time the paint was different and none matched the original colour . In the end he gave up and had to live with one panel a different shade to the rest of the van.
Ralph
I'd suggest that even original colours are subject to great variation anyway, according to year, batch and manufacturer ..and so it makes little difference if a car's colour is a standard or custom. Particularly where the blend and mix ratios are known.
Fading (depending on the proximity of industry &/or coast, the climate and quality of light) and yellowing of paintwork changes hues and tones yet again, as to a certain extend does the primer undercoat. Arguably quanties of lead and other additives in those can have a long term effect on colour fastness. Fading of course tend to happen more on upper panel surfaces, and again where a car is parked for many consecutive years on the same driveway. ie., where the sun and weather beats down on one side more than the other. Red pigment in paints is infamous for fading faster than most any other colour pigment. Either way, colour matching of an upper panel surface will look very different to one from even the same panel ..in the shadows. Nowadays the matter is very much more complicated by different brands, different paints (chemical composition), their lacquers, and the percentage of matte, relative to the original cellulose.
Pete
-
Thank you. I've registered my interest.
Pete
-
Hi Clem, I'd have thought you need to be a bit more specific as backlights, either fibreglass or the original aluminium ones, usually come with their fastenings.
Otherwise < this > and subsequent post record my fitting of a fibreglass Surrey top.
Pete
-
Recommend you instead flash spray a piece of metal that will not involve a whole lot of rubbing down again if you don't like the colour. The bonnet is a big panel and a lot of re-work compared to something like a door skin. Pete
-
44 minutes ago, stuart said:
the lip that the rubber goes on should be 10mm at least
Thanks Stuart, that's very useful to know. I would have been guessing around 11mm to allow 1mm for tolerance, but 10mm is still probably 4mm more than it had been trimmed to before.
^ The nature of working with fibreglass is that I've deliberately extended the flange quite a bit more (that's seen as cyan blue ..as it's not cured yet). I trim it off when cured to the width required.
^ I had hoped to do a bit more this evening, but the resin I had in stock is well passed its best. I'll get out to buy some fresh tomorrow, as it'll make the task a dozen times easier than trying to wet out this old stuff.
Up the B-post section I've laminated x3 additional layers of 450g chopped-strand glass over the window-rubber flange. There's just one across the inside width. The flange facing into the car (seen here, facing towards the bottom clamp in the photo) isn't critical but I've reinforced over where the section of frame had ripped out. The masking tape and weight is only there to stop the edge of that laminate from lifting, which glass fibres tends to do when bent over a 90 degree corner.
Finished early .. so it's time for a cuppa
Pete
-
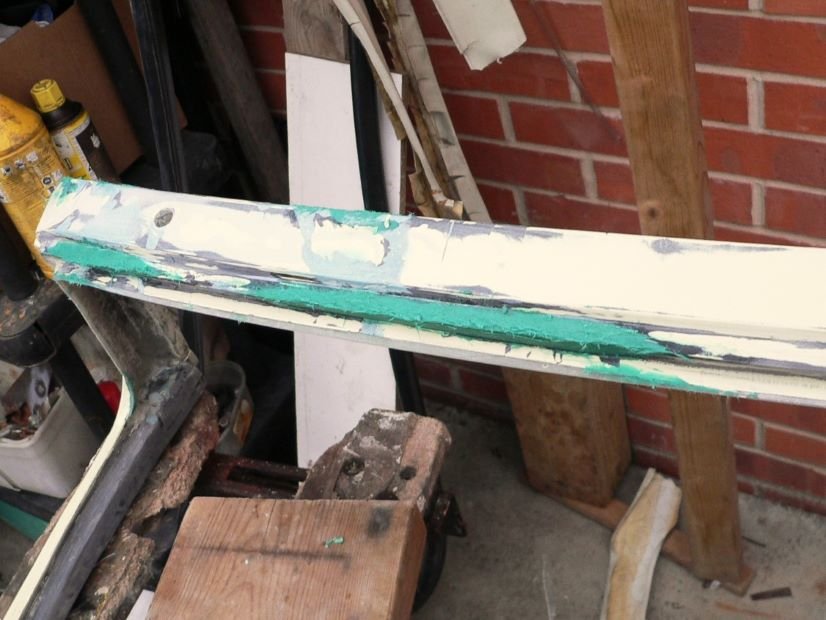
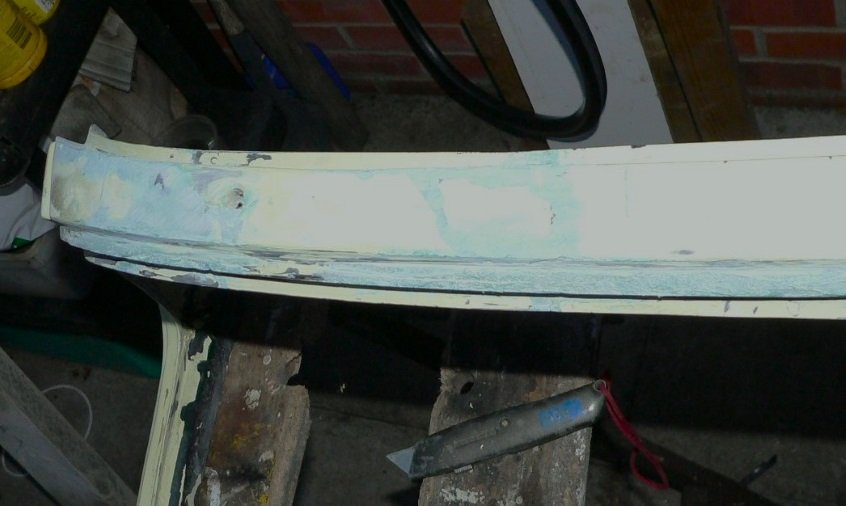
Life grinds me down sometimes, and there's not much worse than grinding fibreglass ..as its dust (minute glass fibres) gets in places you really don't like it to.
 Nevertheless, like many an unpleasant task it has to be done, and done carefully and well. Neither filler paste nor fibreglass resin will stick well unless you cut the crud off the surface and score it. So that was my start for today
..fortunately the weather's turned for the better and I can now work in the garden.
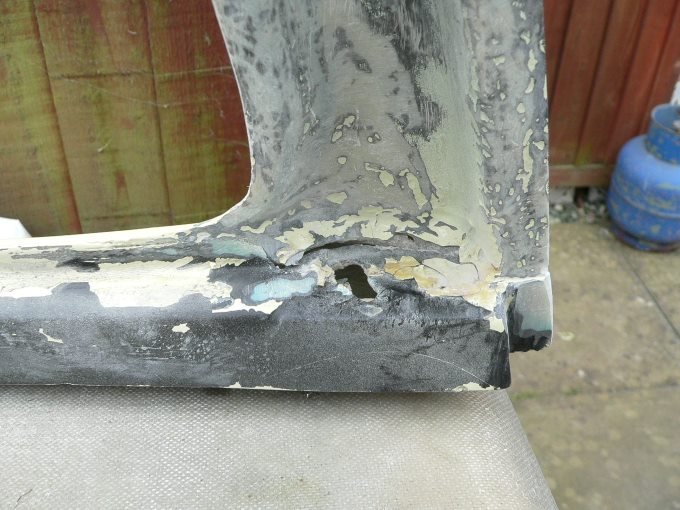
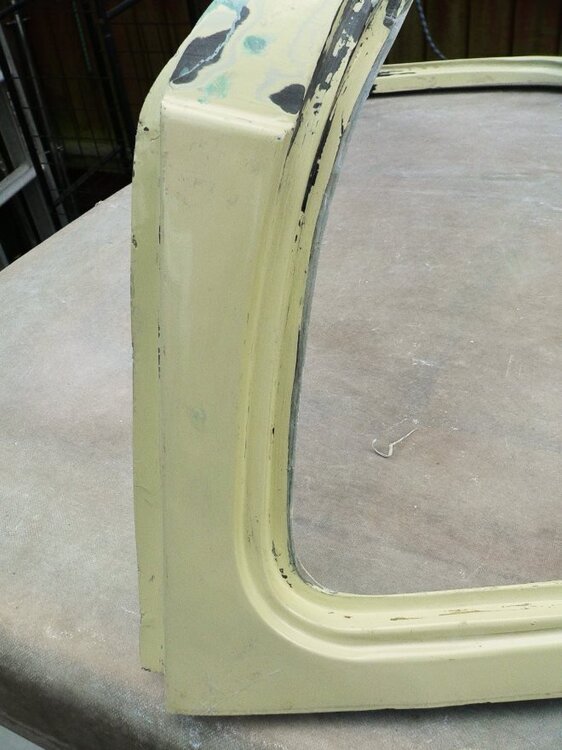
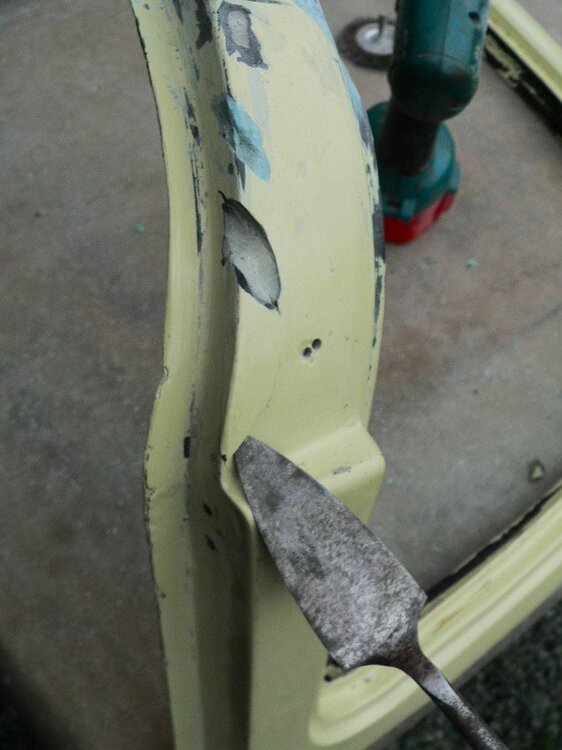
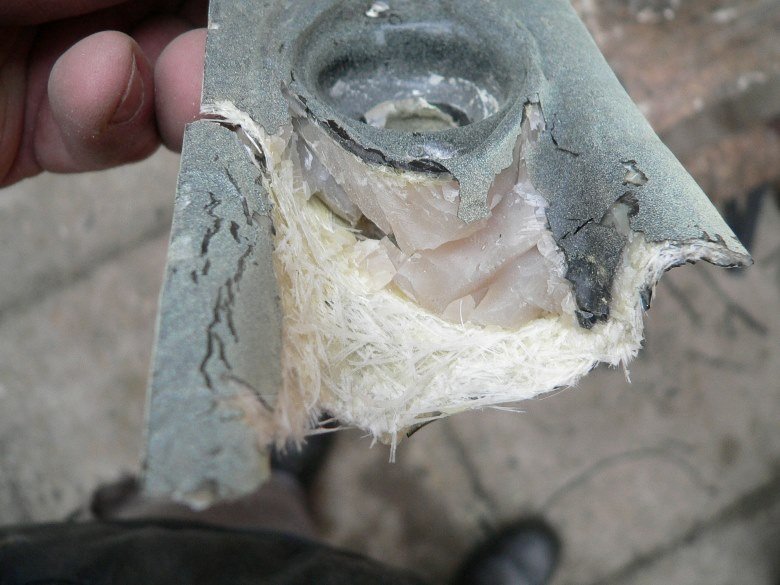
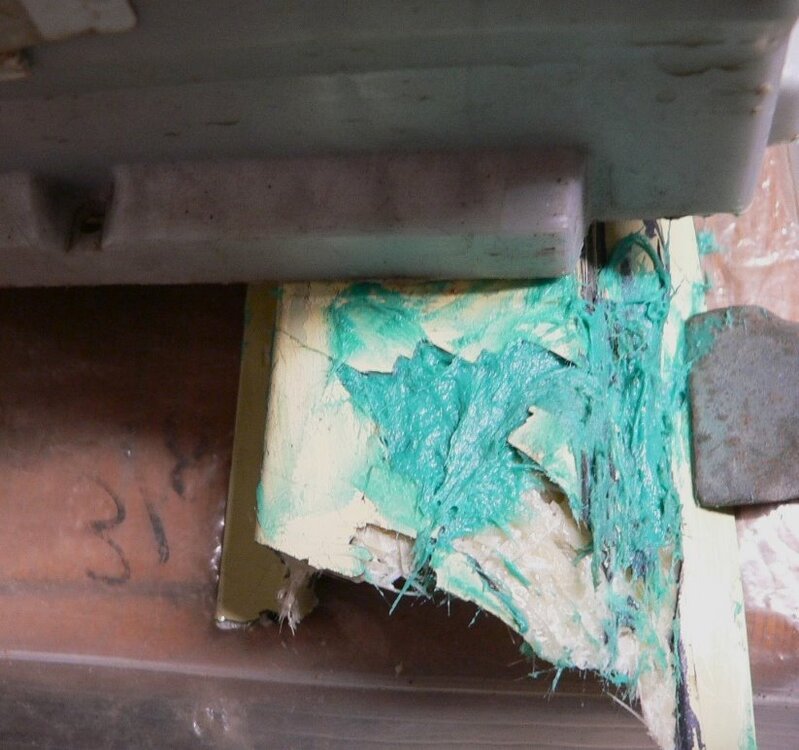
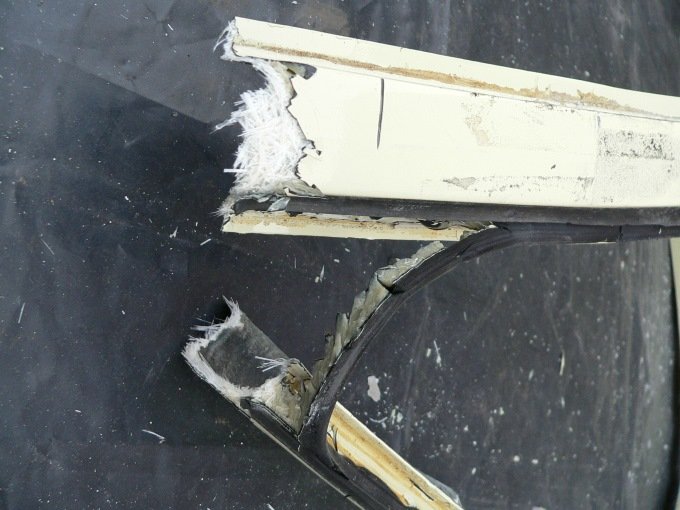
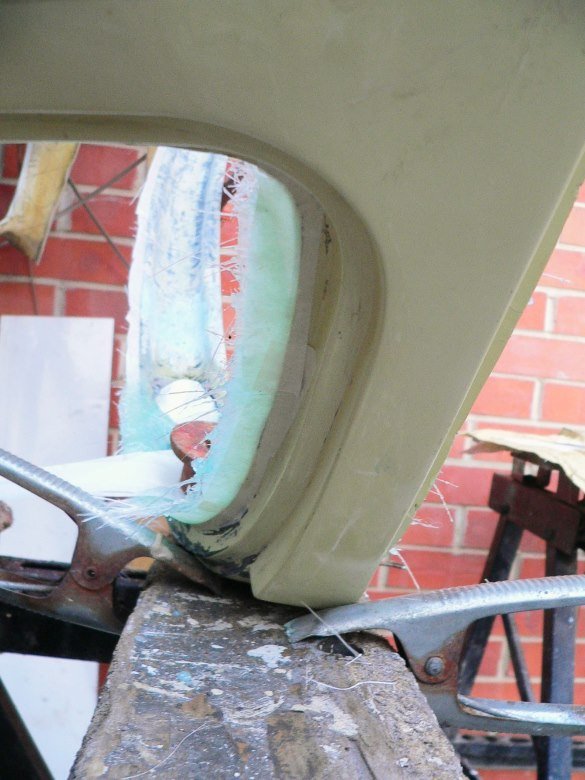
^ at the bottom front corners (the B-post) of this backlight frame is where the first, and arguably the most important fastening, goes. However the quality of production can be seen in the crack around it. From the above ; it's apparent that someone was trying to bond onto the top of a polished moulding (not even keyed). From the underside it's not looking much better . . .
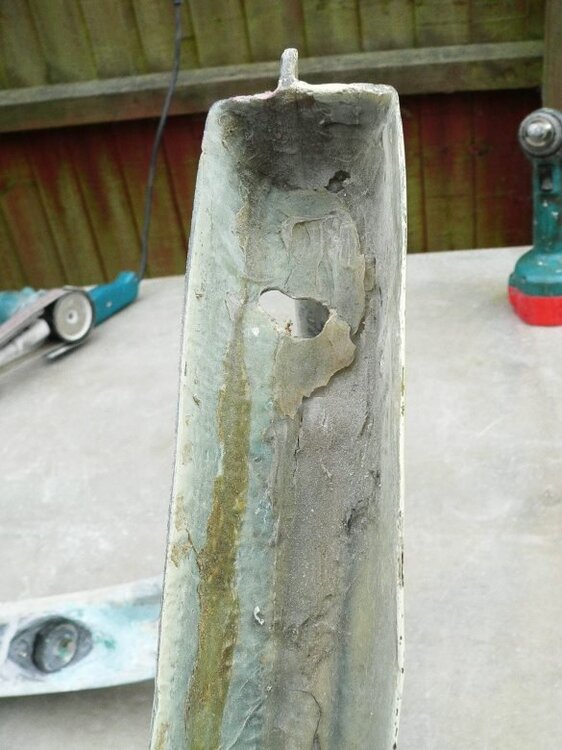
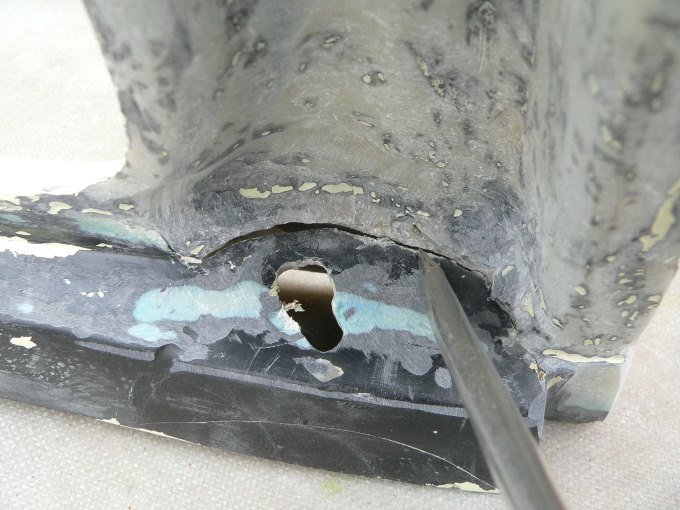
^ here the bond is gel (not fibreglass) onto a extremely lightweight moulding. When (carefully cleaning this corner out I broke through to the outside. The panel really is that thin. Once clean, I masking tape on the other side, and prised the crack open to apply filler paste. ^^
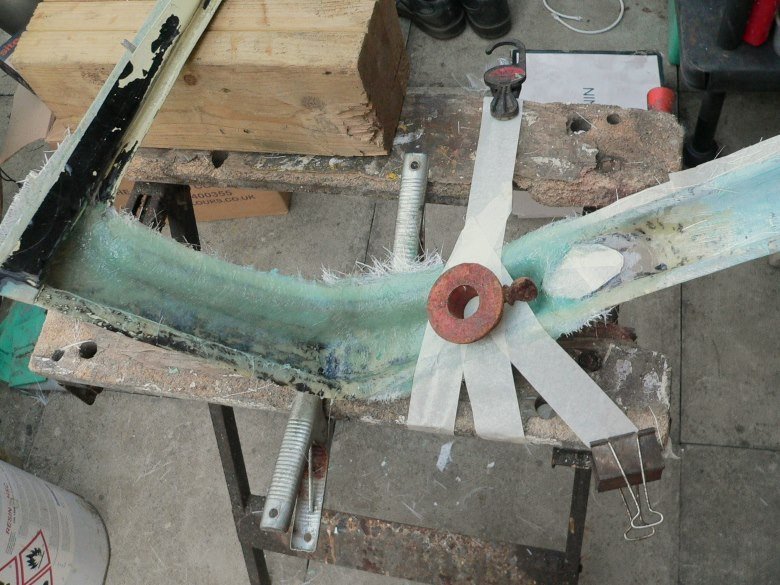
The other side's front corner wasn't as bad, but it was likewise cracked. As I say these are the most critical mounts to hold the back window onto the car, so I've reinforced them with fibreglass laminate. . .

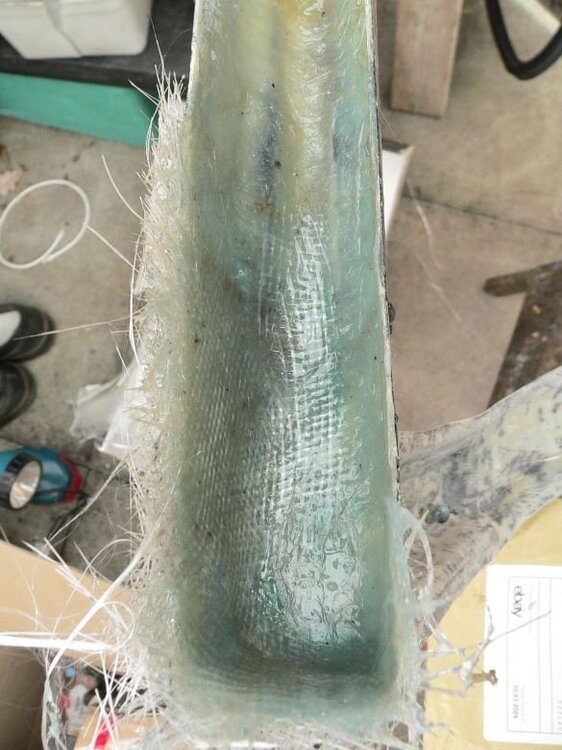
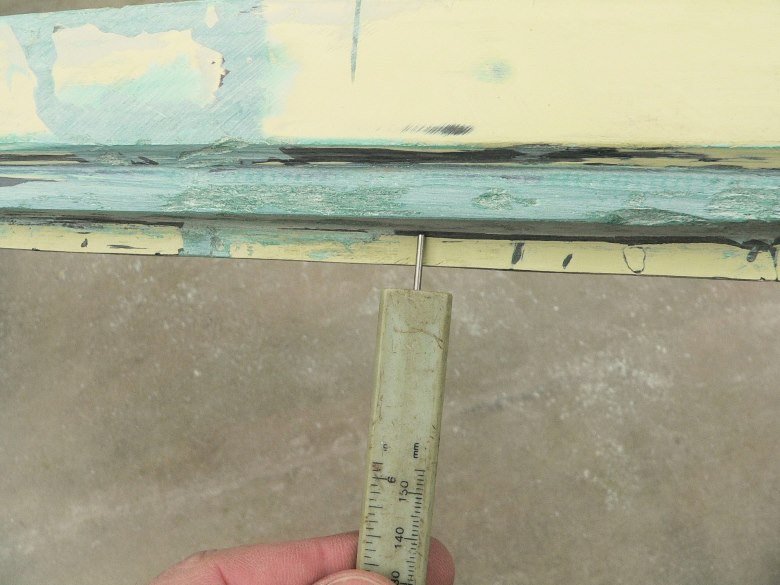
^ That same left hand side ..and then similarly ^^ the right hand side. Each now has chopped strand mat + x2 layers of woven glassfibre mat. Naturally, I'll need to redrill the holes and retrim the bottom edges once the resin has thoroughly cured. Btw the row of clamp seen in the first photo are an attempt to straighten that bottom edge. They are pulling the fibreglass out to a steel ruler.
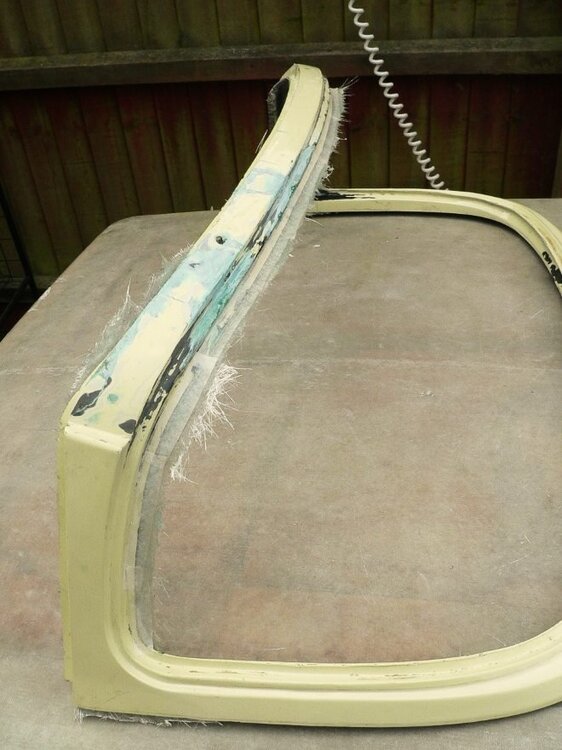
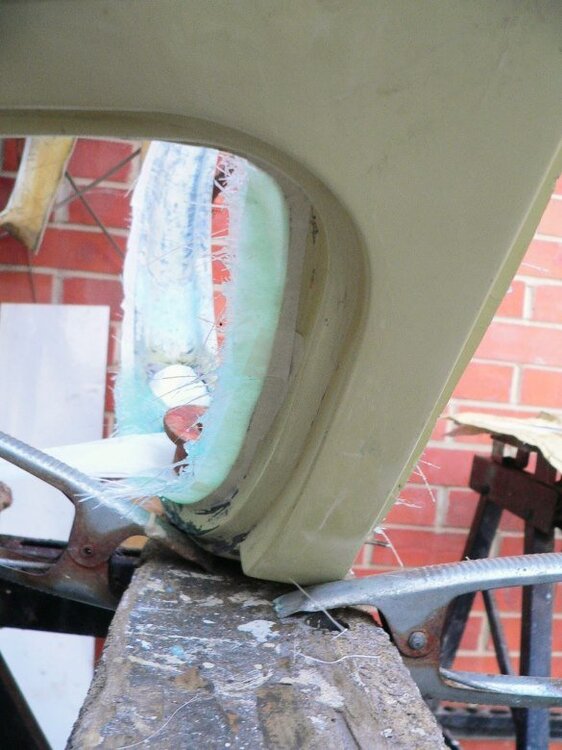
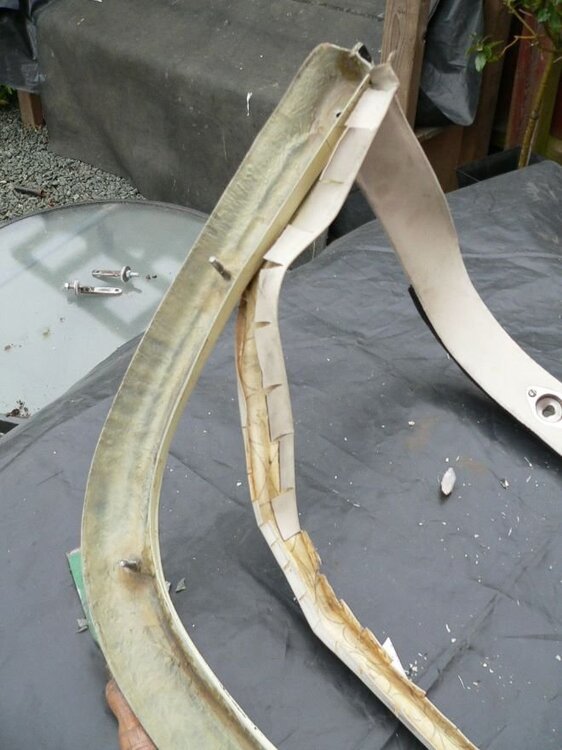
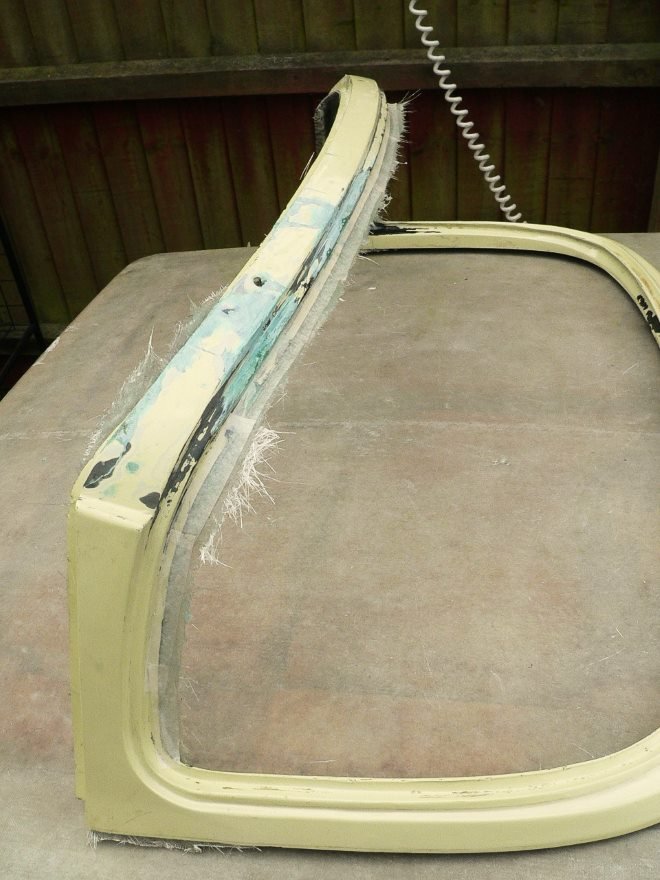
Irrespective of having no core to help prevent this frame from twisting, the thickness of the fibreglass leaves something to be desired. . .
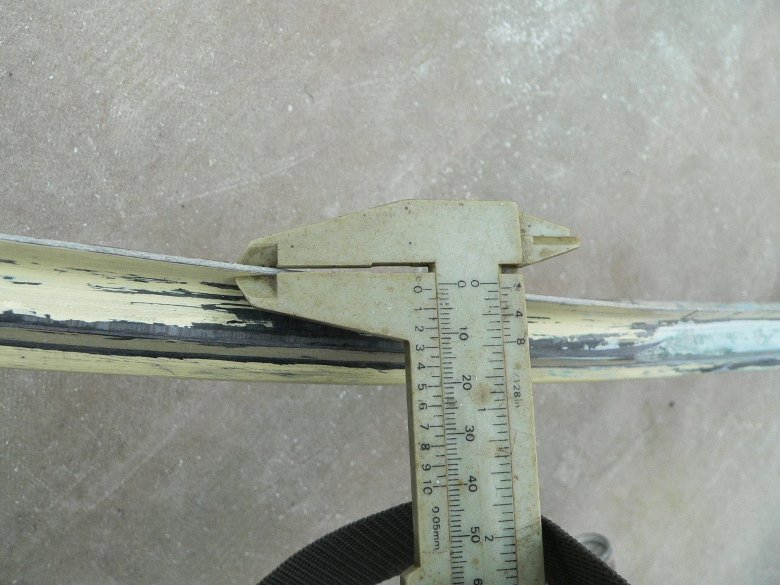

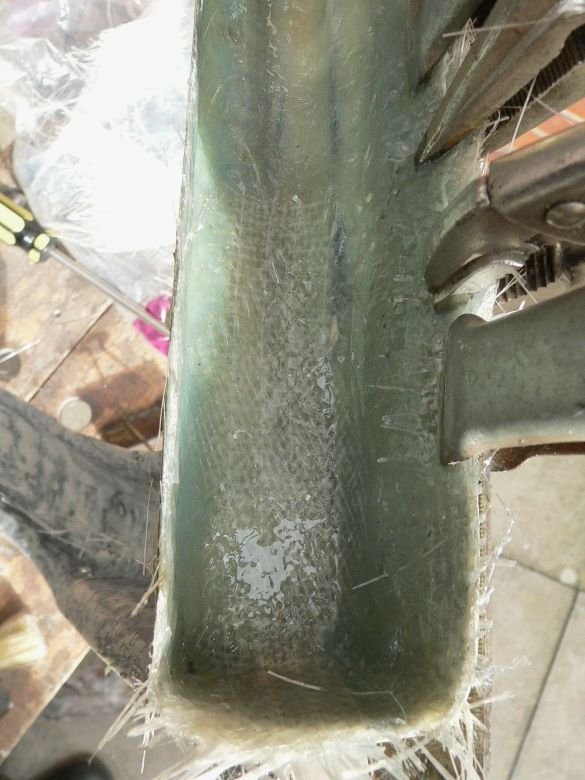
^ Across the top of the frame - the fibreglass flange, which hold the rear window glass in is, with gelcoat + paint, about 1mm thick. ^^ Around the rear bottom edge and inner and outer moulding together with its bonded brings that thickness to 3mm.. the glazing rubber is of course for the thicker dimension, which is presumably why it leaked and needed copious amounts of black mastic to seal.
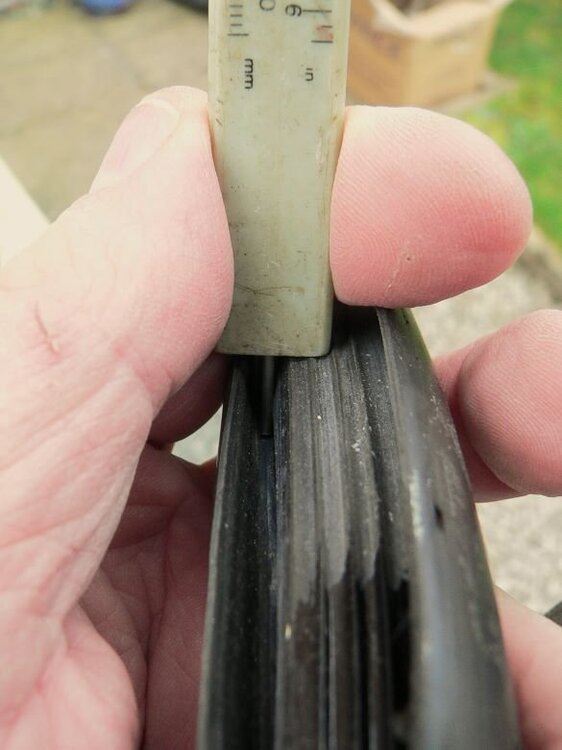
^ The depth of the seal to fit along that flange is 12mm deep. ^^ The second photo shows that same depth relative to the flange itself. This was why, when I first tried fitting this backlight with its fabric top - the glass kept pulling out at the top. When I made my fibreglass surrey-top lid(s) I made a very stiff T-bar to hold the frame back to prevent the glass from popping out.
Now I'll address these issues.
Lunch break over, that fibreglass should have cured by now, so it's again time for more fibreglass.
Pete
-
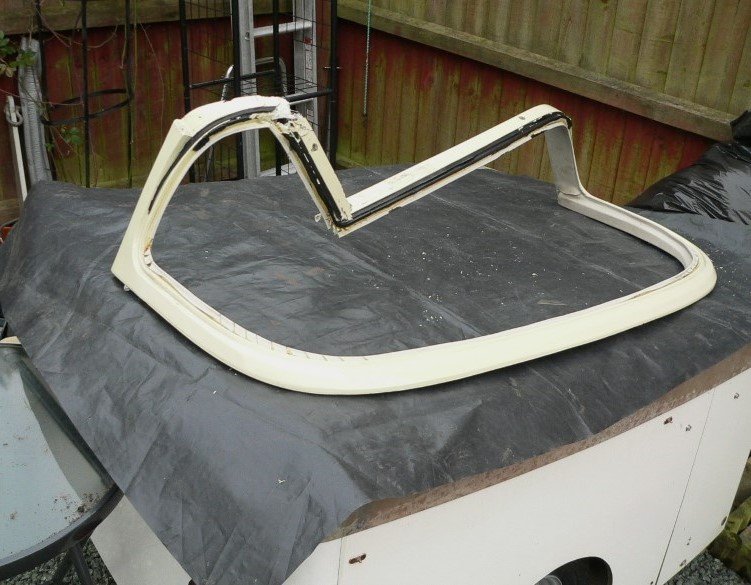
yes indeed Stuart .. just as I was planning to do. It's back together in one piece now and so, possibly tomorrow, I'll laminated another layer of glass inside it. And once that has set I'll add a batten of timber, which I picked up from the boat on Monday and which has been in the dry since.
^ Bonded back together and holding its shape once again. Nb. the black you see is gel-coat. All the mastic has been cleaned off.
^ prising out the stress cracked gel and grinding ..to then be filled with the glass-fibre filler paste.
^ taking shape, as I rebuild the moulded edges around the top of the rear screen.
Pete
-
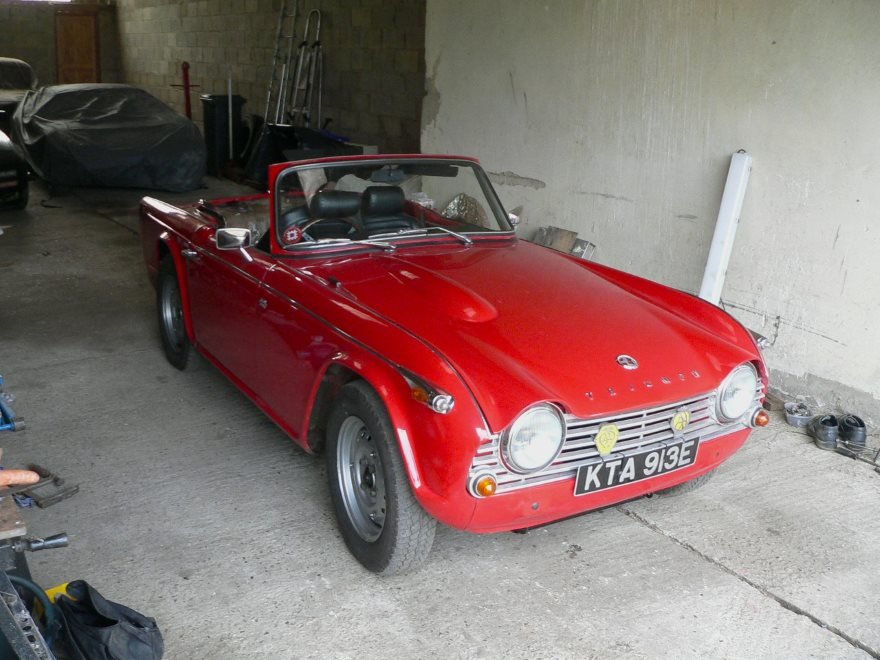
Those really annoying little bugs are going to be very disappointed in your not going for the primrose yellow Jase.

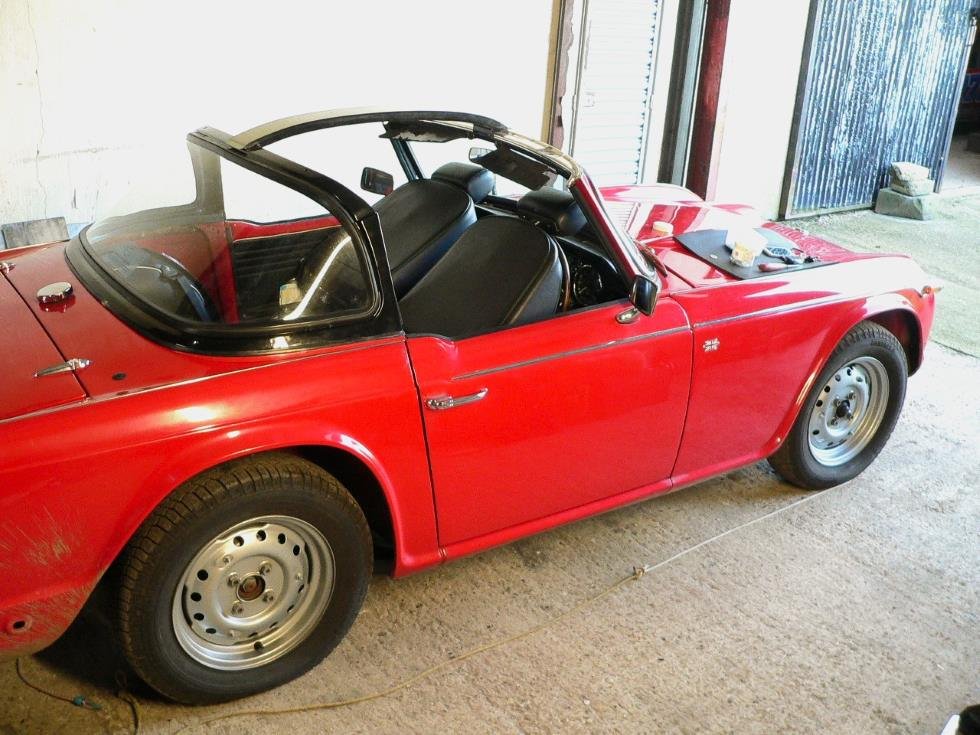
I'd typed a derogative comment regarding that exhaust tailpipe, but remembered ..just before posting it, that.. just because I have an opinion I don't need to express it.
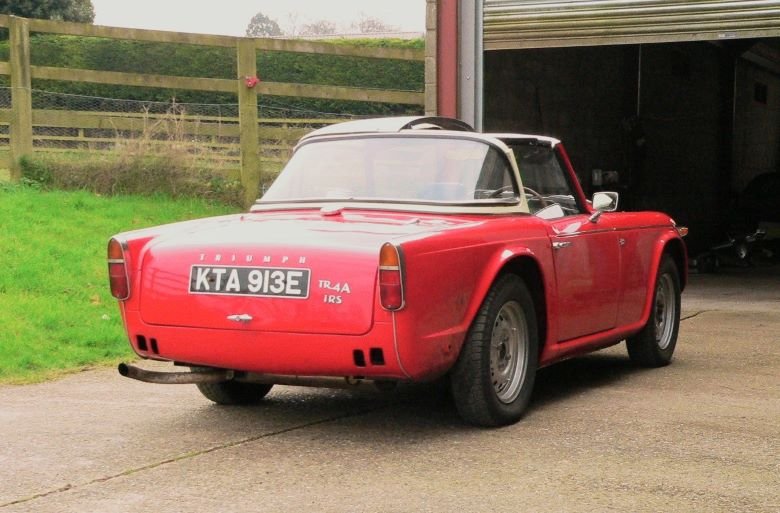
..a bit of a dangler.. Now that I'm happy with not having bumpers & their overriders, I really ought to cut two or three inches off of it, and then with a refresh of its silver paint it'll will do for me.
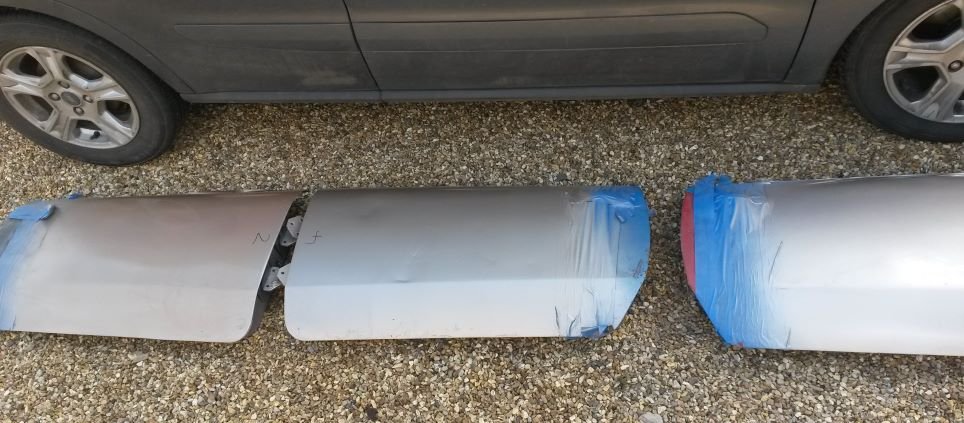
Re. your choice of colour. If there's a part of your car that's painted in the colour you like then it's worth polishing it and getting it scanned, for the paint to be mixed from. Colours on most computer or phone screens is not accurate enough to select from. On my HP computer's screen ; the top left and the bottom right of your four samples look more blue than green.. At least one of my local paint suppliers can mix up any scanned colour as an aerosol. I did this with Katie for some touch-up paint. At the time 400ml cost me £22. Using aerosol paint you can spray a sample panel to see what it looks like under differing lights. If it's close but not quite what you're looking for, it's not wasted when spraying underneath the car or under the wheel-arches.
Otherwise look around newish car lots, even supermarket car-parks to find the colour you most like and from the make, model and years any decent paint supplier ought to be able to find its colour code easily enough. Any car that been repainted may not be true to the original.
Pete
-
Minor but nevertheless useful progress this afternoon.
However it started like this ! . . .
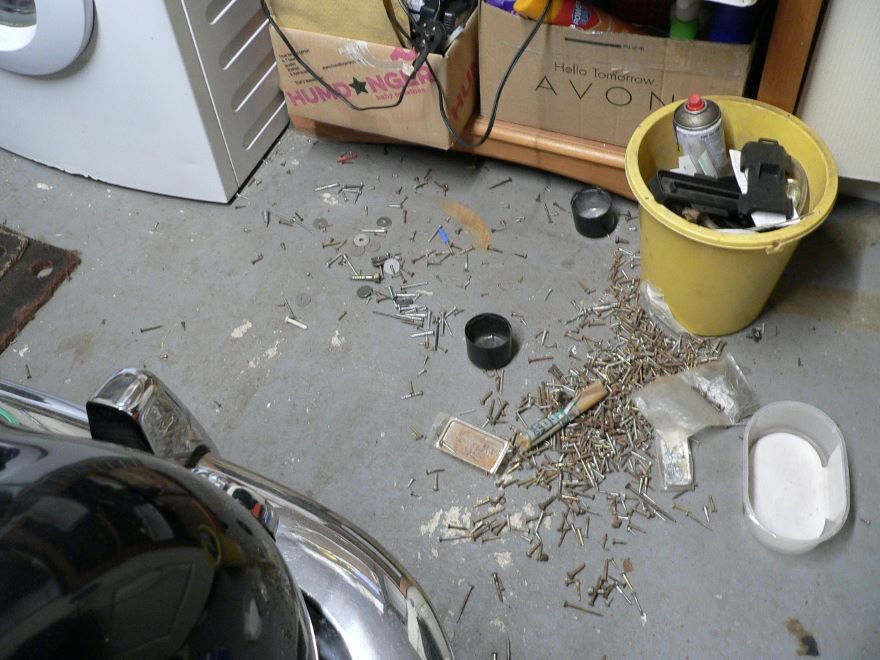
Box of screws, tippled from the shelf above and I caught it just in time ..but for a few pots stacked on top of others. I have lots of pots of screws, some stainless, some countersunk, others raised, some cheese headed, wood screws and self tappers, cross head, straight cut, you name it I've probably got some, sorted out into individual pots. And then I have all sorts of bolts, nuts, set screws, .. many of different sizes and different treads, as well as locking washers, plain washers. And of course I have pots of clips, and bleed nipples, springs and trim clips.. So I was really lucky that only these screws fell to the floor. The fact that they caught the rubbish bin was unfortunate but again not the end of the world as we know it..
Moving on. . .
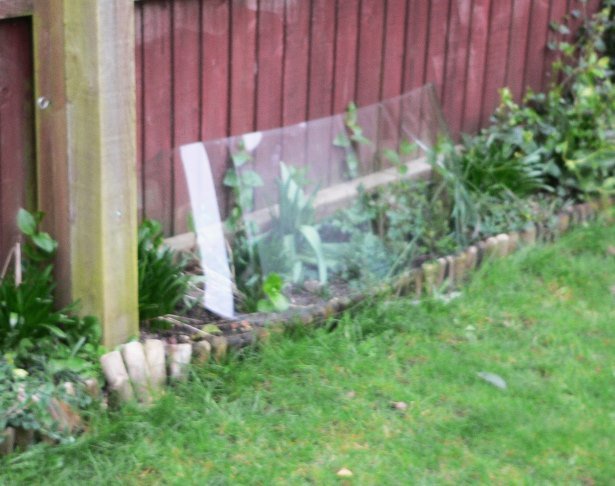
..to the polytunnel and broken bits of fibreglass...
Before I can repair - I need to get rid of the mastic. Five minute job ? in your dreams. The black goo had excellent adhesion and wonderful elasticity..
Fibreglass is an incredibly useful material for making things from, but it is not the easiest stuff to get clean once it's been painted and gooed. The issue may be identified in its other common name 'glass reinforced plastic' .. it's the plastic which prevents chemical cleaning or seriously abrasive techniques to be applied. It's lightweight and not very tough to clamp down, so even holding it is less than easy. Still with craft knife to slice and shave much of the mastic off, followed by a choice of scraper, followed by shaved wire-wool I finally got there.

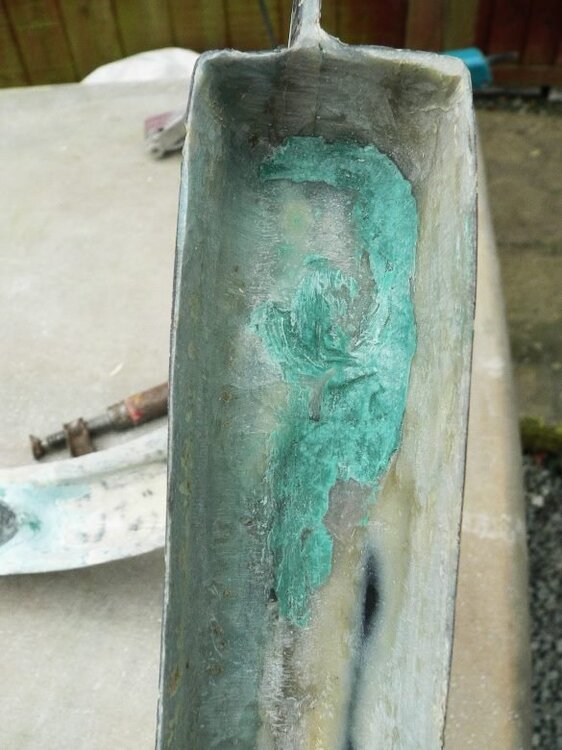
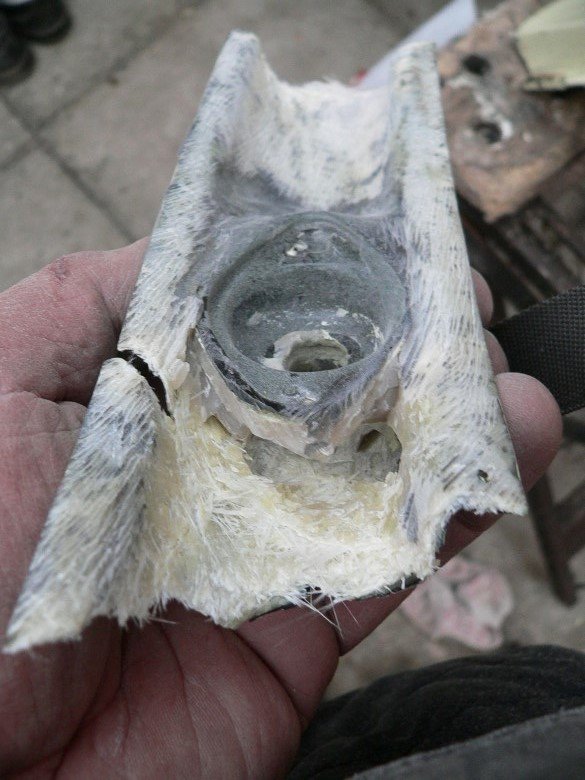
^ The inside ..where the rear fastening for the surrey top lid goes through, was painted over. This is commonly done by the fibreglassing business to 'finish' the raw mat so that it looks better value to the paying customer. I power-wire-brushed that off to reveal the thin layer of glass-fibres and otherwise gel.
So cleaned, this part was ready for the first stage of 'repair' . . .
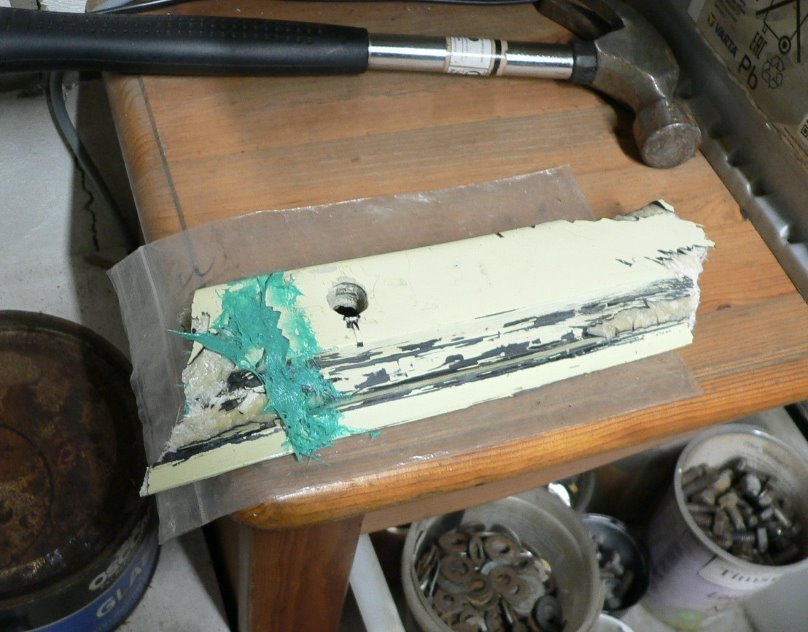
The end of this was cracked most of the way across, so I opened up the crack and spread it with polyester glass filler. Which is like body filler but instead of filler-power it has very fine glass fibres. Because those glass fibres are exceptionally strong in tension, this filler paste, if it adheres well is also very strong. The random alignment of those fibres means that it doesn't crack very easily in any direction. Where the gel had been inside against the cup for the lid's fastening, I spread some more as reinforcement. Now all I needed to do was to hold it to the right shape . . .
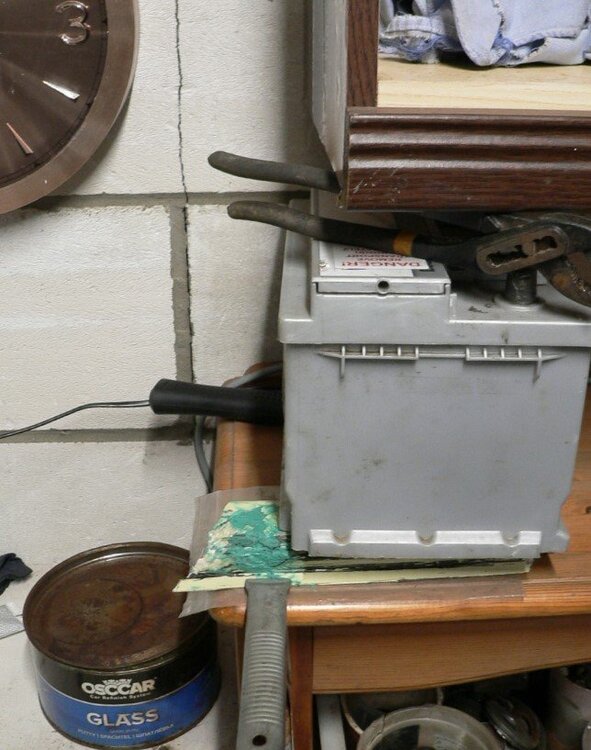
I'd dry run with the clamps.. in this instance a strategically placed car battery, (formerly in my Chrysler diesel) which itself was being held down by the wedge of grips under the wall shelves. The clamp (sort used to secure the tarps over market traders stands) on the side holds the flange straight for that short section, with the slightly curved tail of it hanging off the side of the shelf.
That's it for tonight. As I said not a lot but still useful to have this piece strong enough to be glued back into place in the backlight frame. The essential thing at the moment is maintaining its shape and dimension. If I'd let this end break off then the finished width of the backlight would have been very much more difficult to get right.
^ a close up of the work. It looks pretty awful but it'll clean up. You'll note on the left hand side a fine hairline crack. That is all the way through and was opened up to spread this adhesive inside. As you can see it's closed up nicely under the weight of the car battery and upper cabinet. It'll be left to fully cure overnight.
So.. time for a cuppa..
Bidding you a good evening,
Pete
-
Thanks Stuart & Roger.
No complaint, just an observation from someone who used to own a fibreglassing business, and took pride in the quality of their product. And.., leaving the front catch undone (the cause of the damage) was the fault of the plonker driving the car at that particular moment.
He.. being the same plonker who'll have to fix it now. 
I also have no idea who made this backlight. I bought it from a chap who had sold their primrose yellow TR6 ..who had bought it with the car. Who knows perhaps it was made sometime back in the last century ! ?
Pete
-
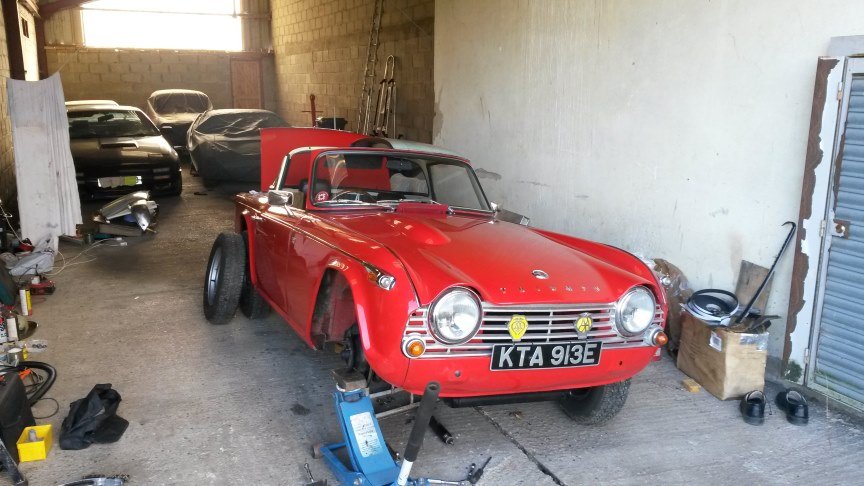
^ It's March and in anticipation of using the more frequently this summer ..I'm back at it.. This time working in the barn. Although too spacious and draughty to heat, it's a useful workspace surrounded by quiet and attractive Suffolk countryside.
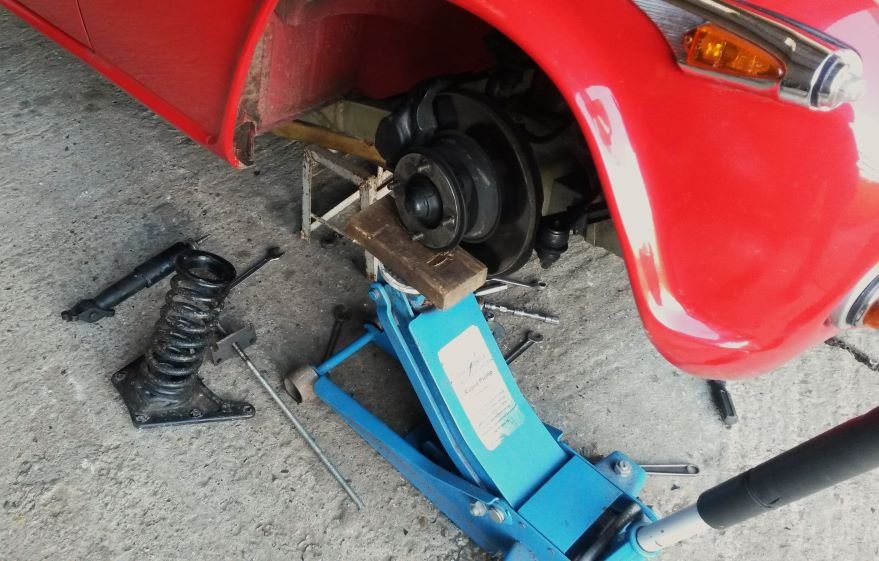
^ Since the chassis swap I've never been happy with the springs and the suspension's ride height, I swapped them before from those M&T fitted and it helped but it still wasn't right. Although good for country lane driving - the car has a tendency to float at high motorways speeds (as if the front wheels are lifting). So.., out with the springs also supplied by M&T and back in with the springs the car came with, as bought. . .
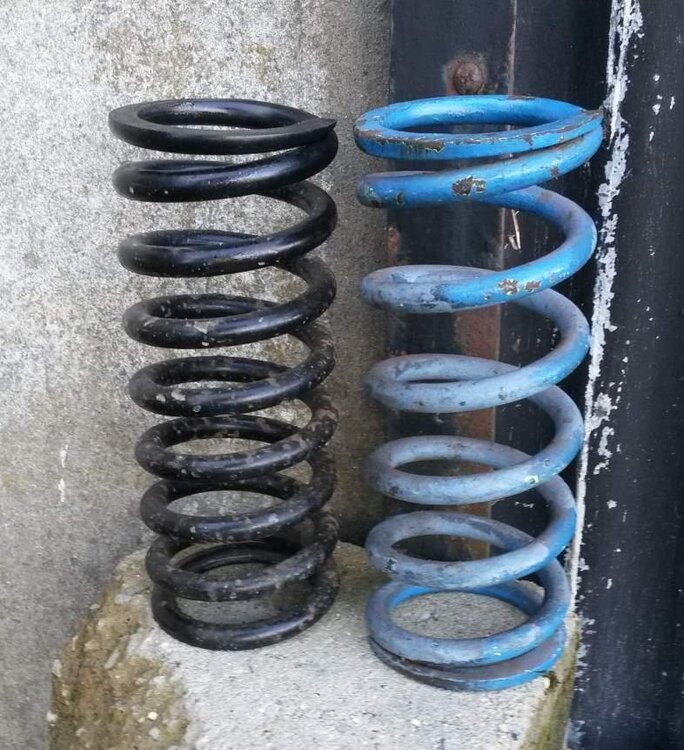
^ I seem to recall comparing the length and compression of the black springs when I fitted them. I reasoned that the black ones, having a greater number of coils would have been softer, but that was not the case. Using a pile of storage heater bricks to do that, they each compressed the same amount under the same load.
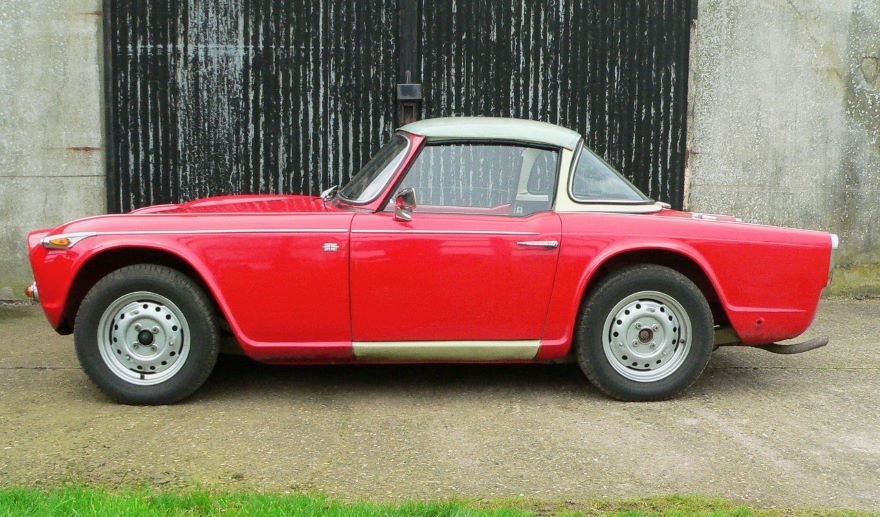
^ After a 10 mile test drive the car looks to be sitting the same as it was before, but a high speed run down the A12 left me with the impression that it is now directionally more stable. I checked the car's tracking and it was spot on. I'll leave it as it is and see how i get on with it over a period of time.
- - -
Moving on to the next task..
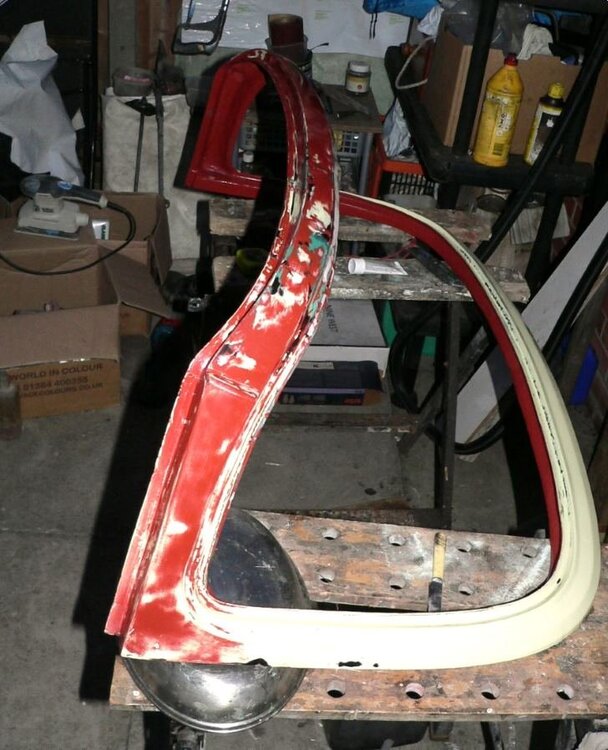
^ Some may recall my mentioning that I made the mistake of driving the car with the front (TR6) clamp of the Surrey top lid being undone. This was back in November when I was running out in the car to try its different seats. Tucked away under the sun visor I didn't notice the clamp was undone ..until WHAM the half lid suddenly opened as I was accelerating up to open dual-carriageway speeds and slammed down onto the boot lid. The force was enough to bend the 1/4" screw, rear fastening, but thankfully despite the noise - the roof and boot lids were barely marked. The fibreglass backlight frame however was ripped apart as it was twisted 180-degrees back on itself. If the rear screen rubber had not been gooed in with some sort of structural black mastic - I guess the roof panel with this section fibreglass would have flown off to pose a threat to following traffic. I was furious at myself at the time, but in retrospect can see how fortunate I was.
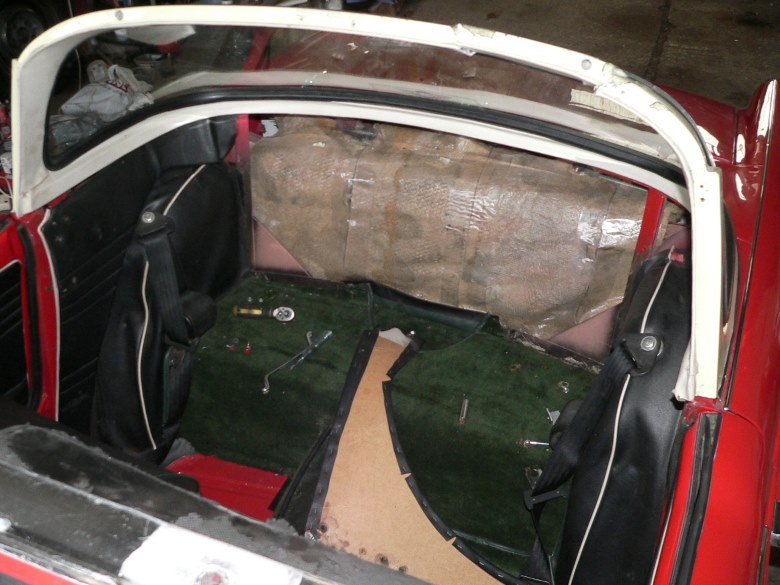
^ This weekend, with my lid's T-bar first removed, I released the trim for access to the backlight's fastenings.
^ it's a long time since I last saw her topless.
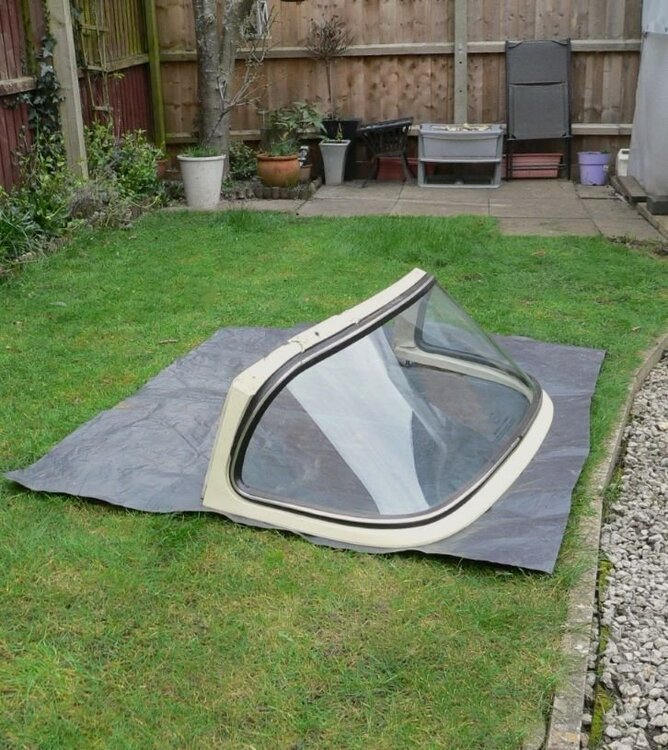

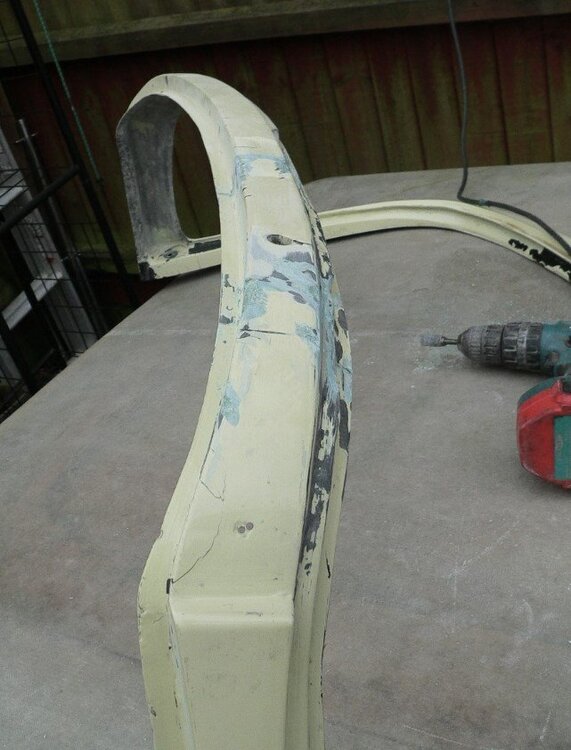
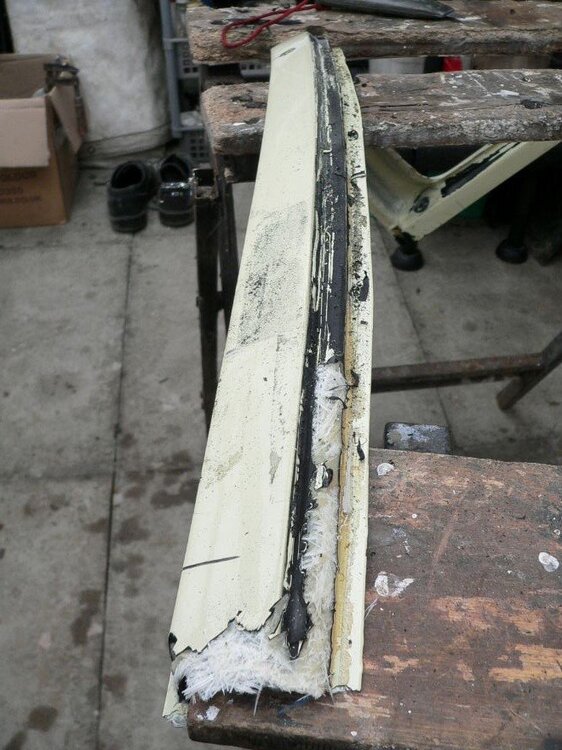
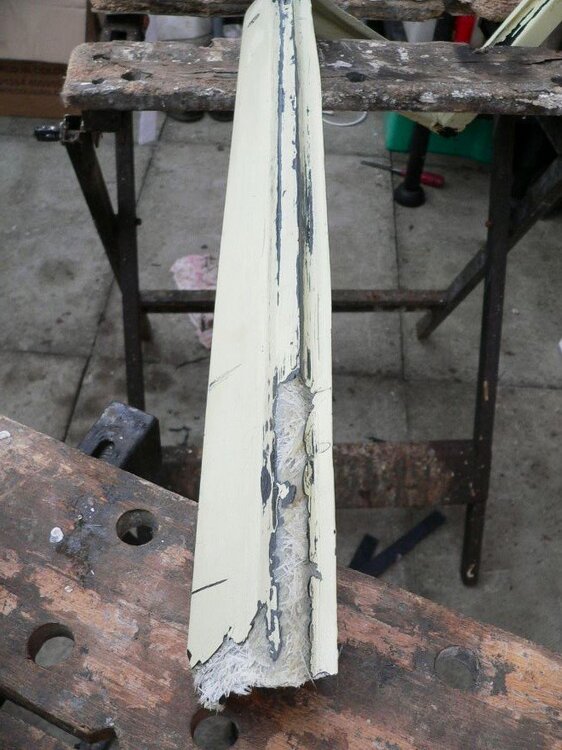
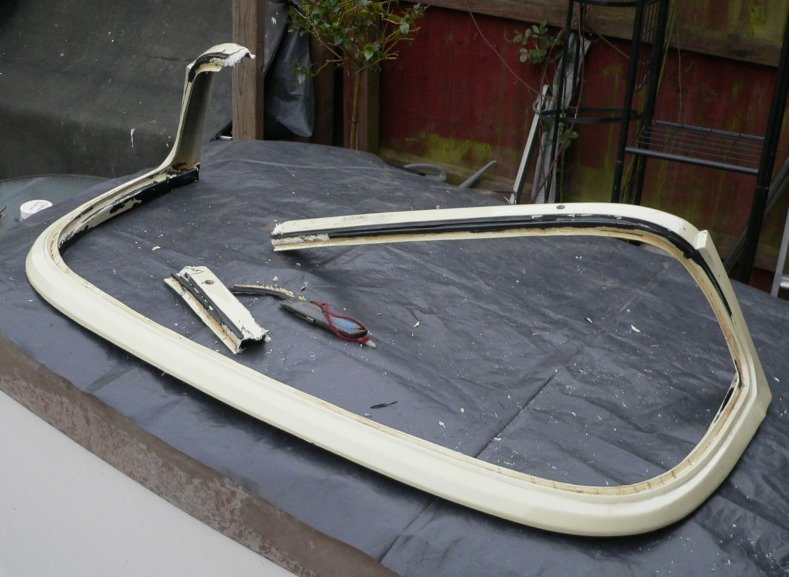
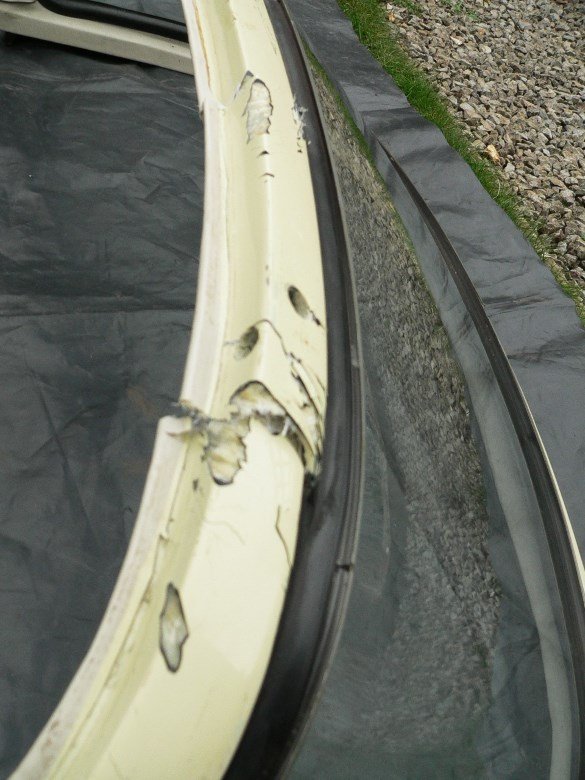
^ The barn is useful but it's also a 20 mile round trip from home, so I've brought the backlight home to work on it. Although where I now live has an integral garage, I won't want to be grinding glassfibre in it. So my first task was to cut the lawn and then tidy and clear my garden shed / polytunnel as a workspace. The lawn seemed the safest place to remove the glass. Before doing anything else I indexed the distance (cut marks) either side of the damage with a hacksaw.
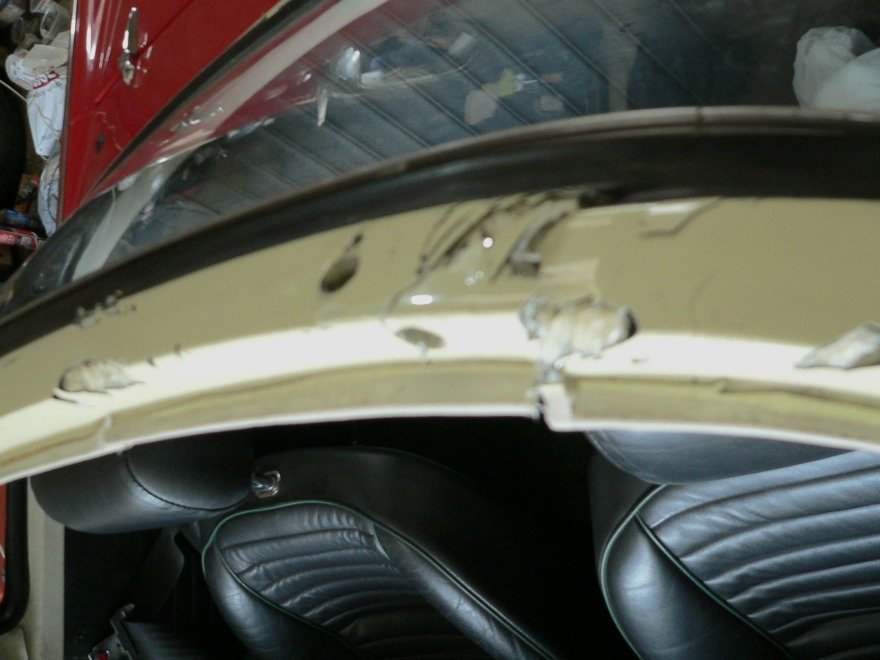
^ The damage looks no better in the daylight ! I had to cut through the mastic to get the glass out. It's now been set aside for safety. I would not be at all chuffed if I were to drop it on a paving slab.
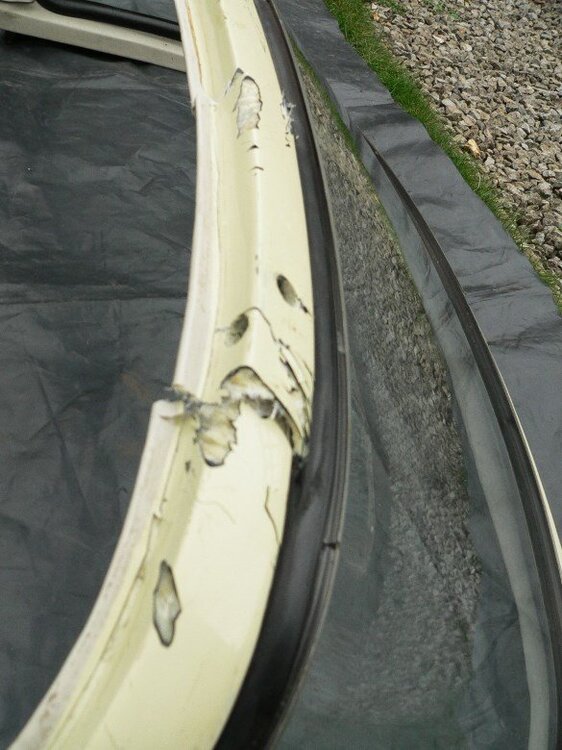
^ Moving to a more comfortable working height, the glassfibre now unsupported by the glass is only held in place by threads of vinyl trim on the inside and the black mastic which was used to hold and seal across the top of the glazing rubber.
^Removing the vinyl was what I imagine skinning a snake would be like. The black mastic could only be cut away. As you can see, even through the paint its bond was strong enough to rip the corner of the fibreglass out.
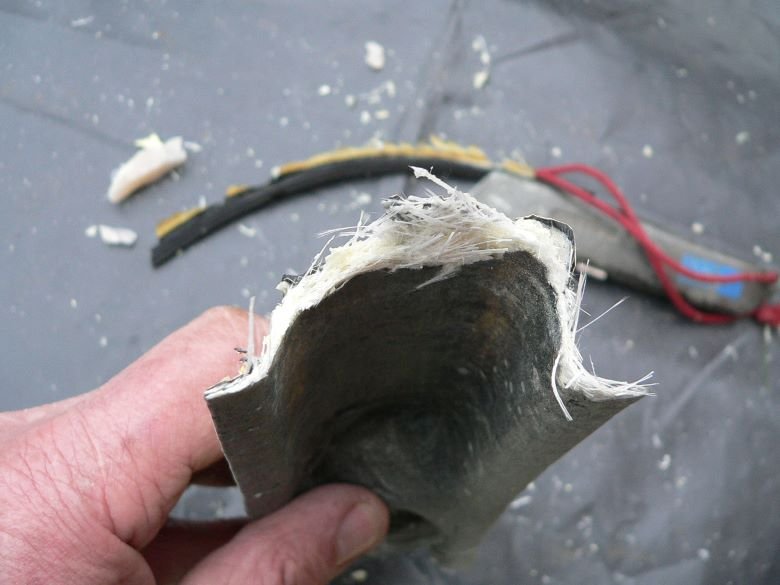
^ The quality of fibreglassing is appalling, insomuch as the hard corners have no glass in them at all. I think just clear gelcoat had been used to fill the corners of this frame ..which is not at all structural. Inside that is a very thin layer of fibreglass chopped strand mat. I guess it did its job. Or at least it did after I fitted a T-bar ..to prevent it twisting, but for the price charged for these things I would have liked to have seen better.
Unless someone has a backlight frame going ..that I might afford to buy - my task is now to try and fix it. It'll be 'a challenge' to do it well ..sort of like trying to mend a broken and chipped vase. Rainy weather yesterday and today is not helping motivation, but it needs to be done.
Pete
-
On 2/15/2024 at 10:31 PM, Z320 said:
I'm so pleased this project is finally finished, me and sheet metal will not get friend.
-
^
Fascinating Peter .. I'm sure that photograph could be assigned a profound meaning and be admired in the finest art gallery.
.
-
Looks really good David. I'm supposing you followed CTM's example of welded doubling plates for the rear springs ?
Pete
-
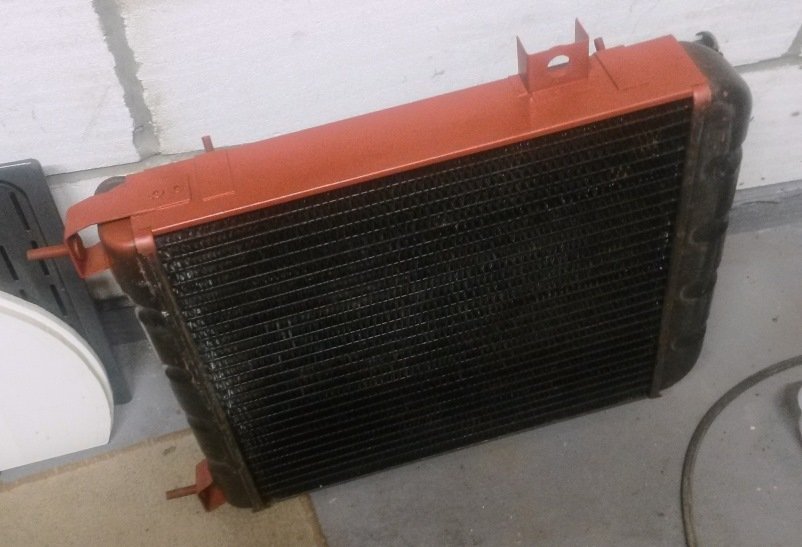
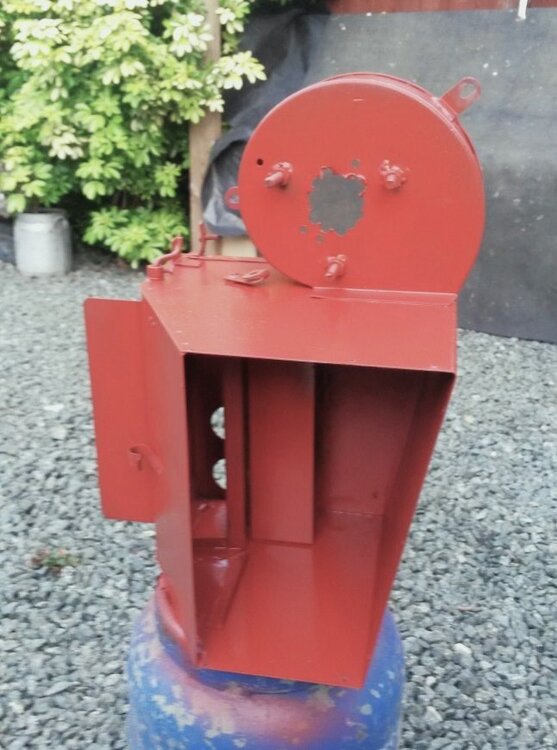
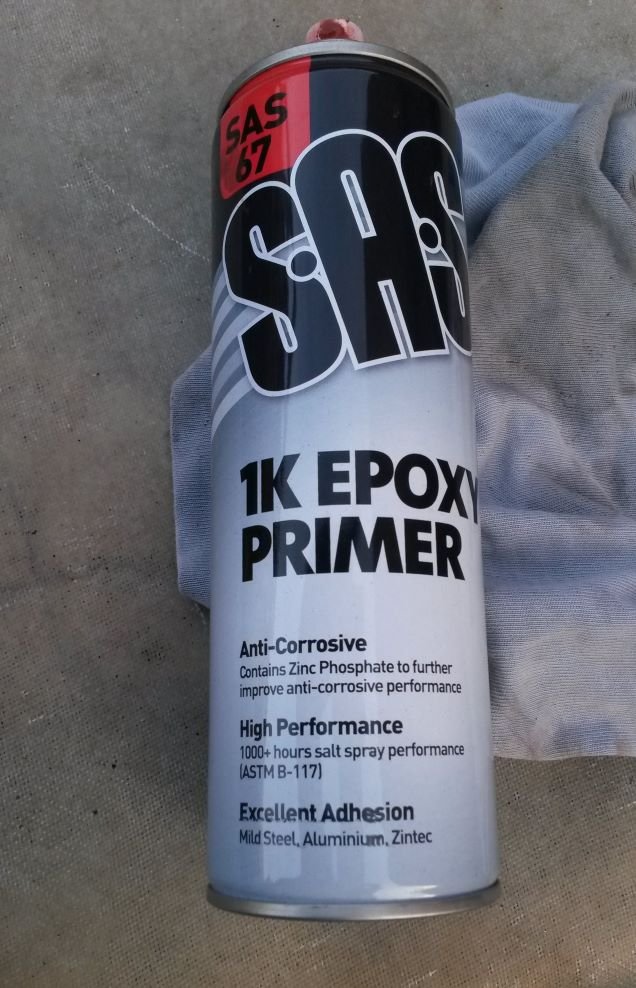
Hi Jase, I'm trying a rattle-can 1k epoxy primer just now, see images below. I've used it on the steel sides of my Daimler's radiator and have repainted its heater box with it. The paint's colour is like red-oxide and coverage is good.
The paint sticks well to wire brush cleaned metal, but the black rattle-can spray paint I've used is easily scratched, leaving the reddish colour showing through, but that may be because I applied it straight onto the dry epoxy primer rather than keying it with fine emery paper. I really ought to test another piece with rubbing down between primer and finished paint coats.. and then leaving the test piece outside through the wet spring weather.

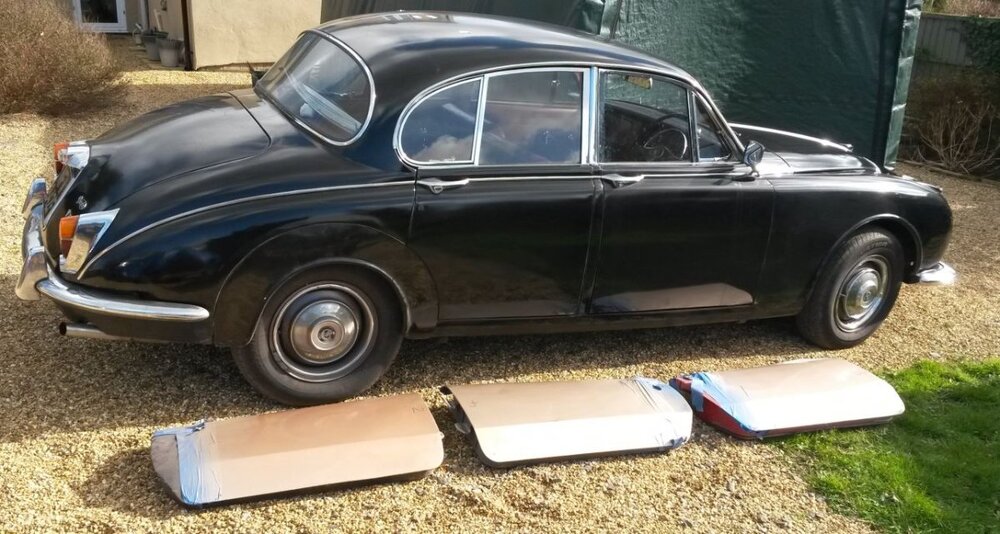
Regarding final colour, I'd go with what you like best, balanced with what you feel looks great on a TR4. It's worthwhile remembering that the original colour was a customer choice, and from a very limited range ..and now you are the paying customer.! Again I've been focused on my Daimler and decided not to stick with its original silver grey colour, nor the black it was subsequently repainted in. Both colours though went well with the car's ox-blood red leather seats, interior trim and carpets. I started by looking at dozens of internet photos showing the car (Jaguar-Daimler compact saloons of the '60's) and then eliminated those which I didn't think would compliment my car very bold red interior.
I then decided which tone (light or dark) to exclude, because light shows up panel gap deficiencies. And dark colours because they show the dirt n' dust too much (for my country lane driving). Also as I've matured ..yeah okay 'got old' , my eyes have more difficulty seeing into dark corners ..like in the engine bay. So I chose a light colour but not too light. I even ruled out the most common colour of the car, which on the Daimler V8 saloon seems to be a lovely light blue metallic. It might not be, but of course it's more about what one sees (notices most) rather than what is. Surprising even myself I've chosen to paint the Daimler gold (aka opalescent beige
).
Jaguar-Daimler's opalescent golden sand of the period was spec'd with the red seats, and it looks very nice ..on a posh saloon car. However.. me being me I wasn't sure, in fact I was almost certain the colour wasn't exactly what I was looking for. This sorta stems from when I restored one of my Sunbeam motorcycle. It's an opalescent silver bike from the 1950's. ...one of the very first to have metallic paint. I had removed its rear light housing to find unbleached / non-yellowed original paint, and it looked too bluish-silver. Over the period of 60+ years the exposed silver had yellowed. That yellowed-silver colour looks right on a bike of that vintage, whereas previously hidden bluish silver looked far too modern. I had paint mixed to the yellowed-silver (a light nickel colour) and was / am delighted with the choice. It looks befittingly 'classic'.
So it was with my choosing a new colour for the Daimler. What might have looked great in 1968 sort of looks odd in 2024 ( yep I know, but as a former designer I still have to live with myself !). What sense is there in spending all that money ..and full resprays are expensive ! , and then not be quite happy with the final colour ! ?
I went to the paint supplier in Colchester, and from colour names and sample cards, I selected five colours of gold to be mixed as 100ml samples. My friend Mathew has sprayed these onto Triumph Spitfire door panels. And just this Monday i drove up to Norfolk to make my final selection. . .
The first two I rejected were both Jaguar colours. One was the aforementioned 'opalescent golden sand' ..which i thought would still look good on an F-type., and the other was like a tarnished copper colour, which I thought would look fabulous on an XK120 or a Triumph TR2.
Now shortlisted to three colours / tones to choose from . . .
In the sun, laid down, and then stood up, turned different angles to the sun, seen when cloudy, and again when placed in the shade next to a dark grey car. Reflected colours, like blue skies and fresh green grass, can really effect the final effect.
The sample mixes of paint cost £40, in addition to the (common) primer and clear coat, plus my friend Mathew's time in painting them for me (he supplied the old door panels).
As my father used to say ; 'you're big enough & ugly enough to make your own decisions' and so I made my choice according to what I feel will look good on the curves of this particular car, with those red seats and the walnut dashboard. There's no right nor wrong. It's simply the customer's own choice.
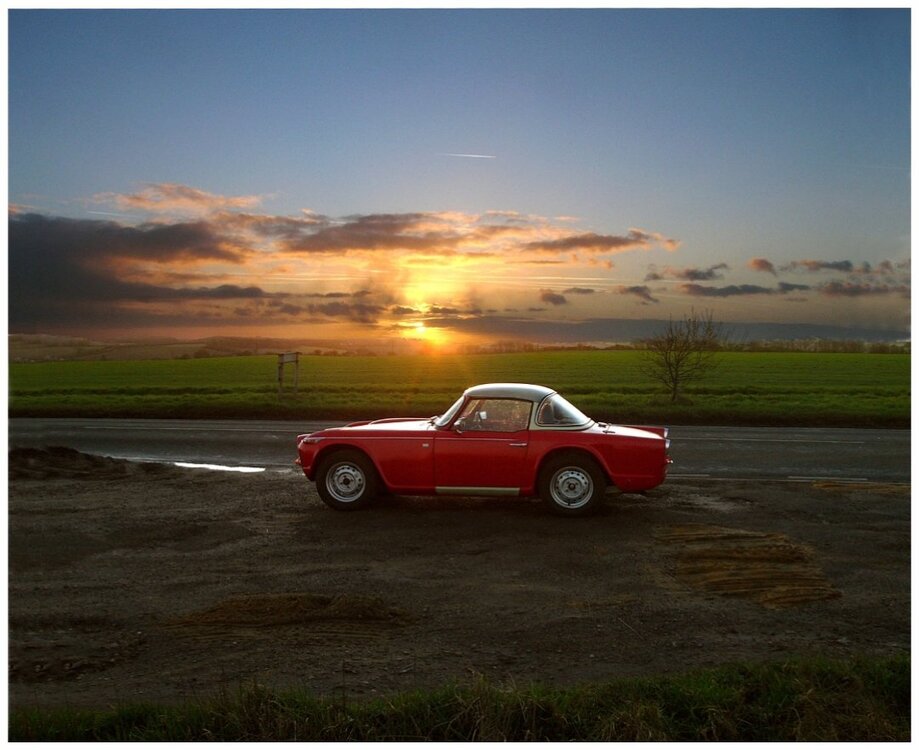
When driving Katie around I've noted that the very sight of her on the roads is appreciated by onlookers. The Daimler is a wholly different lady, which is being dressed for the ball.
To reiterate.. I'd say to you 'chose what you like best, on that particular car'.
Pete
-
well done Jase. Now to put it all back on again


Where did you drive to with your TR today
in TRs Out and About
Posted · Edited by Bfg
I designed a very similar looking cab when I worked for Cab-Tech in the early 90's. Our client was Simon-Gloster-Saro (the latter part of the merge were formerly the aircraft manufacturers). I fell out with the the owner of cab-Tech ..big time., when he insisted on entitling our tender for the contract a 'crash-cab'. It wasn't. It was a weather cab of tubular steel clad with aluminium. Although I conceived its quite substantial tubular steel structure to include three continuous loops (roll-over bars) over the cab (which the above design clearly doesn't have in their side windows) - I doubted if the cab would protect its occupants in the event of it being rolled. According to official reports and photographs I had at that time, such an occurrence was not unusual. With 46-tonne behind the cab and some airports, such as Hong Kong, having open (very broad and deep) monsoon drains - I felt their seven-man fire crews had a right to know.
P.