


NCS_TR3A
-
Content Count
165 -
Joined
-
Last visited
Content Type
Profiles
Forums
Calendar
Posts posted by NCS_TR3A
-
-
As it seems to be with everyone else, I fitted to the hardtop and then added the perspex to it. I think I did use sealent around the perspex just before adding the locking strip. If you get a leak it's usually were the screen joins the rubber and not where the rubber joins the bodywork in my experience. Use lots of soapy water when fitting the locking strip and follow Hamish's advice in ensuring the join for the rubber is at the bottom and the join for the filler is at the top. I guess you could do it the other way around but I was always told to do this. I found it easier to do with the hard top on the car. You want everything to be a tight fit so it doesn't blow out whilst driving.
Neil
-
9 hours ago, Ralph Whitaker said:
Actually came back from Malvern yesterday, finally used my 2019 Christmas pressie of a Factory tour at Morgan cars. Didn`t go down in the TR though. It was a horrible journey, all motorway, and not one I want to repeat in the TR, so probably will not be coming unfortunately, at least not in the TR, unless I can find a better route or travel at night.
Ralph
Ralph,
Way off topic, but what did you think of the Morgan tour. I've never done it but it does interest me and interested to get your opinion for the tour.
Neil
PS not planning to sell the TR3A and switching to Morgan
")
-
On 8/4/2021 at 5:53 AM, Ralph Whitaker said:
Fitted the in line pressure regulator yesterday, set at 1.5 psi, and took the car for a short run of about 8 miles.
I have to say it has never run so sweetly. Consistent tickover at junctions etc, instant pick up and smooth power delivery, and not a hint of flooding from the carbs.
Very pleased so far.
Ralph
Hi Ralph,
Mine is presently running well but I recognise the symptoms you have described. I'm not sure how I fixed mine (it might be a different pump) and think I will test the fuel presssure. Out of interest what fuel regulator have you used and were have you placed it.
Thanks,
Neil
-
1 hour ago, RogerH said:
Sometimes the 'interlock roller' can innocently fall out when rebuilding the top cover.
I always keep it in place with some thick grease whilxt getting the balls in place followed b the rods.
Roger
Roger, I think you've written that somewhere else on the forum as I remember reading it fairly recently when I was doing this job and followed this as well.
Ali,
Its's a little fiddly but far less scary than it all sounds with regards getting everything back in and in the right place. I guess the risky bit of undoing the square bolts on the selectors without snapping them has been done to get to the stage you are at so it's all just reassembly. Good luck and it sounds like you have found the problem.
Neil
-
Hi Ali,
As Roger has said the top of the gearbox needs to come off and be checked. As pointed out, there are some ball bearings located on the three shafts that are there for safety, stopping you selecting more than one gear. I suspect like Roger has pointed out that there is something missing here. It's a top of the box off and strip down to check.
Neil
-
17 hours ago, John McCormack said:
Yes it could be rocker shaft wear, it could also be the rocker face is pitted and when you set the gap correctly the actual gap between where the valve impacts the rocker is larger, causing the tapping.
I put a new rocker shaft in my daily driver some years ago but failed to have the rockers ground smooth. I sometimes have a 'tapping' noise and believe that is why.
I go faster and can't hear it.
Thanks John,
Yes presently I'm ignoring it as it goes as soon as any increase in revs or driving. You do have to be listening for it also. When you say grind the rockers smooth, would this be possible just using a file and then wet and dry or do they need to be hardened on something after getting the face smooth.
Neil
-
Thanks Guys,
I had never heard of setting tappets hot before. I have this tappet sound at tick over ~750rpm, it goes if the revs increase and certainly not present underload (not small end). It comes from around the middle of the rocker cover.
I'll rechecked the tappets and they are good. I've read a few different things suggesting an exhaust leak can sound the same but I cannot find one. On searching the forum I found something suggesting it could be wear in the rocker shaft itself. Any views on this.
Neil
-
Just watching wheeler dealers on Quest. They are doing a Austin Healey 3000 Mk3. Very nice. Ant just made a comment about not setting the tappet gap to 12thou at the moment as this needs to be done hot?? Is this right? I thought you set them when the cold and this gap was the amount that closed up as the engine warmed up.
I've set my tappet gap when cold, is this right for a Triumph or do I need a bigger gap, set them when the engine is hot?
Neil
-
One thing to remember is not to go too far...... Its needs to disengage when you switch off otherwise you will damage the unit. It is a little fiddly to set up but make sure you check it disengages cleanly as well. But it does sound like it needs to go that little bit further as Roger has already stated.
Neil
-
Wow, when I started replying there was no other reply to this :). You guys type fast
Neil
-
Hi Rod,
It's normal for the ammeter to shoot up for a second but it should then drop. The Soleniod has two coils, both are activated initially (this is when the amps go high) to pull the shaft up and engage the overdrive. Once the shaft is fully up one of the coils disengage and amps drop. Sounds like you have a solenoid issue. Might be stuck but I'm guess you will be needing a new one at the very least.
Neil
-
13 hours ago, Ralph Whitaker said:
I gave the car a good run on Saturday evening and the O/D seems to be working fine again now, especially when fully warmed up. Mine is a b---er to get into second when cold, but becomes considerably easier when the oil gets hot and thins out, so I suspect the thicker oil is preventing the syncro rings doing their job. I think I am going to change to a 40 weight oil, as I feel that it will ease the gearchange and probably help the o/d too.
Ralph.
Ralph,
Thats exactly what mine was like before I changed the oil at the first service. Ie the pig to get into 2nd until warm. All gears were a little harder but 2nd was the pig. I have no idea what was in it but suspect it was 90 grade. The only issue with going thinner would be the risk of oil leaks. 40 does seem to be the preferred "thin" oil.
Glad to hear its working though and I guess you can live with it until you have time etc.
Neil
-
Yer it was one of those days were it was hot but could have been a lot hotter without clouds. Sounds like you had fun and a successful day.
Neil
-
On 6/7/2021 at 6:48 PM, Ralph Whitaker said:
I agree, I don`t want it in bits again now the sun is shining ( between the rain).
Ralph
I'm using Sae30, mainly because that's what it said in the manual. I must admit that the gearbox used to be a liitle difficult until warm when I first got it (25 years plus ago). On changing to Sae30 the gear change was a lot easier so I guess it was some what thicker originally. I've just put the engine and gearbox back in a few weeks ago and found that setting the overdrive up was a little trial and error. As you stated the system in the book doesn't work (or didn't for me). I actually ended up with it engaging but not disengaging. So had to back it off a little. Now it seems to be right but I do notice that the going in is far less "violent". An auto changing gear is a great description.
If it's slow to disengage due to the oil thickness you could take it on a long test drive and get it nice and warm and see if it makes a difference. You then will know if a change in oil would help. I must admit the more I read the more I think I should be going thicker than the Sae30 I'm using.
Neil
-
How did they perform at the 3 sisters today? Hopefully it went well
Neil
-
2 hours ago, John Morrison said:
Guess not Hamish,
but how you store them is very, very important.
Upright, away from sunlight indeed any light, and rotate them regularly.
John.
John,
I only have one set so this isn't a problem for me but I'm interested in your comments. Why upright, I can understand the rest. I've seen tyre storage racks before which are just a "pole on wheels" and you lift the wheels onto them (I think for storing winter or summer wheels when not in use). I do note that better tyre shops tend to store the tyres vertically so there must be a reason.
Thanks,
Neil
-
A quick question on ignition timing. I have three working distributors for my TR3A. I've had them all in the car today. Set them all to 10 Deg BTDC with the engine at 750 to 800rpm. This with the vacuum advanced connected (but should make a difference at that RPM) when each was set at 10 Deg BTDC at tick over I measured the max advance at higher rpm. I got 28 to 32 Deg BTDC dependent on the distributor. Which seemed OK. All vacuum advances work as far as I can tell (to the suction and tongue over test). However I'm.not sure they are right for the TR but take comfort that they were all similar at max.
My question is more about the variability of the timing. All three distributors showed an iratic timing spike. It would be consistent and then suddenly there would be one spark that was about 10 Deg retarded to the rest and the back again. I'm using an Accuspark SP8000 which also measured rpm which also jumped about at the same time. The mechanical rev counter in the car was rock steady. The reading did not feel correct and just a glitch. Is this because the distributor is not surpressed or could this be a real reading. I'm not presently believing all three distributors have the same fault but it not impossible.
Another quick question, are you better advancing the timing until it pinks and then take it back a bit or is 10 Deg dynamic about right and leave it alone.
Neil
-
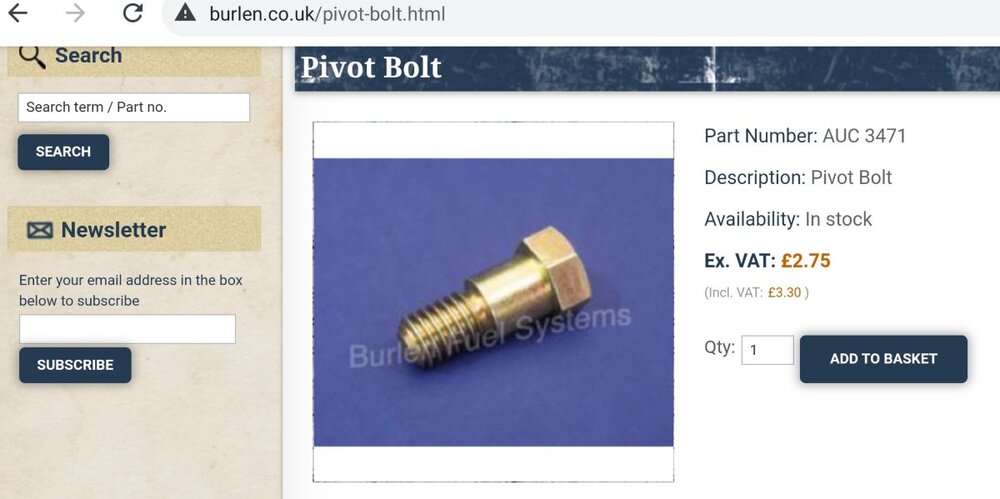
Hi Ralph,
I've lots of carb spares but not that one. I didn't realise the hole went all the way through either. On your picture all parts seem to be number 50 but I know the bolt you mean (and there is only one bolt).
Have you looked at Moss? They seem to have them at present. AUC3471. Although if it is this bolt Burlen seem to have them. They are used on MGs as well so if you have an MG parts provider near you it's worth a try.
Neil
-
Thanks Tom, I have a collection of needles and jets, the needles are all SM although one does look a little different to the eye (I haven't measured it but fatter I would say about half way down) the other 4 all look the same. 2 jets and needles are new as in probably only done 2k miles. Changed at that time because I really couldn't see what else it could be even thought they didn't look bad. I've certainly seen bad jets on minis I used to play with (lack of being centralised) for fiends and family.
I had tried the dropping the needle previously and it helped but not much. Probably could have dropped it further though.
I do have some concerns that I'm using SM needles on a 87mm bore engine. It looks good now on tick over and actually OK throughout the range. I'm just thinking it's a fair change from the 83mm engine it should be so the needles should be of the richer type. I assume all the needles have pretty much the same idle profile though.
I have two standard lower jets so I do and did have the option to go back but I'm happy to leave it without the slight petrol leak and having a good mixture. If there was a big lesson it's the Jets need to be clamped in place by the tightening of the large nut, if they are lose after tightening this you will get a leak and you cannot rely on the internal spring to apply enough pressure to stop this leak. This was my initial working assumption and the clarity on this has made a big difference to solving the issue.
Neil
-
Thanks John, so nothing to worry about. The engine is not new, it came out to tackle oil leaks giving me something to do at weekends in lockdown as driving it wasnt possible (we'll ethically not at least). Just changed the front crank seal, fitted a rear Crank seal, new timing chain etc. Gearbox seals and diff seals and was just happy it all worked when put back together :).
It is certainly time to start using it again.
Thanks,
Neil
-
On 3/1/2021 at 11:08 AM, Tom Bryant said:
A few comments:
1. Lots of luck with the Viton. They don't work. Well, they might seal the leak, but they have too much friction, and the jet won't return.
2. PTFE (Teflon) does work, but you need to install two of them in place of each original cork jet seal. And, of course, the two dished washers must be installed the proper way around.
3. Neil's problem (with leaking Teflon seals) is not the usual outcome. I've installed thousands of the Teflon o-rings, and although there have been a few leakers, all of them were due to some sort of fixable problem, sometimes a mistake of my own, never the PTFE o-rings themselves. I suggest he try again, and if there is a leak, look for the source of the problem, and not give up until he finds it, because it will be fixable. And, once properly fixed, those PTFE o-rings will not fail in your lifetime. The holes in the sides of the jet should be chamfered with a file to remove the sharp edges so they don't cut the PTFE seals as they slide over the holes.
5. Back to the OP (Chipperman52) and the loose conical ring above the gland nut: Sounds to me as if the cork ring itself is too thin. I always toss those in the trash and replace them with a 1/8" X 3/4" ID ("Dash 210") Buna-N o-ring. That should do the trick.
6. Don't even think about tossing that copper washer above the upper jet bearing. It's absolutely necessary for two reasons:
a. It seals the jet bearing so that fuel doesn't leak around it and past the jet orifice, upsetting the air/fuel mixture. Leakage here will not come out the bottom of the jet where it would be visible, but it could make it difficult (or impossible) to get the proper air/fuel mixture.
b. It must be present (and of the proper thickness) to lock the whole jet bearing assembly in place so that the jet adjustment nut can be turned without also turning the male-threaded jet bearing itself. "Proper thickness" is 1/32nd inch (0.031") no more and no less. Many repair kits come with a much thinner (typically 1/64th inch) copper washer. That should be either thrown in the trash, or if necessary, doubled up to get the proper 1/32" thickness. Replacing that 1/32" copper washer with fiber is, well, just plain silly. Don't do it. (Even if that copper washer did leak a smidgen, you'd never know it by examination of the bottom of the jet. Any leakage would be upward, into the throat of the carburetor. Small amounts of leakage past that copper washer, if it should occur (unlikely), would not be enough to upset the air/fuel mixture. So... there's just no reason to ever even think of using a fiber washer there.)
7. In answer to Neil's comment:
"I'm struggling to think why the bottom nut would be tight before you got enough pressure on the cork seal and washer to stop it spinning."
It's not the pressure on the cork seal that prevents that male-threaded piece from turning; rather, it's that 1/32" copper washer that keeps the thing in place and prevents both turning and leakage. It's also quite possible for the cork seal (or Buna-N o-ring) to be "wicked tight" and the upper jet bearing to be loose and leaky, particularly if that 1/32" copper washer is missing or if it's been replaced by a 1/64" copper washer. But again, I must clarify, any leakage past that copper washer and upper jet bearing would be upward, into the throat of the carburetor, and would never be visible at the lower end of the jet.
8. Sometimes fuel leaks past the screw that holds the yoke onto the bottom of the jet. Such leaks can be fixed with Loctite.
9. Frankly, I don't know why everyone doesn't just give up on cork jet seals and move on to the far superior Teflon. There is now a far better material than cork, so why Burlen, Moss, and everyone else, just doesn't enter the modern age and toss the cork in the dustbin of history is beyond me.
Tom Bryant
Right, I've revisited this on my car now the engine is back in. Tom you are a Saint!!!!!!!!!!!! I got the carbs on the bench and really thought through what was going on. The key information you shared, for me, is that the jet bearings should be locked in place by the bottom nut. I had never registered that in my mind before assuming the internal spring would have the stregth to push the seals to make good.
So on stripping down my carbs I found the top jet washer was only 10 thou. I did order 2 new washers from Moss and they were 40 thou. Just my luck. I have quite a selection of old washers (which were all 10 thou.). This allowed me to do some testing to seel how th I the washers needed to be to truly clamp jet bearings in place. On carb 1 (nearest the fan) a 30 thou washer wasn't thick enough, but the 40 thou from Moss did it. On carb 2 a 30 thou would have done but I decided that given I have a 40 thou it was better than using three old ones until I could find one of the right thickness.
So all back on the car using Teflon o rings and I don't have a leak, Great................... But I couldn't get the mixture weak enough even withe the jets fully up. Felt like I was back were I started to be honest. With the 10 thou washers I could get the mixture right but had a leak.
When I looked at the top jet when it's placed in the carb it's flush with the chamber base when there is no washer on it. So when you add a 10 thou washer it's 10 thou lower and with the 40 thou washer it's 40 tou lower and that's enough to remover the tolerance to tune the mixture.
So I need to find a way to raise the jets. I guess reducing the top washer thickness and increasing the bottom washer thickness would theoretically work, but I didn't have the washers to try that. Because I have many spares I took a plug and filed a bottom jet bearing down slightly at the end the nut attaches. This allowing the nut to travel further up (there is plenty of thread). I filed 40 thou, about 1 mm off it, which allowed the jet itself to rais until it is level with the bottom of the throttle chamber when fully wound up. Refitted and I now have no leaks and the ability to adjust the mixture from way to weak to way to rich. I know I'll have offended purists with this but I couldn't see another way for. The jet bearings to be higher up in the chamber without having a small leak.
I haven't tried the viton washers in the end so cannot comment on these. But the Teflon (PTFE) ones are working and have no restriction on the choke jets going back up. Just wanted to report back so others in the future so the issues were not Teflon washer related.
Thanks,
Neil
-
Having got the engine up and running after changing oil seals all around the car, fitting a rear Crank oil seal and working (yet again) on the carbs I seem to have it running the best it has been, plugs the right colour, gunson gas tester reading 3.5 to 4 on CO (possibly still a little high but I always go slightly ritch and plugs look right. The bonus being it no longer leaves a mark on the ground.
Keen to record were everything is I decided to do a compression test (probably would have been wise to do this before removing the engine). The numbers look consistent but high. The guage I have is also a Gunson and I've tested it against others and they are the same, doesn't mean both are right but it reduces the chance by the both reading the same.
I tested the compression cold first, then I added 5ml of oil and tested each cylinder wet and then finally took the car up to temp and tested hot. These were the results -
Cylinder No1. No2. No3. No4.
Cold 205. 207. 205. 210.
Wet. 245. 237. 242. 247.
Hot. 200. 205. 210. 205. Results all in PSI (can only really read the guage in 2.5 increments)
The engine is a TR3A engine but it has 87mm liners, and a standard TR4 cam form what I can see. I have no ideal about the top end as I've never had the head off. It does have a high torque starter which I guess may increase the results (fast spin)
Do these figures look to high to everyone. Is there a risk from having them too high? I was expecting them to be about 150 - 160, and increase when wet (which they have) but then to read higher hot than cold as well which they didn't.
The car seems good, everything is probably were it should be and I guess I have no plans to do anything about this unless someone more wise than me has real concern. I just plan to measure the timing (not done yet, it's about 2 degrees static and doesn't pink, but need to measure dinamic)
Thanks as ever Neil
-
14 hours ago, Lebro said:
I used a tiny amount of silicone as stated in the Marx instructions. (& he invented it)
Bob
Me too, and put the join at the top on the crank for obvious reasons.
Neil
-
On 5/20/2021 at 11:19 PM, Nobbysr said:
certainly would have expected to have a spring to exert even load on the lip of the seal to the crank.
So just received a seal from the TR shop, with spring but there is no link in the spring. I would have thought trying to stretch the steel spring to the size of the end of the crank would have exceeded the elastic limits of the spring , has anyone had experience with the one piece spring???
All the best
Steve
Just done this using the one from TR shop. It had instructions with it and I followed them. Yes I was worried about exceeding the elastic limit but it didn't. You put the spring over the end first on its own, then put the seal around and then manipulate the spring back into the seal.
I now have a TR3A that doesn't leak from anywhere. Really happy I took the plunge to take the job(s). All down to reading Bob's engine rebuild (which is beyond my limits but got me thinking about tackling all the leaks)
Neil

Choke Cable
in TR2/3/3A/3B Forum
Posted
I would also agree with this. It makes it all a lot easier, although I did remake the half moon and also filed the teeth in the pull out shaft to give it more to hold onto. What ammuses me about this is that your method to twist the wire is straight forward, I'm sure I'd did something that was far harder (like trying to pull the whole shaft out and twisting it whilst holding the other end .... I think I missed the obvious and the simplest solution. A little embarrassing. I'll know for next time")
Neil