

john minchin
-
Content Count
121 -
Joined
-
Last visited
Content Type
Profiles
Forums
Calendar
Posts posted by john minchin
-
-
If the pump is dry it may not pump, mine did not after last winter.
I had to tip some petrol into it. Then it all worked fine.
-
After a pin sheared on me I use a masonry nail. Its hard, wedges in tight and long enough to get hold of to pull out.
-
I had my A type overdrive stop working. A plunger (which may be the pump) which is revealed by taking the large brass nut off the bottom had stuck. It came free with a nudge and has never given trouble again.
I took the opportunity to slightly 'over adjust' the solenoid function by clamping the lever to slightly too keenly engage the OD, this is discussed elsewhere on the Forum. It comes in nice and sharp now.
John
-
Assuming that the ignition timing is OK, I would check the cam timing as this is the only time that I have known a manifold to glow red. The one I observed was glowing red at idle, quite a surprise.
You can test for cam timing with Dial gauge indicators on a pair of pushrods and observing the markings on the front pulley.
Good luck, John
-
The lack of resistance variation is highly likely to be down to my lack of ability in electrical things. I can measure Volts and that is about it.
Never mind it all works a treat now and that is what really matters. Full meter reading when I haul the float up with a piece of wire.
My TR3 is now Salvador Blue, abit like yours Bob, I think that it looks stunning. Thanks again, John
-
Rob, It was the earthing of the gauge, I've just added an temporary wire to see.
Thank you for the prompt reply. Excellent, thank you. John
-
I need some help with my TR3 fuel gauge and I have tried some of the ideas in this thread.
I have the original type TR3 gauge (which has worked for me for many years) has a power feed with battery voltage (B terminal). The other wire goes to the sender (T terminal).
The symptoms are :
-The gauge twitches off the bottom stop when I turn on the ignition but never indicates any more fuel even when I pull the float up with a piece of wire.
Tests which I have done from the forum thread above are
- disconnected the gauge wire at the tank - the meter should apparently show full - no effect at all.
- grounded the gauge wire - the meter should apparently show empty - no effect at all.
- I have had a digital and an analogue resistance meter across the sender when the supply wire is disconnected. I see no variation in the resistance when I lift the float the sender with a piece of wire. I was hoping for 70 ohms or similar when the float was lifted.
-I have reversed the gauge to see what happens and it does not even twitch.
Any ideas for diagnostics ?. Thanks, John
-
Mat, I drilled a hole through the square bar and used a split pin. By packing the distance between the split pin and the lever casting you can adjust the resting position of the exterior door handle to make it level. For me that was a good solution as my door handles were annoyingly not level, perhaps my doors were distorted.
John

-
Thank you, that seems like a good solution. I feared that an O ring may fall out but if others have used it that'll do for me.
-
The red seal in my (standard) petrol cap has seen better days. Using a vernier the spec is approximately as below, it is currently a red fibrous material as far as I can tell and it sits in a square section grove.
Internal diameter 53.5mm
External Diameter 62mm
Depth of seal 4mm
My basic question is where can I get one ? They are not listed as a separate item in my spare parts book. (I can not find it anyway). Thanks, John
-
Robert, I am a few days ahead of you, I was asking a similar question, please see the thread linked below. John
-
When I put one in last I had the person at the back taking the weight of the back end with a rope sling whilst also able to twist the drive flange, the OD adds a considerable weight and you have your hands full dealing with the front.
Just after it slots in have a bar ready to slide underneath the tail shaft area to take the weight on the floor whilst you have a breather.
-
I would lift the engine up a bit. Make sure the clutch drive plate is central. Put the gearbox in gear so an assistant can twist the rear flange on demand.
Turn the gearbox anticlockwise to get the clutch lever below the floor until a little further forward. ( I always end up lying underneath it in a health and safety free zone.)
Then wrestle, swear, cus and mysteriously bang its in. Good luck, John
-
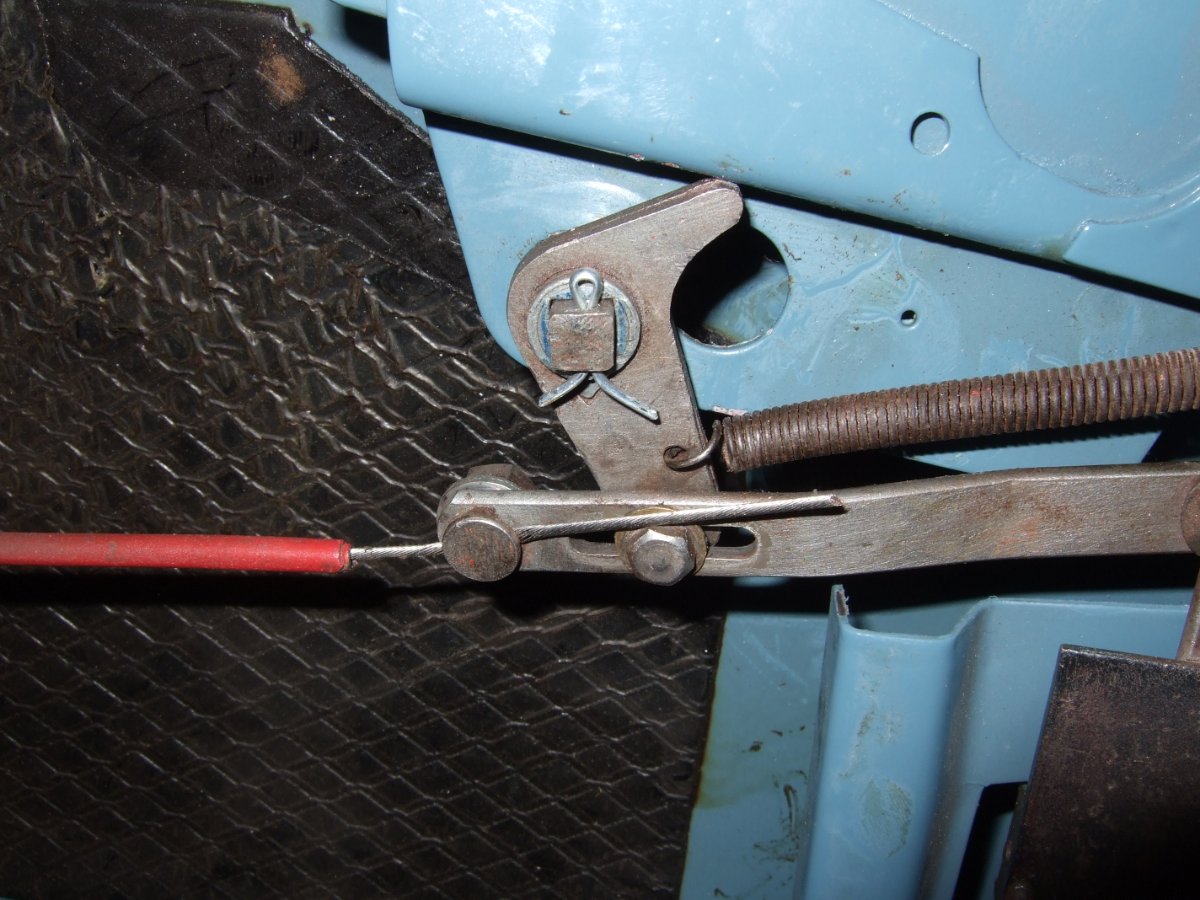
When taking my front suspension apart I loaded up with as much heavy stuff as I could find. In the photo under all the stuff is a chassis. Of course scratching the paint was no issue. John

-
I have tried to go factory original in appearance for a clean look, after all much of the appeal of these cars is the style.
Part of my restoration theory is that Triumph made enough holes in the car originally so I should not need any more. The only concession to that is windscreen washers and so tucked the windscreen washer pump/button under the dash. In response to Miles's comments concerning the cooling fan I have the sensor in the down pipe on both my cars and no override switch (similar to production cars of the 1990's ) and never had a problem in 30K miles.
I have abandoned the reversing light and it's switch in my current rebuild as I have the much brighter LEDs in the rear lights and I do not reverse in the pitch dark any more. (and my TR4a gearbox had a switch in the top). John
-
I think I see where it is touching. It is because the bracket that goes across the car is lower in the middle, a standard one is flat. My suggested hammering would be where the joint is, so no good at all.
Judging by the pictures on the Moss website I would be very tempted to do abit of cutting and welding of that large bracket as it is only used to support the gearbox where the round bush sits. i.e. keep it higher over the exhaust. There seems to be fair bit of space under the OD casting. Brian - see your PM. John
-
Brian, I just recalled on my TR4 the exhaust rattled in the hole where it goes through the chassis. I did an adjustment of the original bracket by cutting and welding to optimise the position of the exhaust. The improvement to the car was immense. I recommend that you take time to 'thread the needle' now whilst it is bits. Sorry no pictures. John
-
Brian, Like you I use the original style of exhaust mount on my TR3 and TR4 both with A type overdrive, I carefully hammered a dent in the front pipe to ensure clearance to the overdrive but there again it is a different set up. There are different front pipes for overdrive and non overdrive I think.
If it is a just touching event then a careful massage with a hammer should do the trick I expect, give it a few mm clearance though. However my experience is A type OD. John
-
A link to the new thread as requested.
-
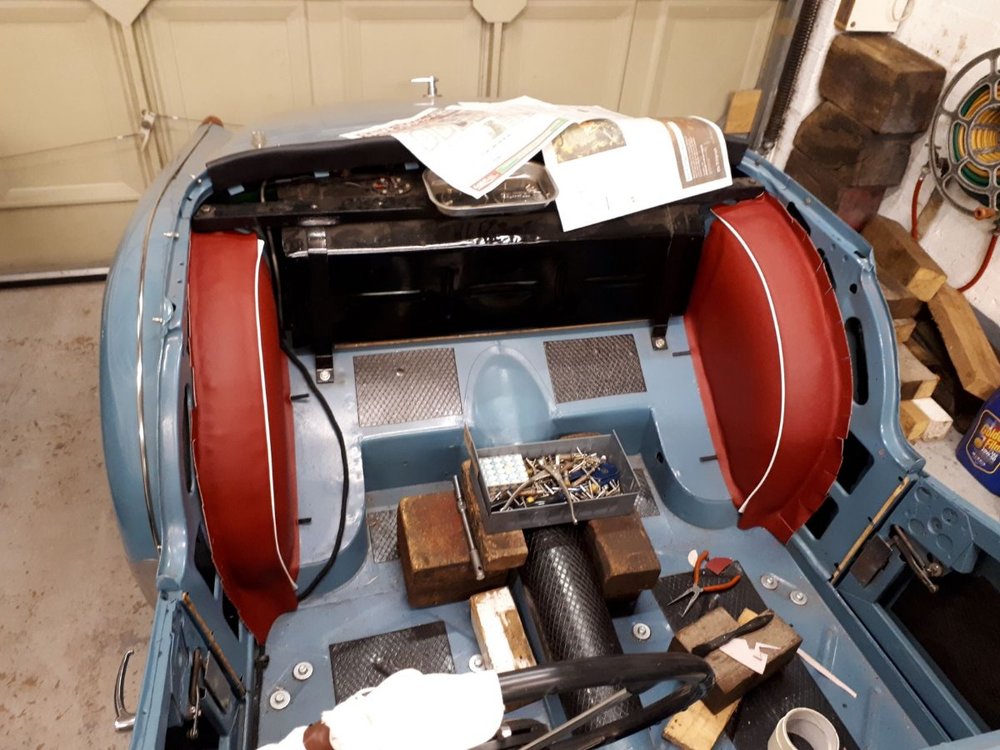
I along with a few others judging by another thread concerning the B pillars are in the process or trimming the car. A common issue is the furflex seals at the front and back of the doors.
Please could we have advice and hopefully pictures as to how it fit the furflex. Thanks, John
This hopefully is a link to the other thread.
-
This is where I am. You can see the wood down each side. The wood is approx 10mm wide. I would appreciate any clues as to how and where the furflex attaches as the side arch trim panels cover the wood.
I am having to adjust the length of the side rear arch trim panels not because they are made wrong but the car seems different side to side, only by 5mm or so.
For 25 years my car had no furflex fitted and I rarely if ever drive it with the hood up so in many ways does it matter if fitted at all ? John
-
There is a rod which goes between the pedal and the master cylinder, this should have a little looseness to it.
If not it pumps more and more fluid into the system to give your issue.
It happened when I left it too tight on my clutch and took me a while to sort it out. John
-
Ralph, I'll PM you as this is going off topic.
-
I put in a piece of pallet wood as this seemed top meet the criteria. By the time I had whittled it to fit there was only a sliver left.
Thanks for the picture Stuart, that is actually my car judging by the roll over bar holes in the inner wing.
John

Clutch problem. Boooo!
in TR2/3/3A/3B Forum
Posted
My money is on the already mentioned slight bit of slack not been in both master and slave cylinder rods. Back to basics, don't overthink it.
Check both rods rattle a little. My TR4 had this same issue it took me 2 years to figure it out.