The front apron story really begins in 2011 when I first removed it and stripped off the paint and bondo. The apron was mostly in good condition with minimal rust and just a few surface dents but the car had been hit hard on the front right corner at some time in its life and along with the front right wing, the apron had not done well in that confrontation. The headlamp pod had been moved back about .25 inch and the front apron corner was badly distorted with many holes drilled in it from its previous repair.
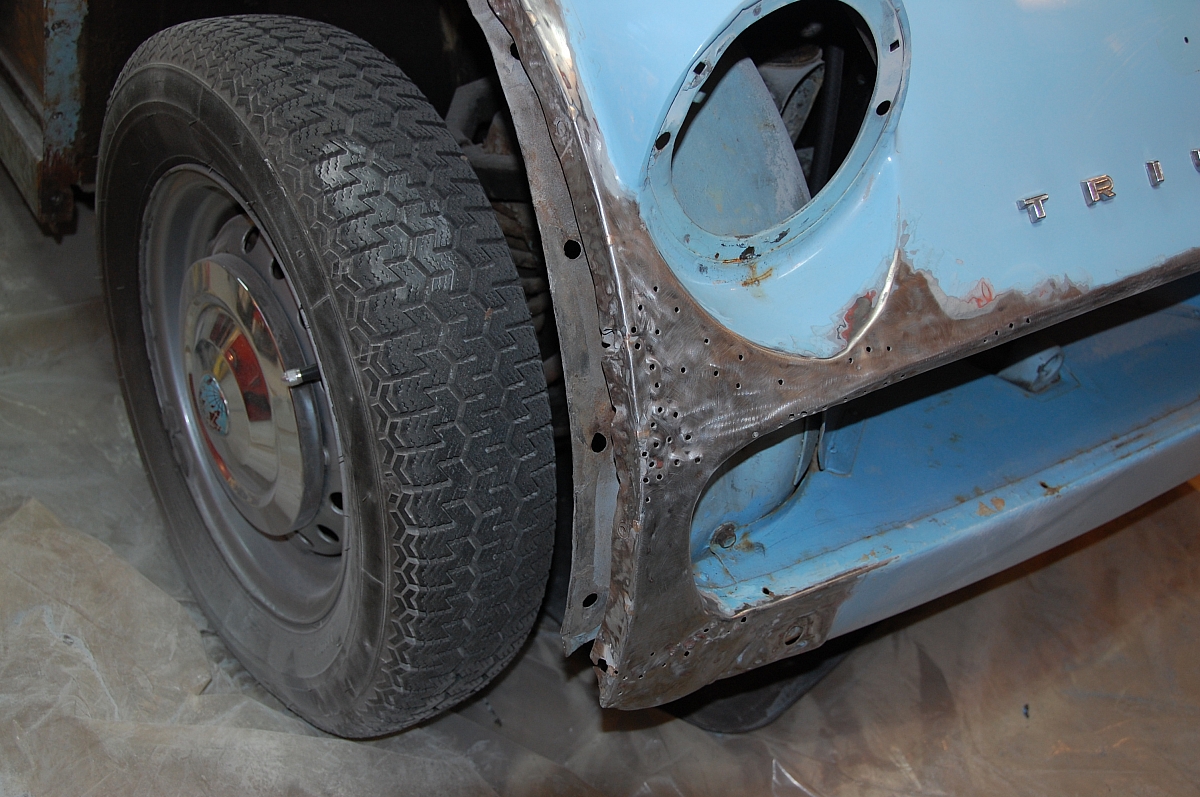
I did some initial repairs during 2011 including welding up the many holes, replacing missing or broken cage nuts and an initial attempt at bringing back the correct shape on that front right corner using body solder to get the basic shape and bondo for the surface finish.
By January 2016 we were ready to prep and paint the apron. It was the last of the major panels to complete with just the two doors remaining.
We first blasted the apron to remove all of the old rattle can primer. This is very important as that old cheap primer is a poor foundation for the final paint.
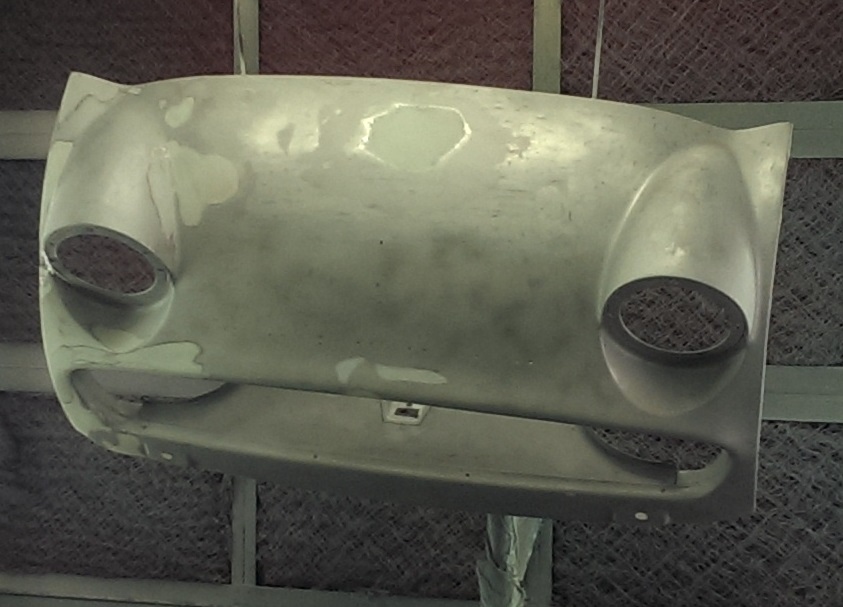
With the panel cleaned of old primer we could see my early incomplete repairs and we gave the apron a heavy coat of primer inside and out.

Wet paint is a great way to see issues in the metal and we could see that we had a lot of work to do on the right hand corner.
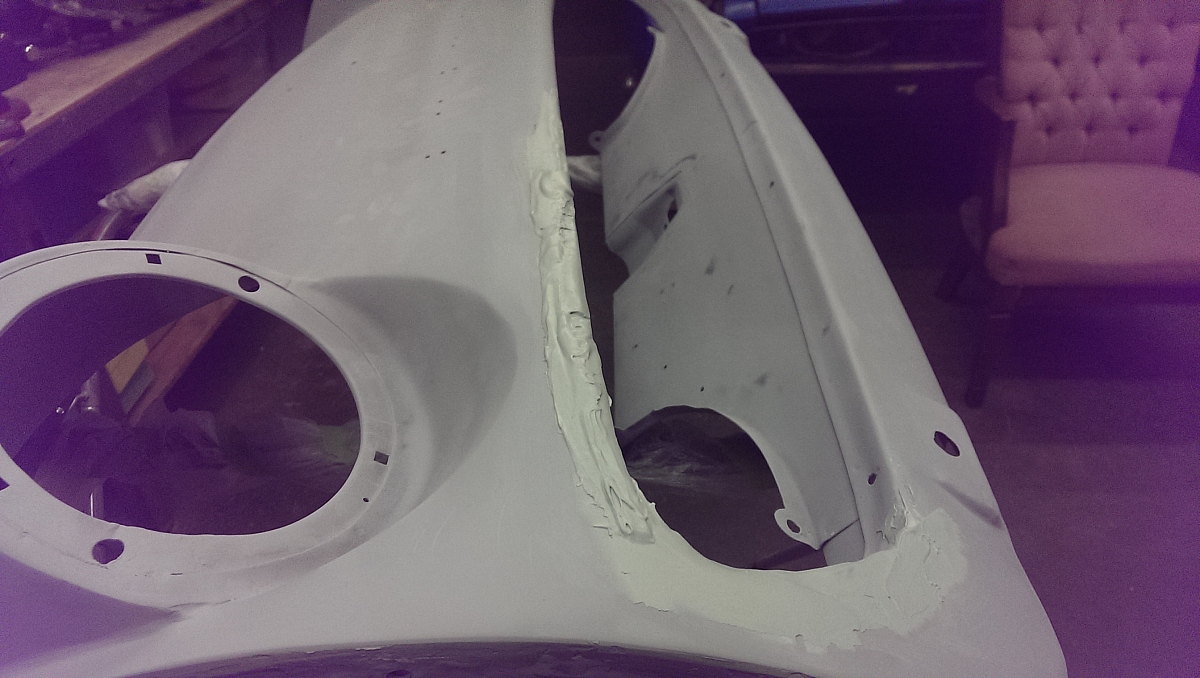
We essentially sculpted the subtle contours around the apron out of bondo using the left hand side as a guide.

To recreate the arc in front of the headlamp pod we created a card template from the left hand side, flipped it over and used it to get the correct profile on the right hand side. This came out better than I had hoped as this area was a mess.
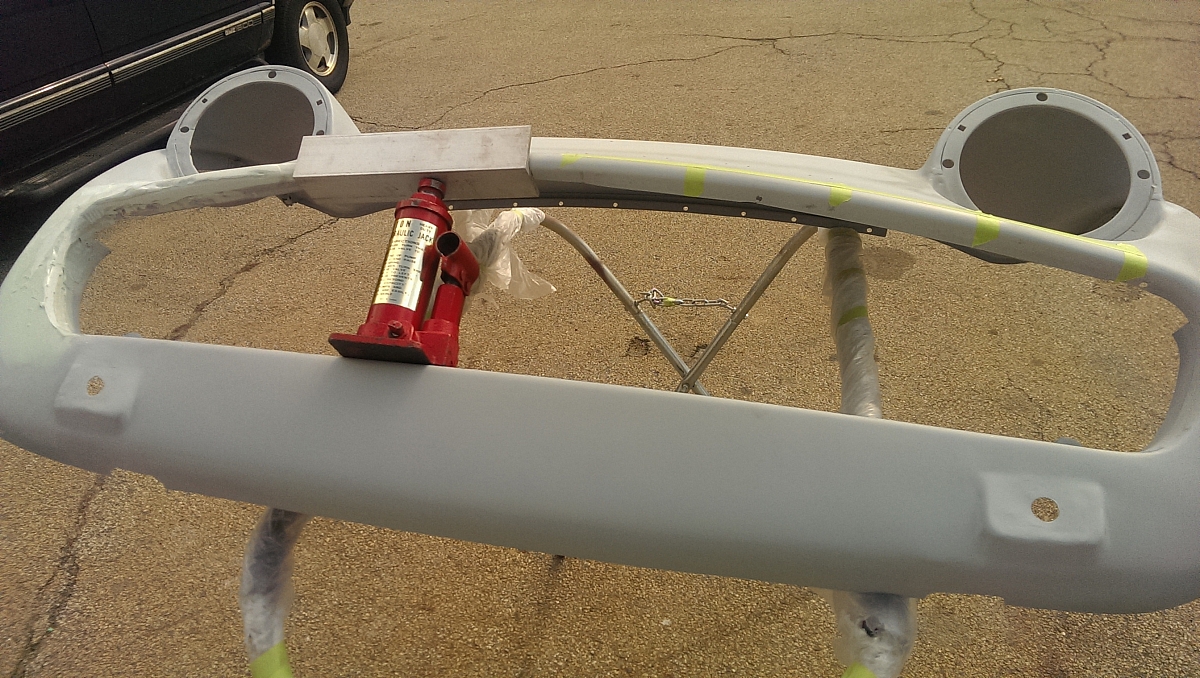
As is typical, the nose had probably been sat on a few times over its 50+ years and we had to use a bottle jack to open it up around 1" in the center.
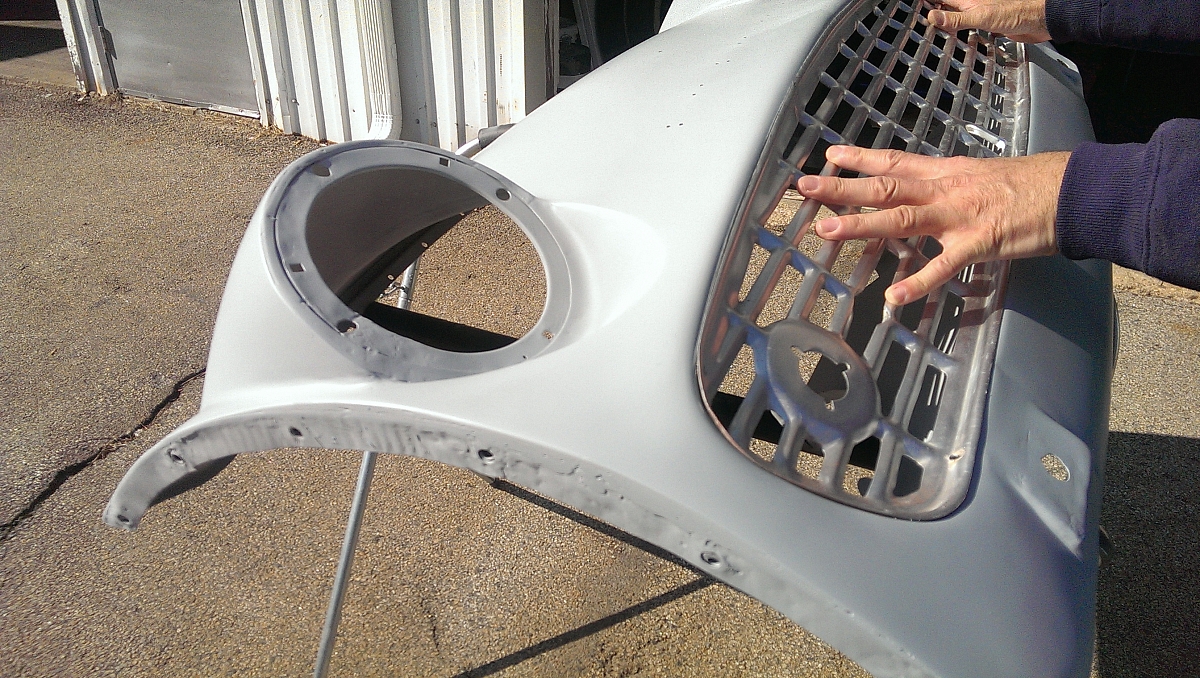
We test fitted the grill often during the work on the apron and also used it as a guide when re-creating the profile of the apron opening.
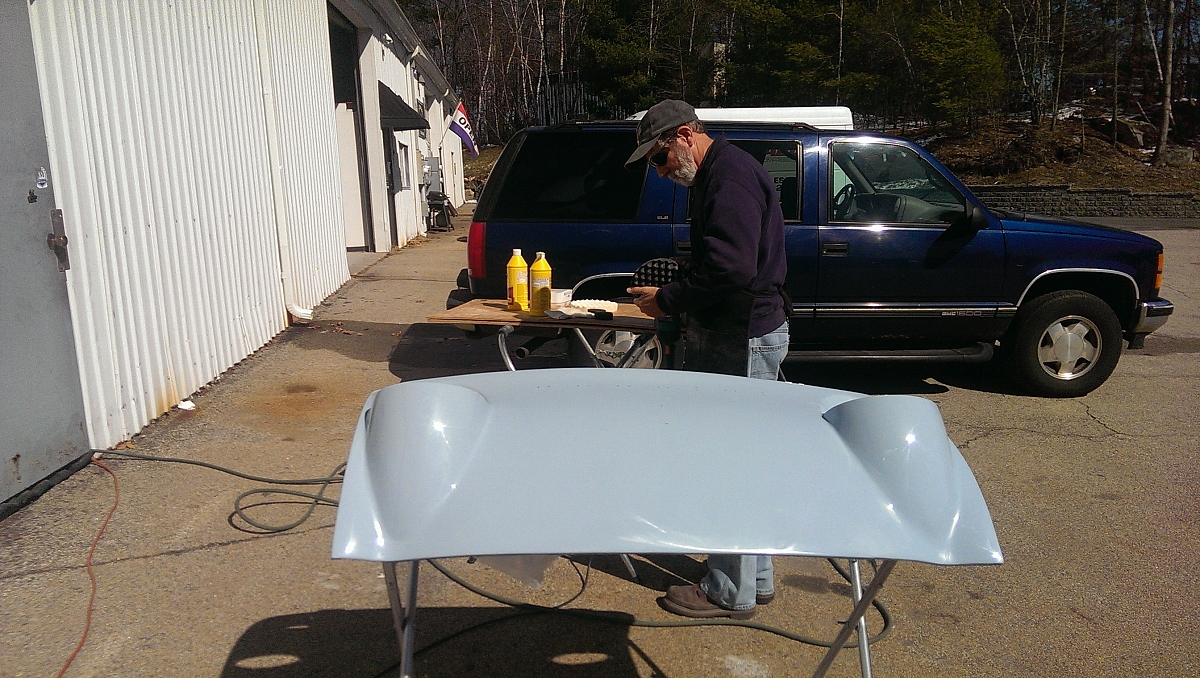
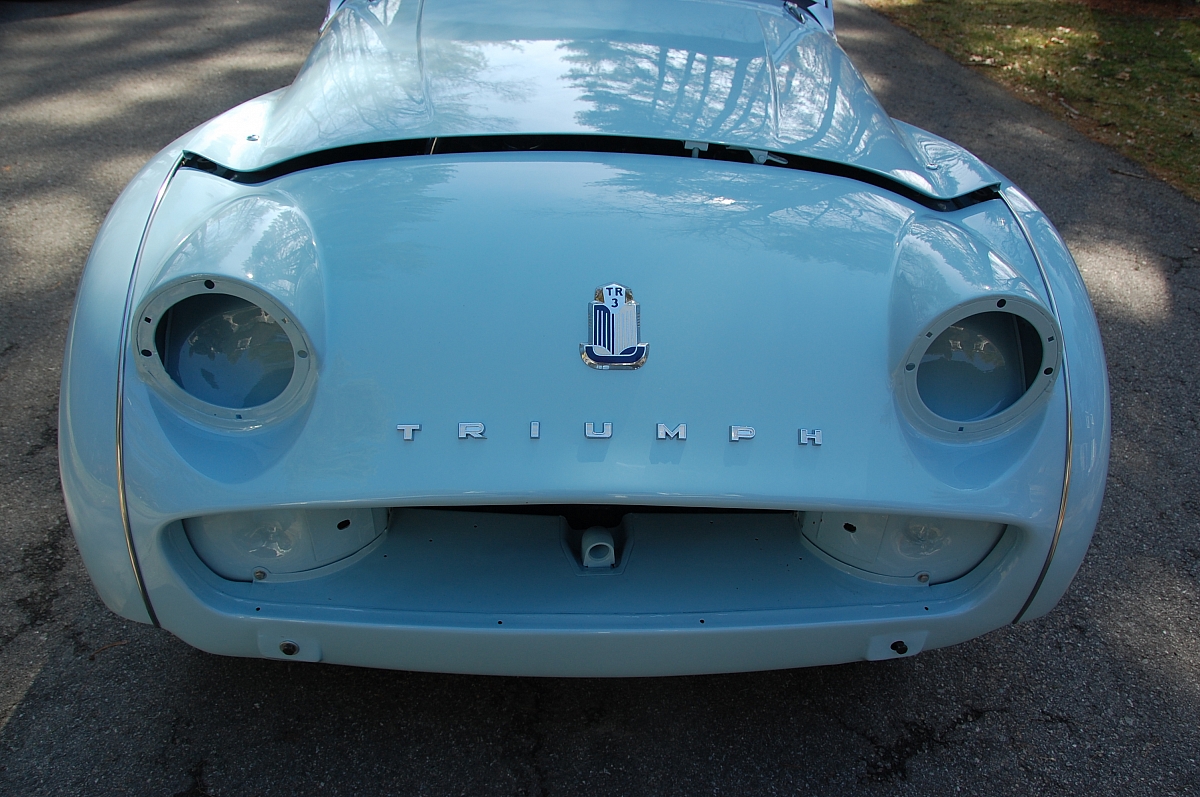
By late March we had done as much with the apron as we thought was achievable and we went ahead and applied the final paint. Here is John during the final wet sand and buff.
Fitting the apron was largely uneventful, another job requiring an ambidextrous octopus to hold the panels and beading in place while the fasteners are tightened. I relied on a Forum post from Stuart Edwards to help with the installation. I copied that post below with a bit of additional formatting.
You will need the head lamps out to get to the beading tags to bend them over.
Slacken the front bumper to chassis irons and remove the bumper and overrider stays and remove the grill and the side/flashers must be disconnected.
Remove the stays from the starting handle guide to the chassis and the support stay to the bottom lip of the front panel. When doing this job its best to unbolt the wings back to the last one in the top channel in front of the bulkhead so you can spread the wings enough to remove the apron without catching the beading and its tabs.
Leave the beading screwed along the large tab along the bonnet aperture sides. I always leave the ally support bar bolted to the front panel and just remove the two bolts in ether side inner wing bracket and then once all the bolts are out down each side you can lift it up and out. When re-fitting put some 2" masking tape down the edge of the shroud but not round the edge and tape the beading down with tape to the wing but dont tape over it into where it will fit to the shroud.
Straighten all the tabs out as best you can. Check all the captives are OK by running a 1/4" UNF tap through them and with a pair of pliers crimp the cage up a little (Dont crimp it up tight as you do need a little movement to facilitate catching the thread with the screw as its not always going to go in straight on) Copperslip helps but so does waxoyl.
If you have removed it for painting then loosely bolt the ally support bar to the top of the front panel but dont tighten the bolts and fit the spring lift/catch assembly but again dont tighten fully.
Now fit the front panel by bring it in and down from above engaging the all bar into the side brackets then laying it into place and then insert the four bolts in the brackets and catch the nuts on the back, again dont fully tighten.
Then refit the all the bolts in the wings and the bolts from the wing to the front panel, again do not tighten. Loosely fit the two stay bars underneath the front that fit to the starting handle bracket and the four bolts on the front panel lower duct section to the inner wing.
Now you can start to tighten the bolts up all the way round making sure that the bottom edge of the front wings line with the lower side angle of the front panel and also keep trying the bonnet down to shut position so you can get the gap along the front edge right and make sure the lift spring lines up with the small cut-out in the bonnet. Keep your eye on the beading as you will have to press it down into place as you tighten the bolts (make sure the tabs arent in the way of any of the bolt holes as they have a habit of sliding down around, they are just inserted between the two panels)
When you get to the top corners of the front panel to the wings you may need to be a bit brutal and either pull the ends up or press them down as you tighten the bolt adjacent to it to get the edge to line up (This is why you dont tighten the bolts across the support bar until last. When its all bolted up and the beading is tight down then reach in through the headlamp apertures or in from underneath and bend the tabs up inside the front panel edge. (Sometimes an old screwdriver bent in a right angle will facilitate just getting the end of the tab bent up enough to get your fingers in to finish bending them up) Dont forget to tighten the starting handle guide stays and fit the lower support bracket that goes from between these stays to the bottom lip of the front panel.
Dont forget to re-adjust the bonnet support buffers at the front edge of each wing channel to get the front end of the bonnet height right, you may also need to re-shim the Dzus fastener brackets on the inner wing tops as although you havent moved them everything else has been slackened and they may not fit the same. Fit your rad shield now making sure it snugs up to the rad properly and then re-fit headlamps and wire them in then fit front grill wiring the side/indicators as you offer it up.
Re -align front bumper irons to the holes in the front panel (I always fit a thin rubber body mounting shim behind to save the paint and the same on the front ) Then fit front bumper and overriders with the stays through the grill.
You will need to re-adjust the headlamps too.