TR5tar Posted May 29, 2015 Report Share Posted May 29, 2015 My driver's side door mirror is working a bit loose. I can see that the inner door panel only clips in and can be easily removed, but the door handle and window wind handle need removing first. Should they just pull off? Darren Quote Link to post Share on other sites
peejay4A Posted May 29, 2015 Report Share Posted May 29, 2015 To get those handles off you need to press on the black escutcheon which will reveal the square part of the handle and you'll see a pin which goes through the handle and the winder (or lock) spindle. You need to push this out, I use a scriber and remove it carefully. The handle will now pull off. Replacement is the reverse procedure. I use a surgical clamp to replace the pin (assuming I haven't lost the blinking thing) but there is other advice on the forum such as using welding rod in lieu of the pin. Good luck. Quote Link to post Share on other sites
pinky Posted May 29, 2015 Report Share Posted May 29, 2015 Hi I use the wedrod method, night mare job what ever you do Length of 1/8 weld rod Cut it half way through the same length as the pin Push through hole And bend the rod so it snaps were you cut it Hope this helps pink Quote Link to post Share on other sites
RogerH Posted May 29, 2015 Report Share Posted May 29, 2015 Hi Darren, don't panic - use the method outlined by Pete. It is fiddly but easy. Roger Quote Link to post Share on other sites
TR5tar Posted May 29, 2015 Author Report Share Posted May 29, 2015 Thanks Pete, Pinky. Blimey, there was me thinking it would be a piece of cake. Nothing is ever as straightforward as it might appear. "Don't panic" . . . you know me too well Roger. Cheers, Darren Quote Link to post Share on other sites
Guest ntc Posted May 29, 2015 Report Share Posted May 29, 2015 My driver's side door mirror is working a bit loose. I can see that the inner door panel only clips in and can be easily removed, but the door handle and window wind handle need removing first. Should they just pull off? Darren Depends on what type of mirrors you have? maybe no need to pull the cards. Quote Link to post Share on other sites
peejay4A Posted May 29, 2015 Report Share Posted May 29, 2015 (edited) Darren. Once you get the hang of it it's not bad. Easier than getting the trim clips to line up when replacing the door cards. Edited May 29, 2015 by peejay4A Quote Link to post Share on other sites
TR5tar Posted May 29, 2015 Author Report Share Posted May 29, 2015 I've got ones that say: "REGD. DESIGN NO 994295 WINGARD". I'm hoping that I don't need to pull the cards, because I'm damned if I can see how to remove those handles as yet. What do you reckon Neil? Darren Quote Link to post Share on other sites
Guest ntc Posted May 29, 2015 Report Share Posted May 29, 2015 Darren Can you post a pic? Quote Link to post Share on other sites
DaveN Posted May 29, 2015 Report Share Posted May 29, 2015 You need to push quite hard on the black estucheon to reveal the square drive and the pin. More so if they've been fitted properly with the felt pad and the springs behind the door card. I use a pin punch to push them out. Quote Link to post Share on other sites
Tom Fremont Posted May 29, 2015 Report Share Posted May 29, 2015 Hi Darren, The cards will have to come off to tighten the mirror post or swivel detent. The former is done via nut; the latter by a setscrew. I use a 1/8" thick 2"x3" rectangular slice of hardwood with a U-shaped cutout in the short side, pushed between the handle and the black plastic disc to reveal the pin. Pushing on the handle ( against a spring behind the card ) then releases the pin which is easily pushed through into the cutout with a wire or small screwdriver. Refitting is the reverse; I use a needle nose plier to fit the pin. Plastic could substitute for the hardwood; 1/8" thick either way. This bit makes a terrible job pretty easy Cheers, Tom Quote Link to post Share on other sites
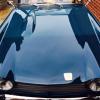
TR5tar Posted May 29, 2015 Author Report Share Posted May 29, 2015 (edited) Hi Neil, Here are some pictures: https://www.dropbox.com/sc/urc3nlurdgwx96w/AACPv1skMvyHRaB49ogaG3nMa https://www.dropbox.com/sc/39endtl371s69nw/AAArnyd5momQHXz6Spni1bB7a https://www.dropbox.com/sc/bom3btvn33425h2/AAAR2gpXT-_ZN2LqRrnxwXcoa Any use? Thanks, Darren Edited May 30, 2015 by TR5tar Quote Link to post Share on other sites
Guest ntc Posted May 29, 2015 Report Share Posted May 29, 2015 Darren Door cards of I am afraid. Quote Link to post Share on other sites
Tom Fremont Posted May 29, 2015 Report Share Posted May 29, 2015 Darren, Take care prying them loose as the board stock doesn't take much to break. I'd mask the adjacent painted surfaces and use a putty knife with care. This of course after you've removed the handles Oh, and while you're in there ( WYIT over here in the 'States ) you have an opportunity to fit TR4 door pulls ( they need a captive nut fitted behind the holes in the doors for that purpose ). I soldered the nuts to a strip of steel and pop-riveted them in place behind the inner door skin. Cheers, Tom Quote Link to post Share on other sites
foster461 Posted May 29, 2015 Report Share Posted May 29, 2015 Even with the door trim off can you really get to that location ?. Stan Quote Link to post Share on other sites
Tom Fremont Posted May 29, 2015 Report Share Posted May 29, 2015 Hi Stan, If you're referring to the mirror anchor point - yes, with difficulty and a hatha yoga predilection! Tom Quote Link to post Share on other sites
foster461 Posted May 29, 2015 Report Share Posted May 29, 2015 Hi Stan, If you're referring to the mirror anchor point - yes, with difficulty and a hatha yoga predilection! Tom Cool. I thought with the TR6 doors you couldnt get in there even if you were fortunate enough to have married a contortionist. I know my RHS bullet mirror is attached with sheet metal screws around that same spot. Stan Quote Link to post Share on other sites
stuart Posted May 29, 2015 Report Share Posted May 29, 2015 The 250/5 mirror has a large nut behind and they are difficult enough to do up in the right place with a stripped door shell, with window right up you can just get a spanner up behind if its a short one. Good luck and while you are in there check that the sound deadening pad is in place on the skin and there is plenty of waxoyl (or similar) inside and the water curtain is in place. The TR4 door pulls are a very worthwhile mod and if Roger can get round to making the cage nuts then it will make it even easier to fit them. Stuart. Quote Link to post Share on other sites
TR5tar Posted May 30, 2015 Author Report Share Posted May 30, 2015 (edited) Thanks for all the additional replies. Apologies for being a bit dim here, but backtracking a little, when Pete says "press on the black escutcheon", does that mean: A) Squeeze/pinch it in? or B ) Push it backwards away from the chrome part of the handle? or C) Push the card back from the escutcheon? I imagine from what Tom says that it's B from this list. Is that right? When a "pin" was mentioned, I was picturing something like a split pin pushed through a hole between handle and crack, but having looked at a couple of YouTube videos about removal, I think I'm mistaken. Is it a horseshoe type pin that I'm looking for? If so, there are videos showing how to use a U-shaped gadget like Tom mentions - specifically: Will something like this work on my handles? If so, I take it it needs to be slipped between the handle and the escutcheon (plastic piece), right? I know, it's like pulling teeth Darren Edited May 30, 2015 by TR5tar Quote Link to post Share on other sites
peejay4A Posted May 30, 2015 Report Share Posted May 30, 2015 (edited) Hi Darren. You push the black plastic escutcheon away from the handle, towards the outside of the car. There's a spring behind the door card that pushes the card away from the inner door skin so there should be enough give in the card to expose the part of the handle that has the pin through it. The pin is just a short piece of plain rod, originals have a taper at one end to help in replacing it. It just pushes into place and the escutcheon stops it from working its way out when the spring pushes the door card inwards, away from the door. You won't get a spring pin in as the escutcheon is a close fit, as is the pin in the hole which stops the handle from flopping around. When you've done it you'll wonder what all the fuss was about. Honest. Edited May 30, 2015 by peejay4A Quote Link to post Share on other sites
TR5tar Posted June 12, 2015 Author Report Share Posted June 12, 2015 Well, after a couple of weeks thinking about it (I never move too fast) and making the tool suggested by Tom, with the cut out U shape to hold the escutcheon away from the handle, today I finally got around to doing the job of tightening the door mirror. One of the reasons I didn't want to tackle it earlier was that I had places to go in the car and I knew that once I'd started taking things to bits it would take another week at least to put it back together again. As I had the window wound down, I thought I'd get a torch, look down the window gap, and see the position of the nut before I set about tackling it. When I bought the 1/8 inch Perspex to make the U shaped tool, I also bought a surgical clamp (as suggested by Pete). Looking down the gap, I thought if I could get something between the gap to hold the nut I might be able to tighten it like that, and that's when I found that the surgical clamp was perfect. I know it's not as good a job as it should be, but it's pretty tight. They say "necessity is the mother of invention", but I'd suggest that it's either "inability" or "laziness". Thanks again for all the tips, and I will have a go at doing it properly soon! Darren Quote Link to post Share on other sites
peejay4A Posted June 12, 2015 Report Share Posted June 12, 2015 Excellent! I love a workaround. Quote Link to post Share on other sites
mike3739 Posted June 12, 2015 Report Share Posted June 12, 2015 Excellent! I love a workaround. Less posting, more time for jobs! Cheers Mike Quote Link to post Share on other sites
peejay4A Posted June 12, 2015 Report Share Posted June 12, 2015 Less jobs, more time for beer surely? Quote Link to post Share on other sites

Recommended Posts
Join the conversation
You can post now and register later. If you have an account, sign in now to post with your account.